Its all very interesting to manage rules, but how to you use or "consume" them in your application? This section covers the usage of the KnowledgeAgent deployment component that automates most of this for you.
The knowledge agent is a component which is embedded in knowledge-api. To use this, you don't need any extra components. In fact, if you are using Guvnor, your application should only need to include the knowledge-api and drools-core dependencies in its classpath (drools and mvel JARs only), and no other rules specific dependencies.
Note that there is also a drools-ant ant task, so you can build rules as part of an Ant script (for example in cases where the rules are edited in the IDE) without using Guvnor at all - the drools-ant task will generate .pkg files the same as Guvnor.
Once you have "built" your rules in a package in Guvnor (or from the ant task), you are ready to use the agent in your target application.
The Following example constructs an agent that will build a new KnowledgeBase from the files specified in the path String. It will poll those files every 60 seconds, which is the default, to see if they are updated. If new files are found it will construct a new KnowledgeBase. If the change set specifies a resource that is a directory it's contents will be scanned for changes too.
KnowledgeAgent kagent = KnowledgeAgentFactory.newKnowledgeAgent( "MyAgent" );

kagent.applyChangeSet( ResourceFactory.newUrlResource( url ) );

KnowledgeBase kbase = kagent.getKnowledgeBase();
The KnowledgeAgent can accept a configuration that allows for some of
the defaults to be changed. An example property is
drools.agent.scanDirectories, by default any specified
directories are scanned for new additions, it is possible to disable
this.
KnowledgeBase kbase = KnowledgeBaseFactory.newKnowledgeBase();

KnowledgeAgentConfiguration kaconf = KnowledgeAgentFactory.newKnowledgeAgentConfiguration();


// we do not want to scan directories, just files

kaconf.setProperty( "drools.agent.scanDirectories", "false" );


// the name of the agent

KnowledgeAgent kagent = KnowledgeAgentFactory.newKnowledgeAgent( "test agent", kaconf );


// resource to the change-set xml for the resources to add

kagent.applyChangeSet( ResourceFactory.newUrlResource( url ) );
An example of the change-set.xml file.
<?xml version="1.0" encoding="UTF-8"?>

<change-set xmlns="http://drools.org/drools-5.0/change-set"

            xmlns:xs="http://www.w3.org/2001/XMLSchema-instance"

            xs:schemaLocation="http://drools.org/drools-5.0/change-set http://anonsvn.jboss.org/repos/labs/labs/jbossrules/trunk/drools-api/src/main/resources/change-set-1.0.0.xsd" >

    <add>

      <resource source="http://localhost:8080/guvnor/org.drools.guvnor.Guvnor/package/mortgages/LATEST" type="PKG" basicAuthentication="enabled" username="uid" password="pwd"/>

    </add>

</change-set>
Important
The User ID and Password in the change-set should be consistent with the requirements of the Authenticator configured in components.xml. By default, a NilAuthenticator is configured that does not authenticate HTTP requests and hence the "basicAuthentication", "username" and "password" attributes are not required. If you change components.xml to use another Authenticator you will need to ensure appropriate authentication credentials are set in the change-set. Please refer to the "Security - Authentication and basic access" section of the "Administration Guide" for more details.
Note
The change-set schema, change-set-1.0.0.xsd, is also included in the knowledge-api JAR file applicable to the version of Drools you are running.
Resource scanning is not on by default, it's a service and must be started, the same is for notification. This can be done via the ResourceFactory.
ResourceFactory.getResourceChangeNotifierService().start();

ResourceFactory.getResourceChangeScannerService().start();
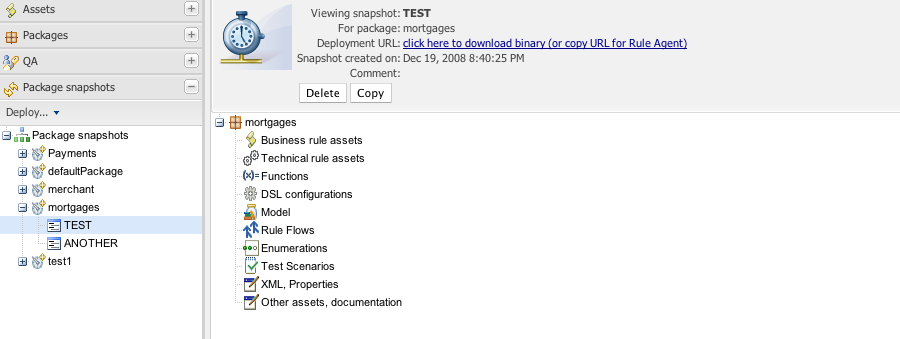
Following shows the deployment screen of Guvnor, which provides URLs and downloads of packages.
You can see the "Package URI" - this is the URL that you would copy
and paste into the change-set.xml file to specify that
you want this package. It specifies an exact version (in this case to a
snapshot) - each snapshot has its own URL. If you want the "latest" - then
replace "NewSnapshot" with "LATEST".
You can also download a .pkg file from here, which you can drop in a directory and use the "file" or "dir" feature of the KnowledgeAgent if needed (in some cases people will not want to have the runtime automatically contact Guvnor for updates - but that is generally the easiest way for many people).
The repository back end can also be accessed via Rest. Rest is a http based protocol API - which has clients on all platforms and in all programming languages.
Representational State Transfer (REST) is a style of software architecture for distributed hypermedia systems such as the World Wide Web. The term Representational State Transfer was introduced and defined in 2000 by Roy Fielding in his doctoral dissertation.
REST-style architectures consist of clients and servers. Clients initiate requests to servers; servers process requests and return appropriate responses. Requests and responses are built around the transfer of representations of resources. A resource can be essentially any coherent and meaningful concept that may be addressed. A representation of a resource is typically a document that captures the current or intended state of a resource. the REST protocol is often considered as a light protocol versus SOAP
The Guvnor Rest API is divided in two groups of services : one around accessing rule assets by their names and packages and the second accessing rule assets by categories.
A rule asset represents all elements that can be stored and handled in Guvnor : a guided rule, a web decision table, a test scenario, etc.
The http address to use as base address is http://{ServerName}/{httpPort}/{drools-Guvnor}/rest where ServerName is the host name on the server on which Guvnor is deployed, httpPort the port number (8080 by default development), drools-guvnor the name of the archived deployed (guvnor-webapp-5.3.0 for version 5.3.0).
This part of the API uses as entry point the categories defined for each rule asset when it is created by the user in Guvnor
Table 9.1. Accessing Rule Assets by Category
| URL | Mode | MIME-Type | Description |
|---|---|---|---|
| /categories/{categoryName} | GET | application/atom/xml | Retrieves an Atom feed to all Rule assets that have the category {categoryName} |
| /categories/{categoryName} | GET | application/json and application/xml | Returns a list of objects of Assets representing a Rule Asset that have the category {categoryName} |
| /{categoryName}/page/{page} | GET | application/json and application/xml | Returns a list of objects of Assets representing a Rule Asset that have the category {categoryName} and retrieves page {page} with is a numeric (1,2, 3, etc..). A page contains 10 elements. If the list contains 20 elements then the list will have 2 pages. You first have to call for page 1 and then call for page 2 |
This part of the API allows to access all rule assets by package (with its name) and by the asset name.
Table 9.2. Accessing Rule Assets by Package
| URL | Mode | Produces MIME-Type | Consumes MIME-Type | Description |
|---|---|---|---|---|
| /packages | GET | application/atom+xml | none | Returns all packages contained in the Guvnor repository in Atom Feed format |
| /packages | GET | application/json and application/xml | none | Returns all packages contained in the Guvnor repository in JSON or XML format |
| /packages | POST | application/atom+xml | application/octet-stream | Creates a new package from an input stream of DRL. Returns the newly created package in Atom Entry format. |
| /packages | POST | application/json and application/xml | application/octet-stream | Creates a package from an input stream of DRL. Returns the newly created package in JSON or XML format. |
| /packages | POST | application/atom+xml | application/atom+xml | Creates a package from an Atom Entry. Returns the newly created package in Atom Entry format |
| /packages | POST | application/json and application/xml | application/json and application/xml | Creates a package from JSON or XML. Returns the newly created package in JSON or XML format. |
| /packages/{packageName} | GET | application/atom+xml | none | Returns the metadata of the package {packageName} as an Atom Entry. |
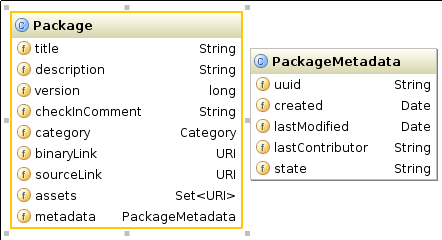
| /packages/{packageName} | GET | application/json and application/xml | none | Returns the metadata of the package {packageName} as a Package element (see UML representatin below). |
| /packages/{packageName}/source | GET | plain/text | none | Returns the source code of the package {packageName} as a text file. |
| /packages/{packageName}/binary | GET | application/octet-stream | none | Returns the compiled binary of the package {packageName} as a binary stream. If the package has not been compiled yet or its binary is not up to date, this will compile the package first. |
| /packages/{packageName}/versions | GET | application/atom+xml | none | Returns the list of package {packageName} versions as an Atom Feed . |
| /packages/{packageName}/versions/{version} | GET | application/atom+xml | none | Returns the metadata of package {packageName} and of version {version} as an Atom Entry . |
| /packages/{packageName}/versions/{version}/source | GET | text/plain | none | Returns the source code of package {packageName} and of version {version} as a text file. |
| /packages/{packageName}/versions/{version}/binary | GET | application/octet-stream | none | Returns the binary (compiled code) of package {packageName} and of version {version} as an octet stream. If the package version was never built, it returns HTTP code 500 with an error message. |
| /packages/{packageName} | PUT | application/atom+xml | none | Updates the metadata of package {packageName} with a given Atom Entry. |
| /packages/{packageName} | DELETE | none | none | Deletes package {packageName}. |
| /packages/{packageName}/assets | GET | application/atom+xml | none | Returns the list of rule assets contained in package {packageName} as an Atom Feed. |
| /packages/{packageName}/assets | GET | application/json and application/xml | none | Returns the list of rule assets contained in package {packageName} in JSON or XML format |
| /packages/{packageName}/assets/{assetName} | GET | application/atom+xml | none | Returns the rule asset {assetName} contained in package {packageName} in Atom Entry format. |
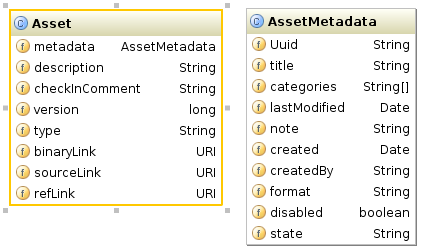
| /packages/{packageName}/assets/{assetName} | GET | application/json and application/xml | none | Returns the rule asset {assetName} contained in package {packageName} as an Asset in JSON or XML format (see the UML representation below). |
| /packages/{packageName}/assets/{assetName}/binary | GET | application/octet-stream | none | Returns the binary content of rule asset {assetName} contained in package {packageName}. If this asset has no binary content, returns its source content instead. |
| /packages/{packageName}/assets/{assetName}/source | GET | plain/text | none | Returns the content of rule asset {assetName} contained in package {packageName}. If this is a binary asset, returns the binary data as a byte array. |
| /packages/{packageName}/assets | POST | application/atom+xml | application/atom+xml | Creates an asset in package {packageName} from the Atom Entry provided. Following info are required from the input Atom Entry: asset name, asset description, asset initial category, asset format. |
| /packages/{packageName}/assets | POST | application/octet-stream | application/atom+xml | Creates a binary asset in package {packageName} from the input stream. The value of Slug header is used to indicate the name of the asset. This returns HTTP 500 error is the slug header is missing. |
| /packages/{packageName}/assets/{assetName} | PUT | application/atom+xml | none | Updates the metadata of the rule asset {assetName} contained in package {packageName} with a given Atom Entry. |
| /packages/{packageName}/assets/{assetName} | PUT | application/json and application/xml | none | Updates the metadata of the rule asset {assetName} contained in package {packageName} with a given Asset (see the UML representation below). |
| /packages/{packageName}/assets/{assetName}/source | PUT | plain/text | none | Updates the source code of the rule asset {assetName} contained in package {packageName}. |
| /packages/{packageName}/assets/{assetName}/binary | PUT | application/octet-stream | none | Updates the binary content of the rule asset {assetName} contained in package {packageName}. |
| /packages/{packageName}/assets/{assetName}/versions | GET | application/atom+xml | none | Returns the list of rule asset {assetName} versions contained in package {packageName} as an Atom Feed . |
| /packages/{packageName}/assets/{assetName}/versions/{version} | GET | application/atom+xml | none | Returns the metadata of rule asset {assetName} of version {version} contained in package {packageName} as an Atom Entry . |
| /packages/{packageName}/assets/{assetName}/versions/{version}/source | GET | text/plain | none | Returns the source code of rule asset {assetName} of version {version} contained in package {packageName} as a text file. |
| /packages/{packageName}/assets/{assetName}/versions/{version}/binary | GET | application/octet-stream | none | Returns the binary content of rule asset {assetName} of version {version} contained in package {packageName}. If this asset has no binary content, returns its source content instead. |
| /packages/{packageName}/assets/{assetName} | DELETE | none | none | Deletes the rule asset {assetName} contained in package {packageName}. |
We are giving a list of example to help using the Guvnor's Rest API
We are using apache CXF in our example to show how to access the Rest API of Guvnor. In the example here we are getting and updating a web decision table. But this example applies to all Guvnor asset type.
Example 9.1. Retrieving the source code of the web decision table
WebClient client = WebClient.create("http://127.0.0.1:8080/");
String content=client.path("guvnor-webapp-${project.version}/rest/packages/essaiRest/assets/tab2/source").accept("text/plain").get(String.class);
GuidedDecisionTable52 dt = GuidedDTXMLPersistence.getInstance().unmarshal(content);
In the first line of code above, we are first creating a WebClient variable that points to the server (here on localhost on port 8080).
In the second line of code above, we are retrieving the source content by accessing the /rest/packages/{packageName}/assets/{assetName}/source where i our case packageName is "essaiRest" and assetName is "tab2".
In the third line of code above, the source code we get is the data structure of a Web decision table. So to be able to manipulate the Web decision table, we have to transform the string variable (the source code that contains the xml of the data structure of the web decision table) in the java structure (a java class) for web decision table GuidedDecisionTable52. All guided asset in Guvnor have a java structure to manipulate them
Example 9.2. updating the source code of the web decision table
String authorizationHeader = "Basic " + org.apache.cxf.common.util.Base64Utility.encode("guest:".getBytes());
GuidedDecisionTable52 dt = new GuidedDecisionTable52();
..
Do some stuff here
..
String newContent = GuidedDTXMLPersistence.getInstance().marshal(dt);
WebClient client2 = WebClient.create("http://127.0.0.1:8080/");
client2.header("Authorization", authorizationHeader);
Response response= client2.path("guvnor-webapp-${project.version}/rest/packages/essaiRest/assets/tab2/source").accept("application/xml").put(newContent);
In the first line of code above, we are first creating a java String variable that contains the authorization element needed to update an asset on the Guvnor repository.
In the next lines of code above, we are doing some stuff to modify the Web decision table.
In the following lines of code above, we are first transforming the java structure in an xml structure that we put in a java String variable. Then we again create a WebClient but this time we are also filling the header with a variable "Authorization" that contains the String we built in the first line and that contains the user name "guest" and its password (here no password). We then put the new content on the Guvnor repository.
Next you can find the pom.xml file to use the Guvnor Rest API in case you are using Maven.
Example 9.3. pom.xml content for our example
<project xmlns="http://maven.apache.org/POM/4.0.0" xmlns:xsi="http://www.w3.org/2001/XMLSchema-instance"
     xsi:schemaLocation="http://maven.apache.org/POM/4.0.0 http://maven.apache.org/xsd/maven-4.0.0.xsd">
  <modelVersion>4.0.0</modelVersion>
  <groupId>org.drools.examples</groupId>
  <artifactId>dt-example</artifactId>
  <version>0.0.1-SNAPSHOT</version>
  <build>
    <finalName>cxf-rest-example</finalName>
    <plugins>
      <plugin>
        <groupId>org.apache.maven.plugins</groupId>
        <artifactId>maven-compiler-plugin</artifactId>
        <configuration>
          <source>1.6</source>
          <target>1.6</target>
        </configuration>
      </plugin>
    </plugins>
  </build>
  <dependencies>
    <dependency>
      <groupId>org.apache.cxf</groupId>
      <artifactId>cxf-bundle-jaxrs</artifactId>
      <version>2.3.0</version>
    </dependency>
    <dependency>
      <groupId>org.drools</groupId>
      <artifactId>droolsjbpm-ide-common</artifactId>
      <version>5.3.0</version>
    </dependency>
  </dependencies>
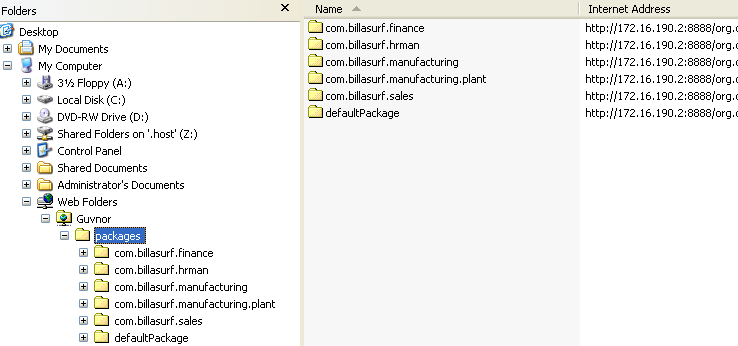
</project> The repository back end can also be accessed via webdav. WebDAV is a http based file system API - which has clients on all platforms (some operating systems such as windows can connect directly to WebDAV repositories almost like a file system.
In windows the "web folders" feature can be used. On OSX - the free
Cyberduck client can work well. To access the repository as webdav, you
the url is the same as the web interface, only with /webdav at the end,
instead of Guvnor.html. Authentication will be
required to get access this way. This will show a packages and snapshots
directory - the snapshots directory is read only (a view of created
snapshots of packages). The packages directory will contain a list of
packages in the repository, drilling in to them will show the individual
assets as files.
There are a few other URLs which are handy to know exist. The
package deployment URL mentioned in the section about knowledge agent
deployment also has a few other features: By appending
.drl to the end of a URL, you will show the generated
DRL for that package. e.g.:
/package/testPDSGetPackage/LATEST.drl - will show the
DRL (not the binary package) for the latest package. Further to this, you
can append /assetName.drl - and it will show the
generated DRL for that item. (even if it isn't a DRL file). E.g.
/package/testPDSGetPackage/LATEST/SomeFile.drl.
The Eclipse Guvnor tools (EGT) provide the ability to push/pull artifacts from the Guvnor repository server and the developers workspace in eclipse. It is therefore possible for artifacts to be both managed via Guvnor as well as in traditional developer friendly SCM systems (such as subversion). The Guvnor repository is not intended as a Source Code Management (SCM) solution, and the EGT are not intended to be Eclipse “team provider” extensions or replacements. Rather, the Guvnor repository is a location where certain artifacts (such as rules and SOA policy definitions) are controlled (“governed”) by policies defined by the deployment environment. The purpose of the EGT is then to enable access to resources held by the Guvnor repository, so they can be used in development. Thus, limited capabilities for reading, writing, adding, and removing Guvnor repository resources are provided in the EGT.
The source code for the EGT is available in github. EGT consist of two plug-ins: org.guvnor.tools and org.eclipse.webdav. They require Eclipse 3.3.x. The current Eclipse Drools plug-ins are also useful for viewing Guvnor repository resources such as rule definitions, but not required for operation of the EGT.
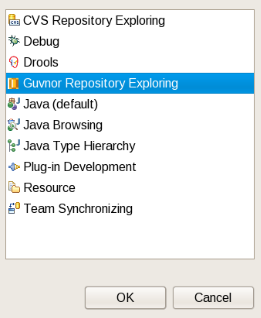
Views and Perspective: The EGT contains two views – Repository Explorer and Version History – that will be the center of most interaction with Guvnor. Eclipse standard views such as Properties and the Resource Navigator are also useful. While each of these views can be opened and positioned independently within an Eclipse workbench, the Guvnor perspective provides a convenient method of getting a suggested layout. In the Eclipse workbench menu, choose Window, Open Perspective, Other to get the perspective list and then choose "Guvnor Repository Exploring."
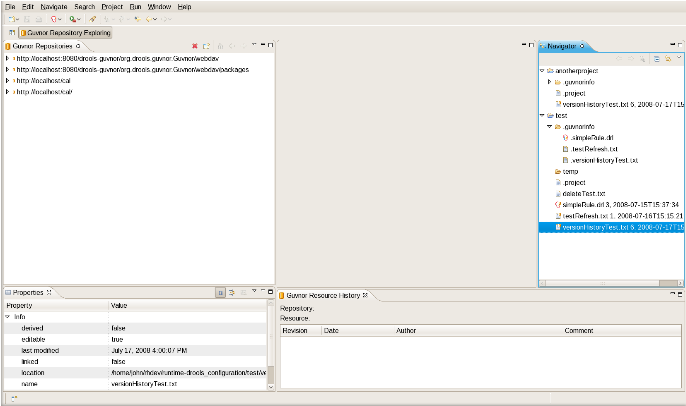
This opens the Guvnor perspective.
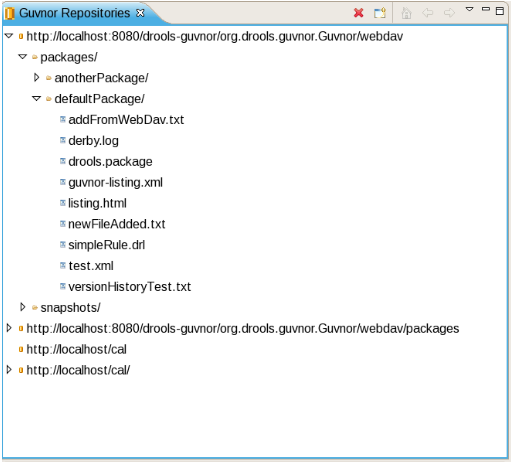
On the left side is the Guvnor Repository Explorer and the Eclipse Properties views, the Guvnor Resource History view is on the bottom, and the Eclipse Resource Navigator is on the right side. The purpose of the Guvnor Repository Explorer is to enable access to Guvnor repository resources in a standard tree format, and the Guvnor Resource History view shows revisions of specific resources available in the repository.
After opening the Guvnor perspective, the first task is to make a connection to a Guvnor repository. This is handled by the Guvnor Connection wizard. This wizard appears in a number of places within the EGT (as detailed below), but in this section we will cover only the two most basic entry points. The Guvnor Connection wizard can be started using the Eclipse menu: File , New , Other , Guvnor , Guvnor repository location, or in the Guvnor Explorer using the drop-down menu:
or the menu button:
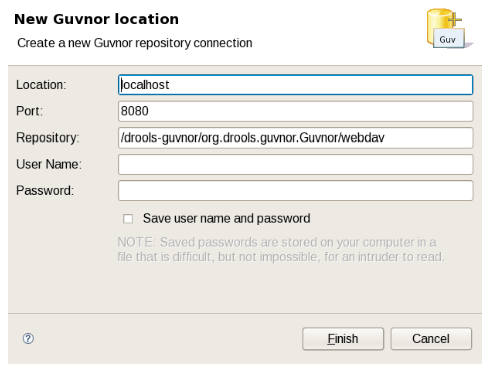
Choosing either of these will start the Guvnor connection wizard:
Default values appear in the Location, Port, and Repository fields. (See "Guvnor plugin Preferences" for details about how to change these default values.) Of course, any of these fields can be edited by typing in the corresponding text box. Drag-and-drop or paste into the Location field of a typical Guvnor repository URL such as http://localhost:8080/guvnor-webapp/org.drools.guvnor.Guvnor/webdav results in the URL being parsed into the respective fields as well. The authentication information (user name and password) can optionally be stored in the Eclipse workbench's key-ring file based on the selection of "Save user name and password." If the authentication information is not stored in the key-ring, then the EGT uses session authentication, which means that the credentials supplied are used only for the lifetime of the Eclipse workbench instance.
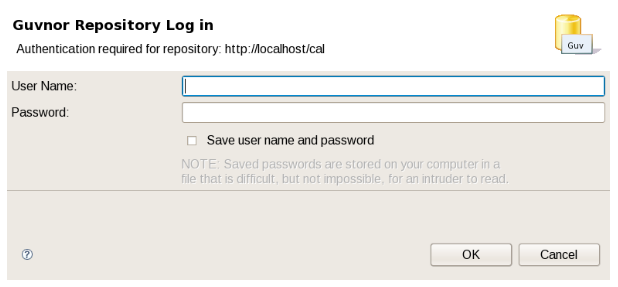
If authentication information is not stored in the key-ring or the authentication information (key-ring or session) is not valid, the EGT will prompt for authentication information when it has to access the Guvnor repository:
If authentication fails, the EGT will retry once and then issue an authentication failure error. (If an authentication failure error occurs, you can retry the same operation and supply different authentication information.) Note that the EGT calls the Guvnor repository at various times, such as when determining if resource updates are available, so, if you use session authentication, the authentication dialog will appear at different times during the Eclipse workbench session, depending on what actions you take. For ease of use, we recommend saving the authentication information in the Eclipse key-ring. (The Eclipse key-ring file is distinct from key-ring files found in some platforms such as Mac OS X and many forms of Linux. Thus, sometimes if you access a Guvnor repository outside the EGT, the key-ring files might become unsynchronized and you will be unexpectedly prompted for authentication in Eclipse. This is nuisance, but your usual credentials should apply in this case.)
Once the Guvnor connection wizard is complete, the new Guvnor repository connection will appear in the Guvnor Repository Explorer. You can then expand the tree to view Guvnor repository contents.
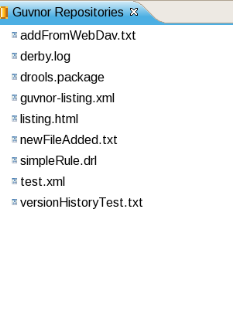
The Guvnor Repository Explorer view contains tree structures for Guvnor repository contents. As described above, there are menu and tool-bar actions for creating Guvnor repository connections. The red “X” in the tool-bar and “Delete” in the menu removes a Guvnor repository connection, and the “Refresh” menu item reloads tree content for the selected node. Finally, there are a number of tool-bar/menu items in support of “drill-into” functionality: one the tool-bar these are represented by the house (“return to top level/home”) and the arrows (go into/back). Drill-down is useful when working with deeply nested tree structures and when you wish to concentrate on only branch of the tree. For example, drilling into the “defaultPackage” node shown above changes the tree view to:
That is, we see only the contents of “defaultPackage” in the tree. Clicking on the house button, or selecting “Go Home” returns the tree to the top-level structure shown in the previous picture above.
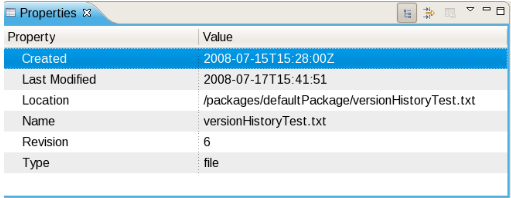
There are a number of operations that can be performed on Guvnor repository files. Selecting a file in the Guvnor repository causes the Eclipse Properties view to update with details about that file:
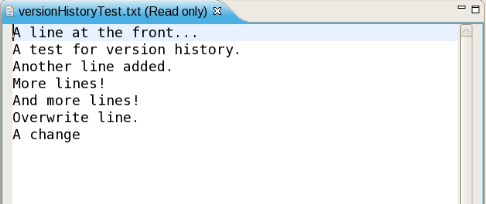
Double-clicking on a folder (directory) in the tree will cause that folder to expand if collapsed and collapse if expanded. Double-clicking on a file in the tree will cause a read-only editor in Eclipse to open, showing the contents of that file:
Dragging a file from the Guvnor repository tree to a folder in an Eclipse local project (for example in the Eclipse Resource Navigator view) will cause a copy of that file to be made in the local Eclipse workspace. (Note: You can also “Save As...” when a file is open in a read-only editor to save a local writable copy of the contents. Doing so, however, will not associate the file created with its Guvnor source.) Finally, you can view the revision history of a file selected in the tree using the “Show History” context menu item. (The details of resource history will be discussed below.)
As mentioned in the Introduction, the main purpose of the EGT is to allow development using resources held in a Guvnor repository. There are two method of getting local copies of Guvnor repository resources:
Drag-and-drop from the Guvnor Repository Explorer, as described above.
Using the “import from Guvnor” wizard, as described below.
When local copies of Guvnor repository files are created, the EGT
sets an association between the local copy and the master file in the
repository. (This information is kept in the (normally) hidden
.guvnorinfo folder in the local project and, like all
metadata, should not be changed by end users.) This association allows for
operations such as update and commit in synchronization with the master
copy held in the Guvnor repository. The EGT decorates local resources
associated with Guvnor repository master copies. This decoration appears
in Eclipse views conforming to the Eclipse Common Navigator framework,
such as the Eclipse Resource Navigator and the Java Package Explorer. The
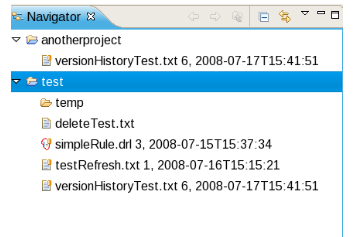
image below shows decoration in the Eclipse Resource Navigator:
Note the Guvnor icon decorator on the top right of the file images,
and the Guvnor revision details appended to the file names. (The
presence/location of these can be changed. See "Guvnor plugin
Preferences" for details.) Here we see that, for example,
simpleRule.drl is associated with a Guvnor repository
resource and the local copy is based on revision 3, with a 7-15-2008,
15:37:34 date/time stamp. The file deleteTest.txt,
however, is not associated with a Guvnor repository file. Further details
about the association can be found in the standard Eclipse properties
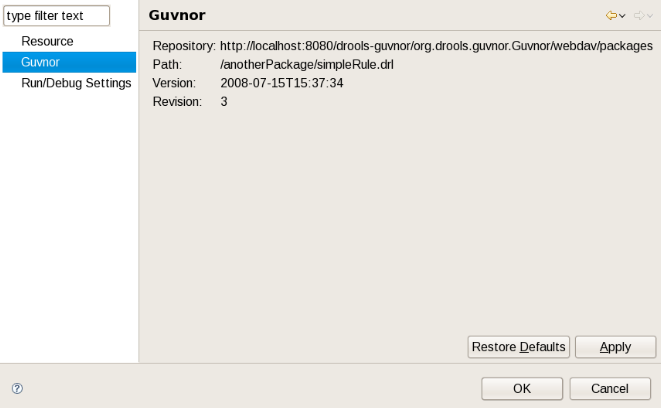
page, via the context menu “Properties” selection:
The EGT contributes a property page to the standard Eclipse properties dialog, the contents of which are shown above. The specific Guvnor repository, the location within the repository, the version (date/time stamp) and revision number are displayed.
The EGT provides a number of actions (available through the “Guvnor”
context menu on files) for working with files, both those associated with
Guvnor repository master copies and those not associated. The actions are:
 1.Update 2.Add 3.Commit 4.Show History 5.Compare with Version
    6.Switch to Version 7.Delete 8.Disconnect
Each of these actions
will be described below.
Update Action:
The Update action is available for one or more Guvnor resources that are not in synchronization with the Guvnor repository master copies. These resources would not be in synchronization because either/both (1) there are local changes to these resources or (2) the master copies have changed in the Guvnor repository. Performing the Update action replaces the local file contents with the current contents from the Guvnor repository master copies (equivalent to “Switch to version” for latest version).
Add Action
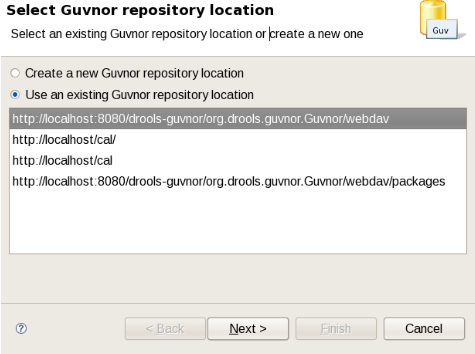
The Add action is available for one or more local files that are not associated with a Guvnor repository master copy. Choosing the Add action launches the “Add to Guvnor” wizard:
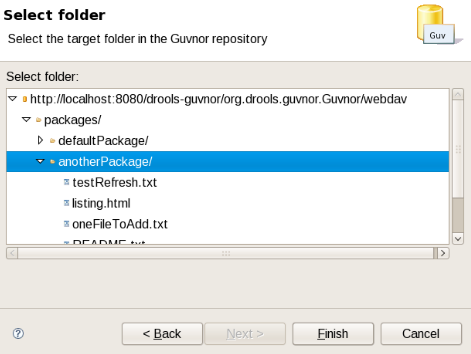
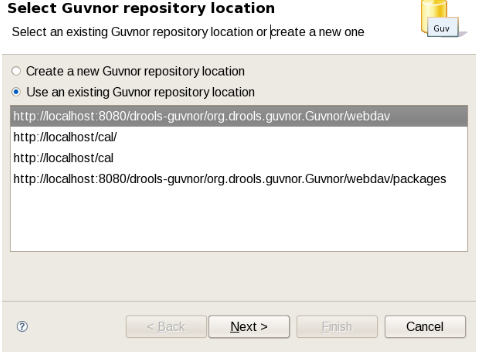
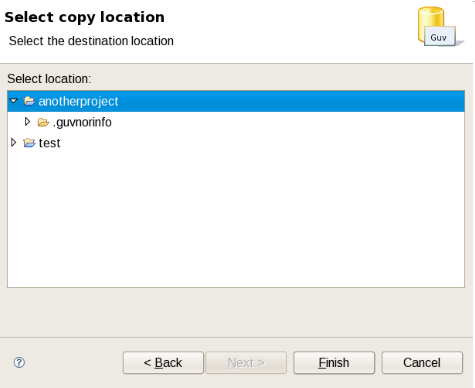
The first page of the wizard asks for the selection of the target Guvnor repository and gives the choice to create a new Guvnor repository connection (in which case the second page is the same as the Guvnor Connection wizard described above). Once the target Guvnor repository is chosen, the wizard then asks for the folder location to add the selection files:
Here I have selected the folder “anotherPackage” as the destination location1. Clicking on “Finish” adds the selected files to the Guvnor repository and creates an association between the local and Guvnor repository files. (Not that the wizard will not allow for overwrite of existing Guvnor repository files – another target location must be chosen.)
Compare with Version Action:
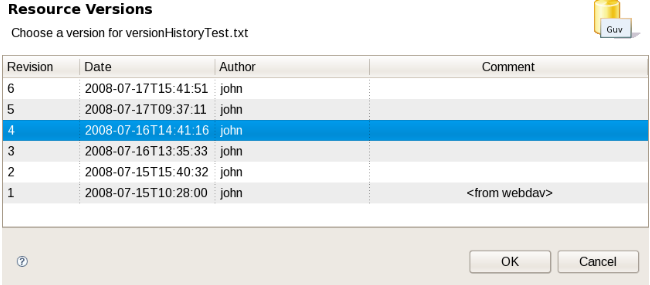
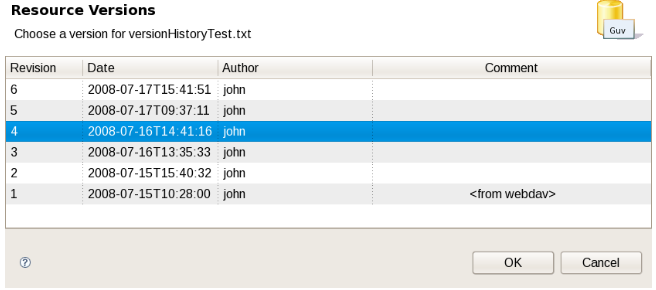
The Compare with Version action is enabled for one Guvnor repository associated file. This action first opens a wizard asking for the version for comparison (with the local file contents):
Once the revision is selected, the action opens the Eclipse compare editor (read-only):
This editor uses Eclipse-standard comparison techniques to show the differences in the two versions. In cases where there are no differences, the editor will not open: rather, a dialog saying that there are no differences will appear.
Switch to Version Action:
The Switch to Version action is enabled for one Guvnor repository associated file. First the Switch to Version action prompts for selection of version:
Once the version is selected, the Switch to Version action replaces the local file contents with those from the revision selected.
Delete Action:
The Delete action is enabled for one or more Guvnor repository associated files. After confirmation via a dialog, the Delete action removes the files in the Guvnor repository and deletes local metadata for the Guvnor repository association.
Disconnect Action:
The Disconnect action is enabled for one or more Guvnor repository associated files, and removes local metadata for the Guvnor repository association.
Guvnor Resource History View:
The Guvnor Resource History view should details about revision history for selected files, both local and those in Guvnor repositories. The initial state of this view is:
The Guvnor Resource History view is populated by “Show History” actions in either the local “Guvnor” context menu or in the context menu for a Guvnor repository file in the Guvnor Repository Explorer. Once this action is performed, the Guvnor Resource History view updates to show the revision history:
Here we see that the file “simpleRule.drl” has three revisions. Double clicking on a revision row (or context menu “Open (Read only)”) opens an Eclipse read-only editor with the revision contents. (Note: You can also “Save As...” when a file is open in a read-only editor to save a local writable copy of the contents. Doing so, however, will not associate the file created with its Guvnor source.)
In addition to the single file drag-and-drop from the Guvnor Repository Explorer view, the EGT also includes a wizard for copying one or more files from a Guvnor repository to the local workspace (and setting the association with the Guvnor repository). This wizard is available from the Eclipse Import , Guvnor, Resource from Guvnor and the Eclipse File, New, Other, Guvnor, Resource from Guvnor menu items. (Note: the wizard is identical but appears in both locations to accommodate users who tend to view this functionality as being in either category.) The first page of the wizard asks for the selection of the source Guvnor repository and gives the choice to create a new Guvnor repository connection (in which case the second page is the same as the Guvnor Connection wizard described above).
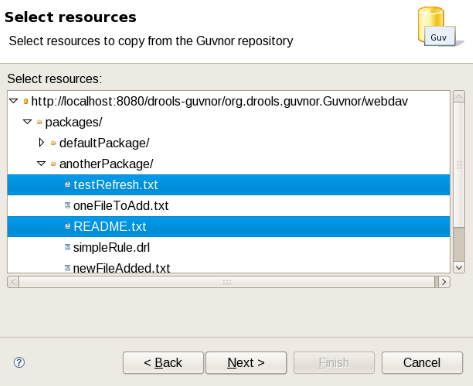
Once the source Guvnor repository is chosen, the wizard prompts for resource selection:
Finally, the target location in the local workspace is chosen:
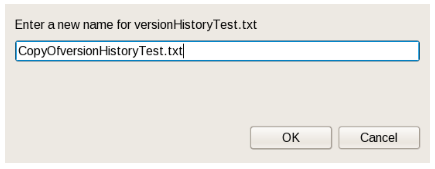
On completion the wizard copies the selected files from the Guvnor repository to the local workspace. If a file with the same name already exists in the destination, the wizard uses the Eclipse standard “prompt for rename” dialog:
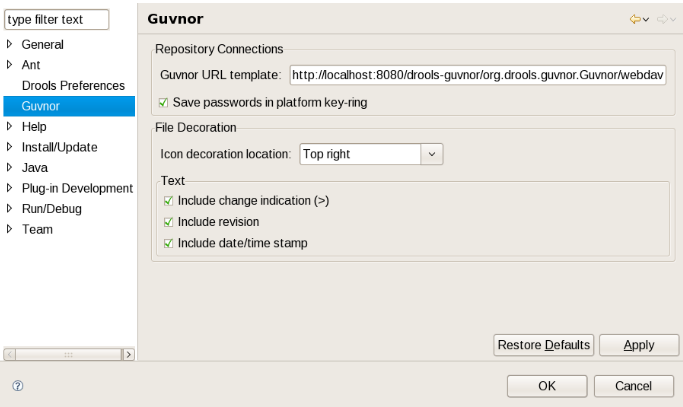
The EGT provides a preference page in the “Guvnor” category:
The preferences cover two categories: Guvnor repository connections and local Guvnor repository resource decorations.
Guvnor Repository Connection Preferences
There are two preferences that can be set for Guvnor repository connections, and these are used when creating new connections. The first is a default Guvnor repository URL template, which can make it easier to create multiple similar connections by simply changing part of the field, such as the host name. The second is whether saving of authentication information in the Eclipse platform key-ring should be enabled by default. As with the Guvnor repository URL template, actually whether to save a specific instance of authentication information in the Eclipse platform key-ring can be determined when actually creating the connection. That is, both of these preferences are simply convenience values set to reasonable defaults.
Local Guvnor Repository Resource Decoration Preferences
The second category of preferences provided by the EGT deals with how decoration of local resources associated with Guvnor repository resources is presented. Since the Guvnor repository is not a substitute for a SCM, and since SCM tools in Eclipse tend to decorate local resources, it is useful to be able to control just how the EGT decorate its local resources to avoid messy conflicts with SCM packages. In the “File Decoration” section of the preference page, you can choose the location (top right, bottom right, top left, bottom left) of the decoration icon, or you can choose not to display it. In the “Text” section, you can format the Guvnor metadata that is appended to the file names: Whether to show an indicator (>) when the local file has changes not committed back to the Guvnor repository. Whether to show the revision number. Whether to show the date/time stamp. Any changes to these preferences take effect immediately upon clicking the “Apply” or “Ok” buttons.
