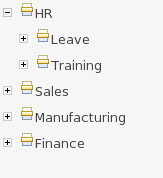
Categories allow rules (assets) to be labeled (or tagged) with any number of categories that you define. This means that you can then view a list of rules that match a specific category. Rules can belong to any number of categories. In the above diagram, you can see this can in effect create a folder/explorer like view of assets. The names can be anything you want, and are defined by the Guvnor administrator (you can also remove/add new categories - you can only remove them if they are not currently in use).
Generally categories are created with meaningful name that match the area of the business the rule applies to (if the rule applies to multiple areas, multiple categories can be attached). Categories can also be used to "tag" rules as part of their life-cycle, for example to mark as "Draft" or "For Review".
The view above shows the category editor/viewer that is seen when you open an asset. In this example you can see the asset belongs to 2 categories, with a "+" button to add additional items (use the trash can item to remove them). This means that when either category is used to show a list of assets, you will see that asset.
In the above example, the first Category "Finance" is a "top level" category. The second one: "HR/Awards/QAS" is a still a single category, but its a nested category: Categories are hierarchical. This means there is a category called "HR", which contains a category "Awards" (it will in fact have more sub-categories of course), and "Awards" has a sub-category of QAS. The screen shows this as "HR/Awards/QAS" - its very much like a folder structure you would have on your hard disk (the notable exception is of course that rules can appear in multiple places).
When you open an asset to view or edit, it will show a list of categories that it currently belongs to If you make a change (remove or add a category) you will need to save the asset - this will create a new item in the version history. Changing the categories of a rule has no effect on its execution.
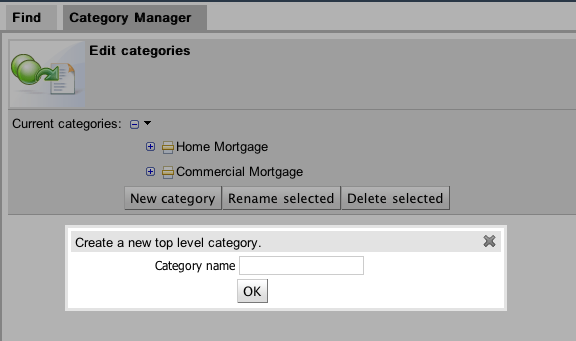
The above view shows the administration screen for setting up categories (there) are no categories in the system by default. As the categories can be hierarchical you chose the "parent" category that you want to create a sub-category for. From here categories can also be removed (but only if they are not in use by any current versions of assets).
As a general rule, an asset should only belong to 1 or 2 categories at a time. Categories are critical in cases where you have large numbers of rules. The hierarchies do not need to be too deep, but should be able to see how this can help you break down rules/assets into manageable chunks. Its ok if its not clear at first, you are free to change categories as you go.
Every asset, including packages, can be assigned a status. Unlike categories assets can only have one status. The use of statuses is optional and does not affect the execution of assets, however, statuses may be used to compile packages when using selectors.
Statuses may help to manage the lifecycle of assets, by assigning assets a status that indicates its current state, for example, draft, review, production.
If the status for an entire package is changed, it changes the status for every asset in the package.
Procedure 8.1. Setting the available statuses
From the navigation panel, select → .
Click New status, enter the status name in the text box, and click OK.
The new status will show up in Current statuses field.
Procedure 8.2. Changing asset status
Open the asset in the asset editor.
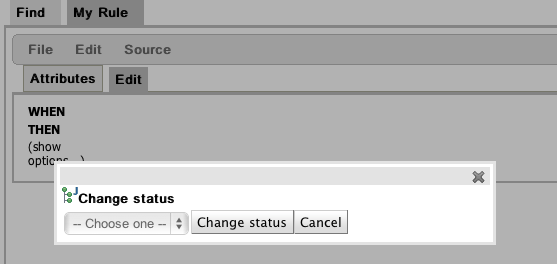
Select → , choose the status from the drop down menu and click Change status.
The status of the asset will be changed immediately.
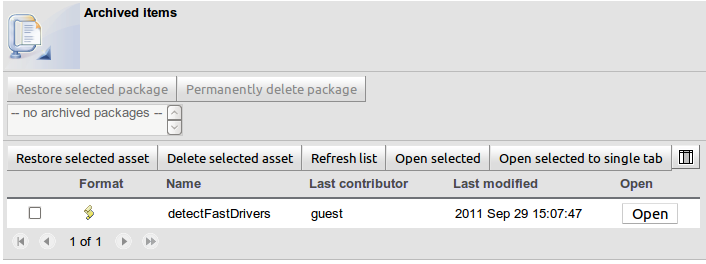
This is basically the trash bin.
If you've archived an asset (effectively deleting it), and you want to restore it, open this screen, select the asset and click the button Restore selected asset.
If instead, you want to permanently delete it, select it and click the button Delete selected asset.
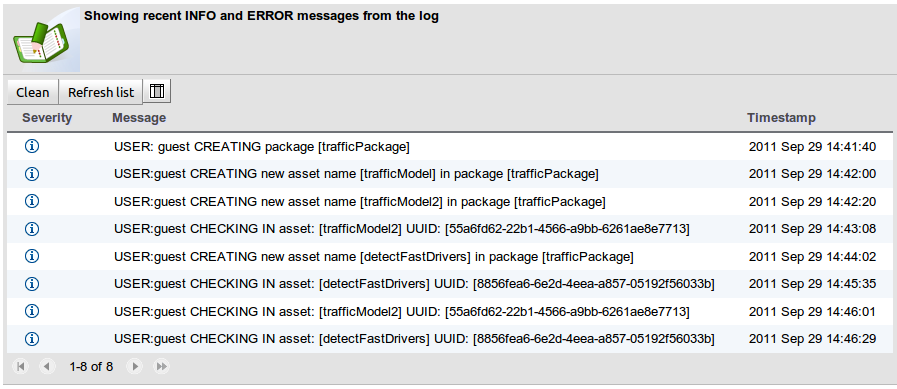
The event log shows the server events that have occurred.
To clean the log, click the button Clean.
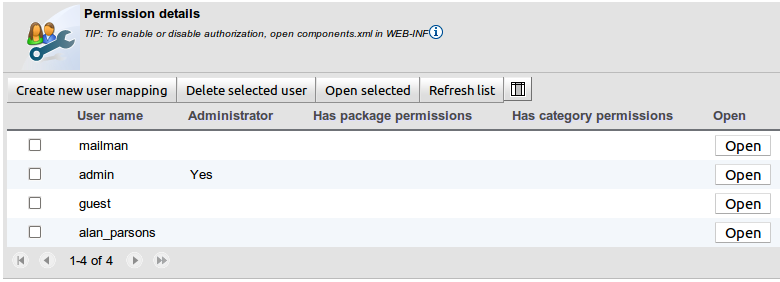
When role based permissions are enabled (see administration guide), it's possible limit user permissions.
To add a new user, click the button Create new user mapping.
Note
The user guest is special: if the user exists, Guvnor will automatically log in users as
guest.
Warning
Do not delete or cripple the users admin or mailman. They are users used
by the system.
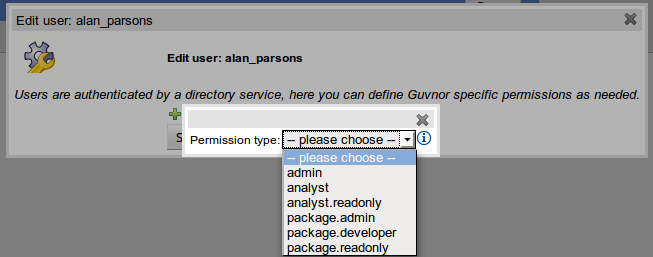
To add or remove a permission to a user, select a user and click on the button Open. Click on the green + to add a permission type:
There are several permission types:
Admin: this user can do everything
Analyst or Analyst read-only: analyst permissions for a specific category. Create the category before attempting to assign users to it.
Package admin, Package developer or Package read-only: package permissions for a specific package. Create the package before attempting to assign users to it.
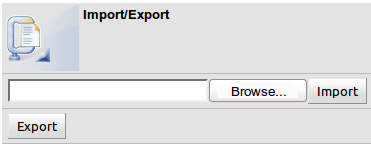
The entire Guvnor repository can be exported to a file. This is useful as a backup. It can be imported in the same or another Guvnor server instance.
To export the entire repository content into a zip file, click the button Export. You 'll get a pop-up in your browser to save the zip file.
To import such a zip file, click the button Browse, select the zip file and click the button Import.
Both actions may take some time, especially if the repository is big.
