It's been a busy year since the last 5.x series release and so much has change.
One of the biggest complaints during the 5.x series was the lack of defined methodolgy for deployment. The mechanism used by Drools and jBPM was very flexible, but it was too flexible. A big focus for 6.0 was streamling the build, deploy and loading(utilization) aspects of the system. Building and deploying now align with Maven and the utilization is now convention and configuration oriented, instead of programmatic, with sane default to minimise the configuration.
The workbench has been rebuilt from the ground up, inspired by Eclipse, to provide a flexible and better integrated solution; with panels and perspectives via plugins. The base workbench has been spun off into a standalone project called UberFire, so that anyone now can build high quality web based workbenches. In the longer term it will facilitate user customised Drools and jBPM installations.
GIT replaces JCR as the content repository, offering a fast and scalable back-end storage for content that has strong tooling support. There has been a refocus on simplicity away from databases with an aim of storing everythign as as text file, even meta data is just a file. The database is just there to provide fast indexing and search via Lucene. This will allow repositories now to be synced and published with estbalished infrastructure, like GitHub.
jBPM has been dramatically beefed up, thanks to the Polymita acquisition, with human tasks, form builders, class modellers, execution servers and runtime management. All fully integrated into the new workbench.
OptaPlanner is now a top level project and getting full time attention.
A new umbrella name, KIE (Knowledge Is Everything), has been introduced to bring our related technologies together under one roof. It also acts as the core shared around for our projects. So expect to see it a lot.
We are often asked "How do I get involved". Luckily the answer is simple, just write some code and submit it :) There are no hoops you have to jump through or secret handshakes. We have a very minimal "overhead" that we do request to allow for scalable project development. Below we provide a general overview of the tools and "workflow" we request, along with some general advice.
If you contribute some good work, don't forget to blog about it :)
Signing to jboss.org will give you access to the JBoss wiki, forums and Jira. Go to http://www.jboss.org/ and click "Register".
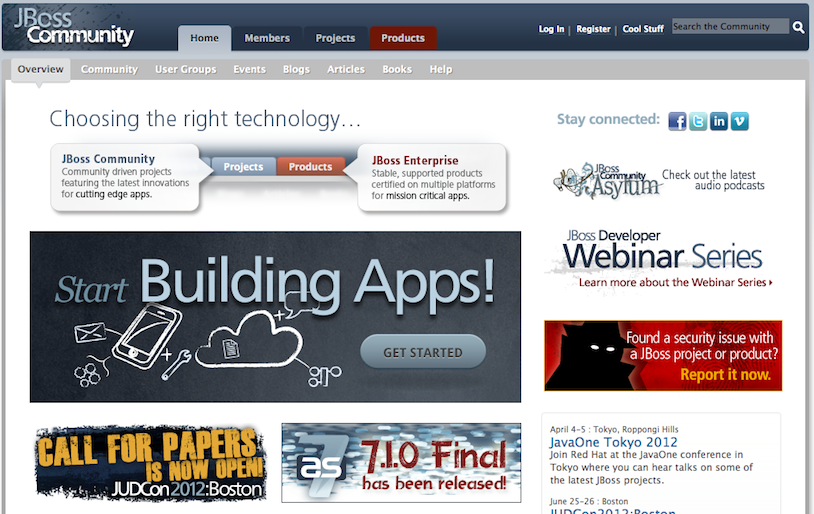
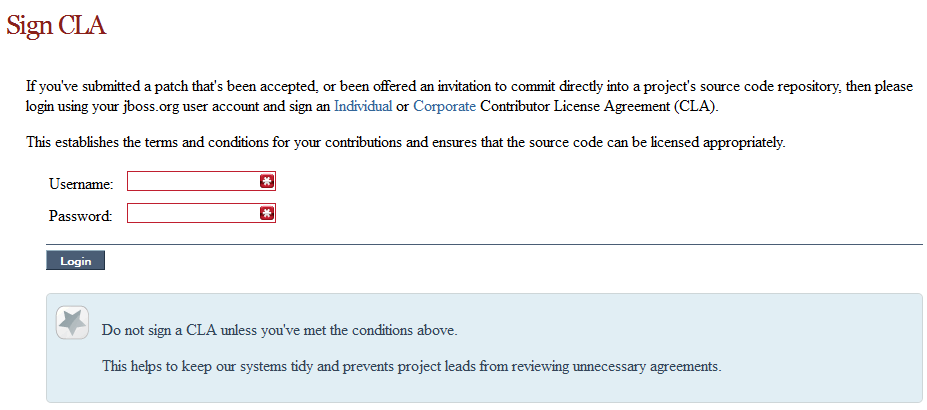
The only form you need to sign is the contributor agreement, which is fully automated via the web. As the image below says "This establishes the terms and conditions for your contributions and ensures that source code can be licensed appropriately"
To be able to interact with the core development team you will need to use JIRA, the issue tracker. This ensures that all requests are logged and allocated to a release schedule and all discussions captured in one place. Bug reports, bug fixes, feature requests and feature submissions should all go here. General questions should be undertaken at the mailing lists.
Minor code submissions, like format or documentation fixes do not need an associated JIRA issue created.
https://issues.jboss.org/browse/JBRULES (Drools)
https://issues.jboss.org/browse/JBPM
https://issues.jboss.org/browse/GUVNOR

With the contributor agreement signed and your requests submitted to jira you should now be ready to code :) Create a github account and fork any of the drools, jbpm or guvnor sub modules. The fork will create a copy in your own github space which you can work on at your own pace. If you make a mistake, don't worry blow it away and fork again. Note each github repository provides you the clone (checkout) URL, github will provide you URLs specific to your fork.

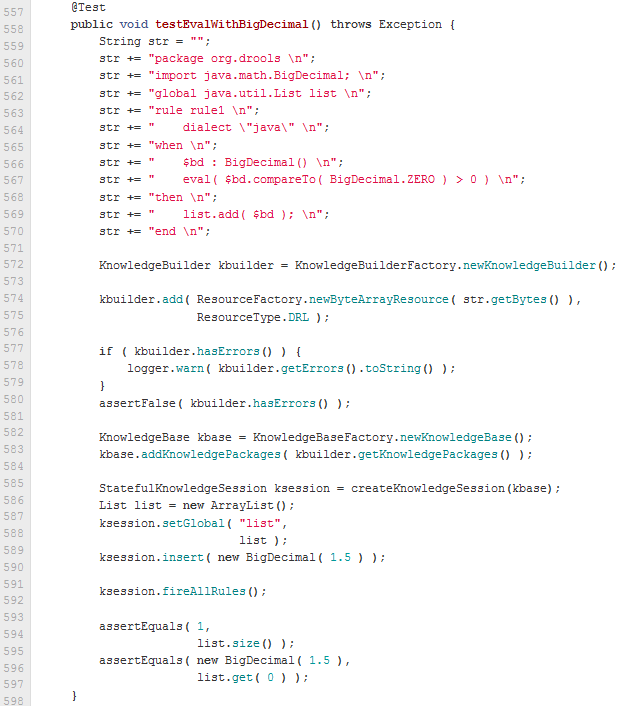
When writing tests, try and keep them minimal and self contained. We prefer to keep the drl fragments within the test, as it makes for quicker reviewing. If their are a large number of rules then using a String is not practical so then by all means place them in separate drl files instead to be loaded from the classpath. If your tests need to use a model, please try to use those that already exist for other unit tests; such as Person, Cheese or Order. If no classes exist that have the fields you need, try and update fields of existing classes before adding a new class.
There are a vast number of tests to look over to get an idea, MiscTest is a good place to start.
When you commit, make sure you use the correct conventions. The commit must start with the JIRA issue id, such as JBRULES-220. This ensures the commits are cross referenced via JIRA, so we can see all commits for a given issue in the same place. After the id the title of the issue should come next. Then use a newline, indented with a dash, to provide additional information related to this commit. Use an additional new line and dash for each separate point you wish to make. You may add additional JIRA cross references to the same commit, if it's appropriate. In general try to avoid combining unrelated issues in the same commit.
Don't forget to rebase your local fork from the original master and then push your commits back to your fork.

With your code rebased from original master and pushed to your personal github area, you can now submit your work as a pull request. If you look at the top of the page in github for your work area their will be a "Pull Request" button. Selecting this will then provide a gui to automate the submission of your pull request.
The pull request then goes into a queue for everyone to see and comment on. Below you can see a typical pull request. The pull requests allow for discussions and it shows all associated commits and the diffs for each commit. The discussions typically involve code reviews which provide helpful suggestions for improvements, and allows for us to leave inline comments on specific parts of the code. Don't be disheartened if we don't merge straight away, it can often take several revisions before we accept a pull request. Luckily github makes it very trivial to go back to your code, do some more commits and then update your pull request to your latest and greatest.
It can take time for us to get round to responding to pull requests, so please be patient. Submitted tests that come with a fix will generally be applied quite quickly, where as just tests will often way until we get time to also submit that with a fix. Don't forget to rebase and resubmit your request from time to time, otherwise over time it will have merge conflicts and core developers will general ignore those.

Drools provides an Eclipse-based IDE (which is optional), but at its core only Java 1.5 (Java SE) is required.
A simple way to get started is to download and install the Eclipse plug-in - this will also require the Eclipse GEF framework to be installed (see below, if you don't have it installed already). This will provide you with all the dependencies you need to get going: you can simply create a new rule project and everything will be done for you. Refer to the chapter on the Rule Workbench and IDE for detailed instructions on this. Installing the Eclipse plug-in is generally as simple as unzipping a file into your Eclipse plug-in directory.
Use of the Eclipse plug-in is not required. Rule files are just textual input (or spreadsheets as the case may be) and the IDE (also known as the Rule Workbench) is just a convenience. People have integrated the rule engine in many ways, there is no "one size fits all".
Alternatively, you can download the binary distribution, and include the relevant jars in your projects classpath.
Drools is broken down into a few modules, some are required during rule development/compiling, and some are required at runtime. In many cases, people will simply want to include all the dependencies at runtime, and this is fine. It allows you to have the most flexibility. However, some may prefer to have their "runtime" stripped down to the bare minimum, as they will be deploying rules in binary form - this is also possible. The core runtime engine can be quite compact, and only requires a few 100 kilobytes across 3 jar files.
The following is a description of the important libraries that make up JBoss Drools
knowledge-api.jar - this provides the interfaces and factories. It also helps clearly show what is intended as a user api and what is just an engine api.
knowledge-internal-api.jar - this provides internal interfaces and factories.
drools-core.jar - this is the core engine, runtime component. Contains both the RETE engine and the LEAPS engine. This is the only runtime dependency if you are pre-compiling rules (and deploying via Package or RuleBase objects).
drools-compiler.jar - this contains the compiler/builder components to take rule source, and build executable rule bases. This is often a runtime dependency of your application, but it need not be if you are pre-compiling your rules. This depends on drools-core.
drools-jsr94.jar - this is the JSR-94 compliant implementation, this is essentially a layer over the drools-compiler component. Note that due to the nature of the JSR-94 specification, not all features are easily exposed via this interface. In some cases, it will be easier to go direct to the Drools API, but in some environments the JSR-94 is mandated.
drools-decisiontables.jar - this is the decision tables 'compiler' component, which uses the drools-compiler component. This supports both excel and CSV input formats.
There are quite a few other dependencies which the above components require, most of which are for the drools-compiler, drools-jsr94 or drools-decisiontables module. Some key ones to note are "POI" which provides the spreadsheet parsing ability, and "antlr" which provides the parsing for the rule language itself.
NOTE: if you are using Drools in J2EE or servlet containers and you come across classpath issues with "JDT", then you can switch to the janino compiler. Set the system property "drools.compiler": For example: -Ddrools.compiler=JANINO.
For up to date info on dependencies in a release, consult the released poms, which can be found on the maven repository.
The jars are also available in the central maven repository (and also in the JBoss maven repository).
If you use Maven, add KIE and Drools dependencies in your project's pom.xml like
this:
  <dependencyManagement>

    <dependencies>

      <dependency>

        <groupId>org.drools</groupId>

        <artifactId>drools-bom</artifactId>

        <type>pom</type>

        <version>...</version>

        <scope>import</scope>

      </dependency>

      ...

    </dependencies>

  </dependencyManagement>

  <dependencies>

    <dependency>

      <groupId>org.kie</groupId>

      <artifactId>kie-api</artifactId>

    </dependency>

    <dependency>

      <groupId>org.drools</groupId>

      <artifactId>drools-compiler</artifactId>

      <scope>runtime</scope>

    </dependency>

    ...

  <dependencies>
This is similar for Gradle, Ivy and Buildr. To identify the latest version, check the maven repository.
If you're still using ANT (without Ivy), copy all the jars from the download zip's
binaries directory and manually verify that your classpath doesn't contain duplicate
jars.
The "runtime" requirements mentioned here are if you are deploying rules as their binary form (either as KnowledgePackage objects, or KnowledgeBase objects etc). This is an optional feature that allows you to keep your runtime very light. You may use drools-compiler to produce rule packages "out of process", and then deploy them to a runtime system. This runtime system only requires drools-core.jar and knowledge-api for execution. This is an optional deployment pattern, and many people do not need to "trim" their application this much, but it is an ideal option for certain environments.
The rule workbench (for Eclipse) requires that you have Eclipse 3.4 or greater, as well as Eclipse GEF 3.4 or greater. You can install it either by downloading the plug-in or, or using the update site.
Another option is to use the JBoss IDE, which comes with all the plug-in requirements pre packaged, as well as a choice of other tools separate to rules. You can choose just to install rules from the "bundle" that JBoss IDE ships with.
GEF is the Eclipse Graphical Editing Framework, which is used for graph viewing components in the plug-in.
If you don't have GEF installed, you can install it using the built in update mechanism (or downloading GEF from the Eclipse.org website not recommended). JBoss IDE has GEF already, as do many other "distributions" of Eclipse, so this step may be redundant for some people.
Open the Help->Software updates...->Available Software->Add Site... from the help menu. Location is:
http://download.eclipse.org/tools/gef/updates/releases/
Next you choose the GEF plug-in:

Press next, and agree to install the plug-in (an Eclipse restart may be required). Once this is completed, then you can continue on installing the rules plug-in.
To install from the zip file, download and unzip the file. Inside the zip you will see a plug-in directory, and the plug-in jar itself. You place the plug-in jar into your Eclipse applications plug-in directory, and restart Eclipse.
Download the Drools Eclipse IDE plugin from the link below. Unzip the downloaded file in your main eclipse folder (do not just copy the file there, extract it so that the feature and plugin jars end up in the features and plugin directory of eclipse) and (re)start Eclipse.
http://www.jboss.org/drools/downloads.html
To check that the installation was successful, try opening the Drools perspective: Click the 'Open Perspective' button in the top right corner of your Eclipse window, select 'Other...' and pick the Drools perspective. If you cannot find the Drools perspective as one of the possible perspectives, the installation probably was unsuccessful. Check whether you executed each of the required steps correctly: Do you have the right version of Eclipse (3.4.x)? Do you have Eclipse GEF installed (check whether the org.eclipse.gef_3.4.*.jar exists in the plugins directory in your eclipse root folder)? Did you extract the Drools Eclipse plugin correctly (check whether the org.drools.eclipse_*.jar exists in the plugins directory in your eclipse root folder)? If you cannot find the problem, try contacting us (e.g. on irc or on the user mailing list), more info can be found no our homepage here:
A Drools runtime is a collection of jars on your file system that represent one specific release of the Drools project jars. To create a runtime, you must point the IDE to the release of your choice. If you want to create a new runtime based on the latest Drools project jars included in the plugin itself, you can also easily do that. You are required to specify a default Drools runtime for your Eclipse workspace, but each individual project can override the default and select the appropriate runtime for that project specifically.
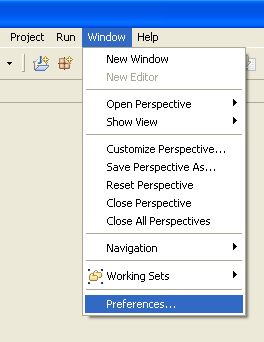
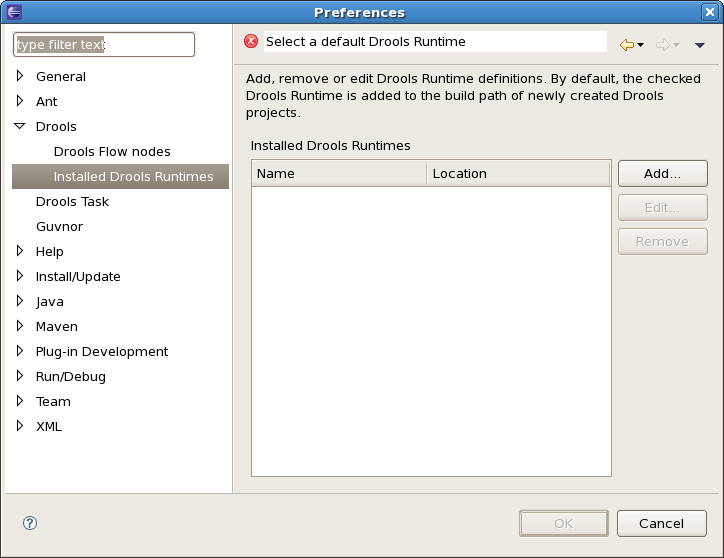
You are required to define one or more Drools runtimes using the Eclipse preferences view. To open up your preferences, in the menu Window select the Preferences menu item. A new preferences dialog should show all your preferences. On the left side of this dialog, under the Drools category, select "Installed Drools runtimes". The panel on the right should then show the currently defined Drools runtimes. If you have not yet defined any runtimes, it should like something like the figure below.
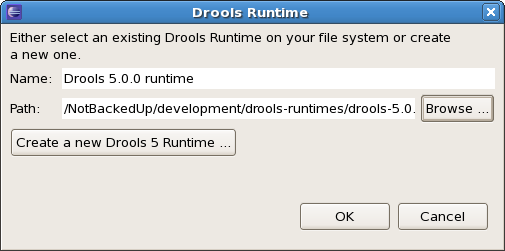
To define a new Drools runtime, click on the add button. A dialog as shown below should pop up, requiring the name for your runtime and the location on your file system where it can be found.
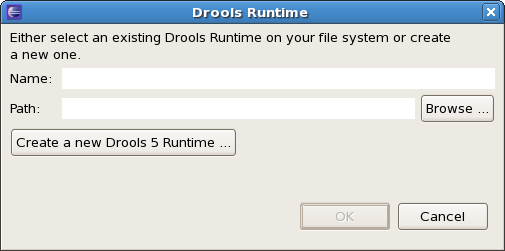
In general, you have two options:
If you simply want to use the default jars as included in the Drools Eclipse plugin, you can create a new Drools runtime automatically by clicking the "Create a new Drools 5 runtime ..." button. A file browser will show up, asking you to select the folder on your file system where you want this runtime to be created. The plugin will then automatically copy all required dependencies to the specified folder. After selecting this folder, the dialog should look like the figure shown below.
If you want to use one specific release of the Drools project, you should create a folder on your file system that contains all the necessary Drools libraries and dependencies. Instead of creating a new Drools runtime as explained above, give your runtime a name and select the location of this folder containing all the required jars.
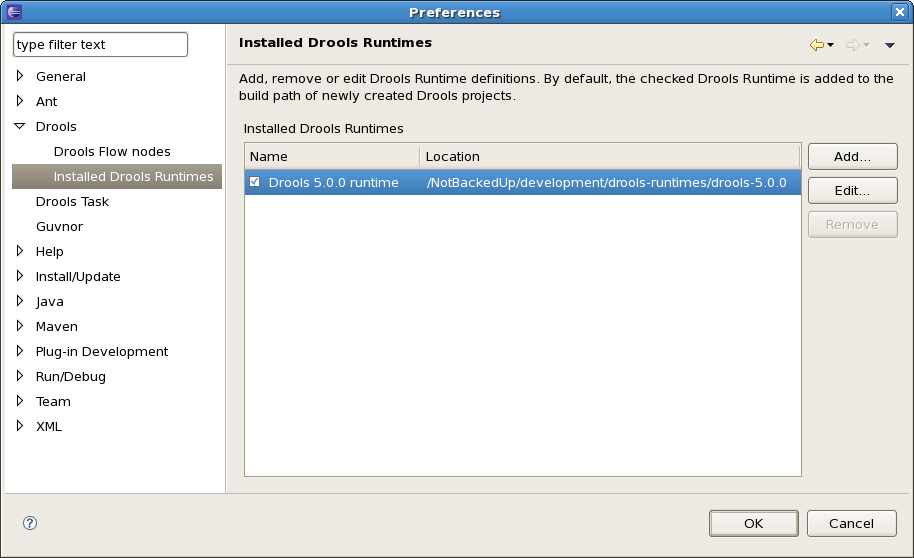
After clicking the OK button, the runtime should show up in your table of installed Drools runtimes, as shown below. Click on checkbox in front of the newly created runtime to make it the default Drools runtime. The default Drools runtime will be used as the runtime of all your Drools project that have not selected a project-specific runtime.
You can add as many Drools runtimes as you need. For example, the screenshot below shows a configuration where three runtimes have been defined: a Drools 4.0.7 runtime, a Drools 5.0.0 runtime and a Drools 5.0.0.SNAPSHOT runtime. The Drools 5.0.0 runtime is selected as the default one.
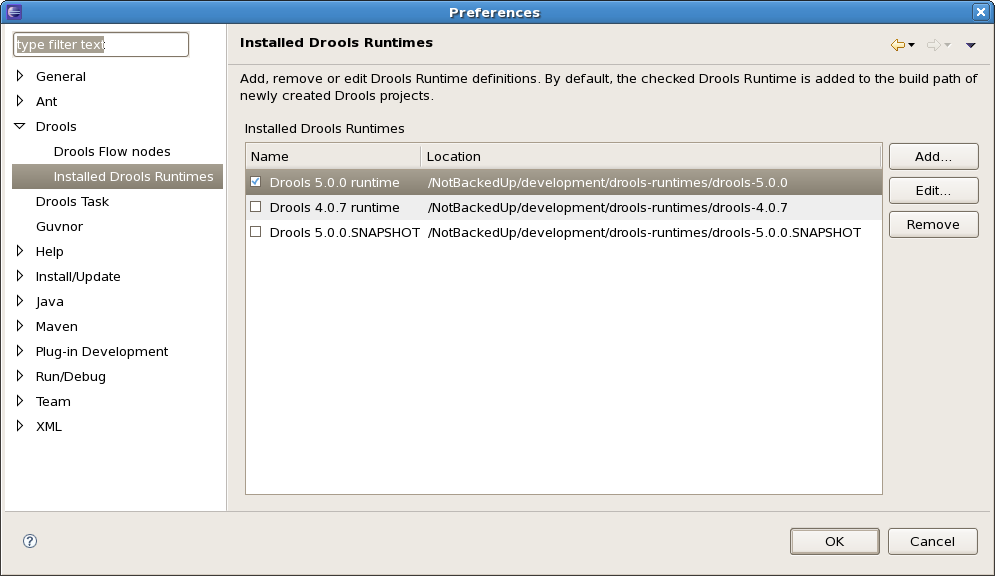
Note that you will need to restart Eclipse if you changed the default runtime and you want to make sure that all the projects that are using the default runtime update their classpath accordingly.
Whenever you create a Drools project (using the New Drools Project wizard or by converting an existing Java project to a Drools project using the "Convert to Drools Project" action that is shown when you are in the Drools perspective and you right-click an existing Java project), the plugin will automatically add all the required jars to the classpath of your project.
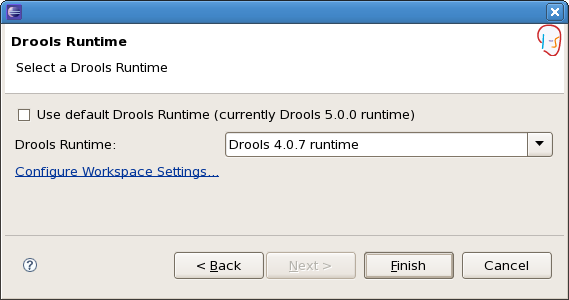
When creating a new Drools project, the plugin will automatically use the default Drools runtime for that project, unless you specify a project-specific one. You can do this in the final step of the New Drools Project wizard, as shown below, by deselecting the "Use default Drools runtime" checkbox and selecting the appropriate runtime in the drop-down box. If you click the "Configure workspace settings ..." link, the workspace preferences showing the currently installed Drools runtimes will be opened, so you can add new runtimes there.
You can change the runtime of a Drools project at any time by opening the project properties (right-click the project and select Properties) and selecting the Drools category, as shown below. Check the "Enable project specific settings" checkbox and select the appropriate runtime from the drop-down box. If you click the "Configure workspace settings ..." link, the workspace preferences showing the currently installed Drools runtimes will be opened, so you can add new runtimes there. If you deselect the "Enable project specific settings" checkbox, it will use the default runtime as defined in your global preferences.

The source code of each maven artifact is available in the JBoss maven repository as a source jar. The same source jars are also included in the download zips. However, if you want to build from source, it's highly recommended to get our sources from our source control.
Drools and jBPM use Git for source control. The blessed git repositories are hosted on Github:
Git allows you to fork our code, independently make personal changes on it, yet still merge in our latest changes regularly and optionally share your changes with us. To learn more about git, read the free book Git Pro.
In essense, building from source is very easy, for example if you want to build the guvnor project:
$ git clone git@github.com:droolsjbpm/guvnor.git
...
$ cd guvnor
$ mvn clean install -DskipTests -Dfull
...
However, there are a lot potential pitfalls, so if you're serious about building from source and possibly contributing to the project, follow the instructions in the README file in droolsjbpm-build-bootstrap.
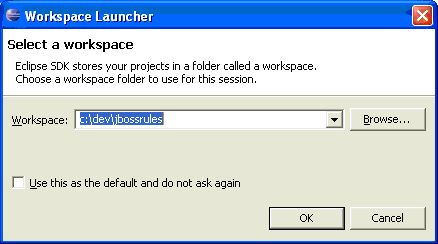
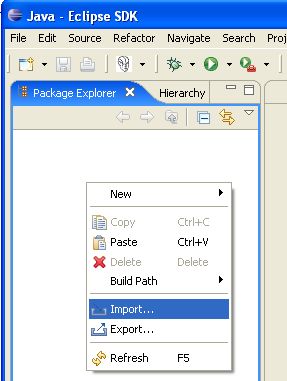
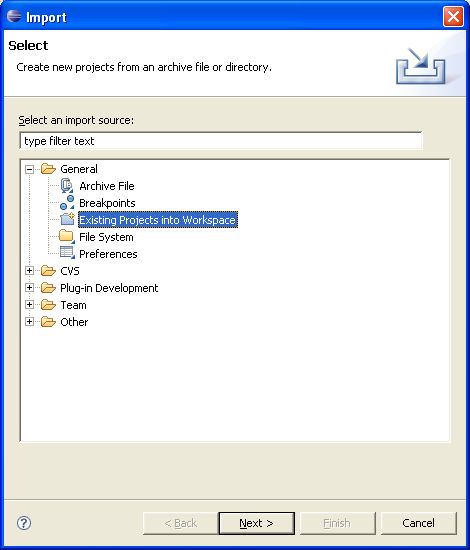
With the Eclipse project files generated they can now be imported into Eclipse. When starting Eclipse open the workspace in the root of your subversion checkout.

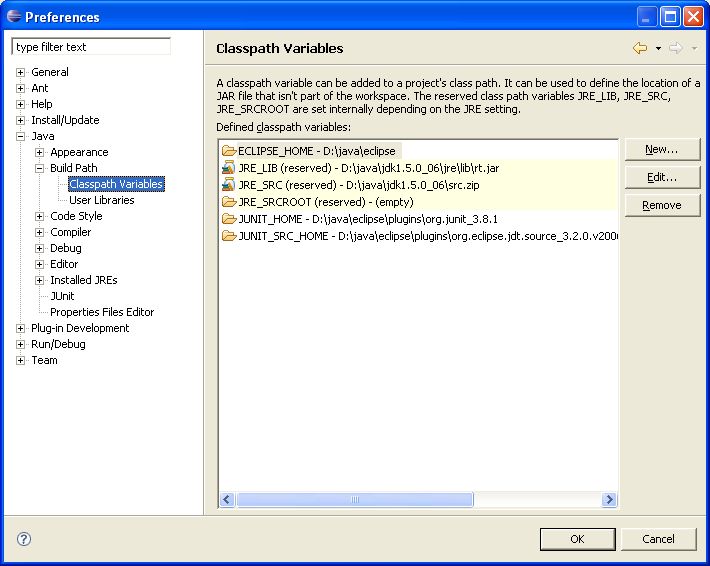
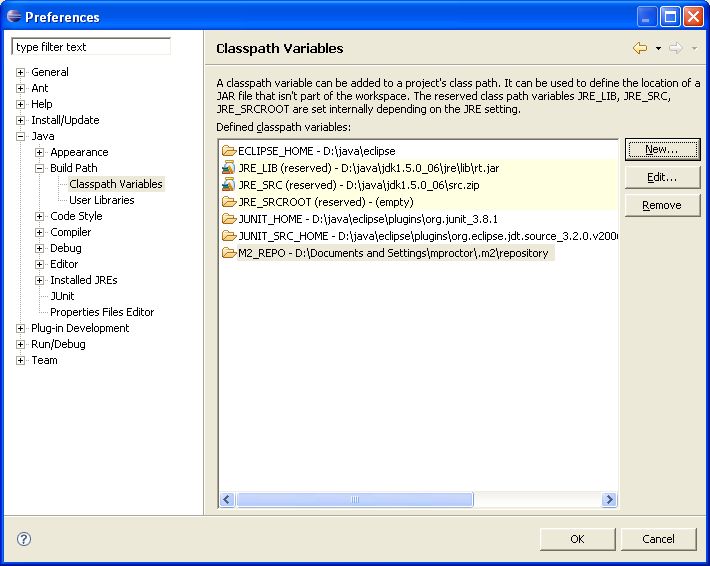
When calling mvn install all the project dependencies were downloaded and added to the
local Maven repository. Eclipse cannot find those dependencies unless you tell it where that repository is. To do
this setup an M2_REPO classpath variable.
