From the workbench distribution zip, take the kie-wb-*.war that corresponds to your
application server:
jboss-as7: tailored for JBoss AS 7 (which is being renamed to WildFly in version 8)eap-6: tailored to JBoss EAP 6tomcat7: the generic war, works on Tomcat and Jetty
Note
The differences between these war files are superficial only, to allow out-of-the-box
deployment. For example, some JARs might be excluded if the application server already supplies them.
To use the workbench on a different application server (WebSphere, WebLogic, ...), use the
tomcat7 war and tailor it to your application server's version.
The workbench stores its data, by default in the directory $WORKING_DIRECTORY/.niogit, for
example wildfly-8.0.0.Final/bin/.gitnio, but it can be overridden with the system property -Dorg.uberfire.nio.git.dir.
Note
In production, make sure to back up the workbench data directory.
Here's a list of all system properties:
org.uberfire.nio.git.dir: Location of the directory.niogit. Default: working directoryorg.uberfire.nio.git.daemon.enabled: Enables/disables git daemon. Default:trueorg.uberfire.nio.git.daemon.host: If git daemon enabled, uses this property as local host identifier. Default:localhostorg.uberfire.nio.git.daemon.port: If git daemon enabled, uses this property as port number. Default:9418org.uberfire.nio.git.ssh.enabled: Enables/disables ssh daemon. Default:trueorg.uberfire.nio.git.ssh.host: If ssh daemon enabled, uses this property as local host identifier. Default:localhostorg.uberfire.nio.git.ssh.port: If ssh daemon enabled, uses this property as port number. Default:8001org.uberfire.nio.git.ssh.cert.dir: Location of the directory.securitywhere local certtificates will be stored. Default: working directoryorg.uberfire.metadata.index.dir: Place where Lucene.indexfolder will be stored. Default: working directoryorg.uberfire.cluster.id: Name of the helix cluster, for example:kie-clusterorg.uberfire.cluster.zk: Connection string to zookeeper. This is of the formhost1:port1,host2:port2,host3:port3, for example:localhost:2188org.uberfire.cluster.local.id: Unique id of the helix cluster node, note that ':' is replaced with '_', for example:node1_12345org.uberfire.cluster.vfs.lock: Name of the resource defined on helix cluster, for example:kie-vfsorg.uberfire.cluster.autostart: Delays VFS clustering until the application is fully initialized to avoid conflicts when all cluster members create local clones. Default:falseorg.uberfire.sys.repo.monitor.disabled: Disable configuration monitor (do not disable unless you know what you're doing). Default:falseorg.uberfire.secure.key: Secret password used by password encryption. Default:org.uberfire.adminorg.uberfire.secure.alg: Crypto algorithm used by password encryption. Default:PBEWithMD5AndDESorg.guvnor.m2repo.dir: Place where Maven repository folder will be stored. Default: working-directory/repositories/kieorg.kie.example.repositories: Folder from where demo repositories will be cloned. The demo repositories need to have been obtained and placed in this folder. Demo repositories can be obtained from the kie-wb-6.1.0-SNAPSHOT-example-repositories.zip artifact. This System Property takes precedence over org.kie.demo and org.kie.example. Default: Not used.org.kie.demo: Enables external clone of a demo application from GitHub. This System Property takes precedence over org.kie.example. Default:trueorg.kie.example: Enables example structure composed by Repository, Organization Unit and Project. Default:false
To change one of these system properties in a WildFly or JBoss EAP cluster:
Edit the file
$JBOSS_HOME/domain/configuration/host.xml.Locate the XML elements
serverthat belong to themain-server-groupand add a system property, for example:<system-properties>
<property name="org.uberfire.nio.git.dir" value="..." boot-time="false"/>
...
</system-properties>
These steps help you get started with minimum of effort.
They should not be a substitute for reading the documentation in full.
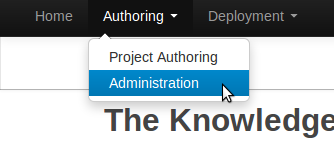
Create a new repository to hold your project by selecting the Administration Perspective.
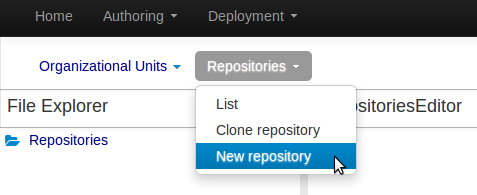
Select the "New repository" option from the menu.
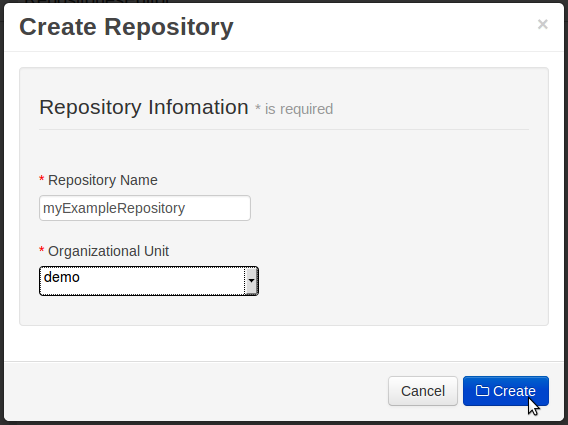
Enter the required information.
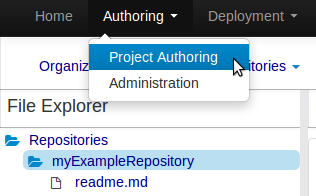
Select the Authoring Perspective to create a new project.
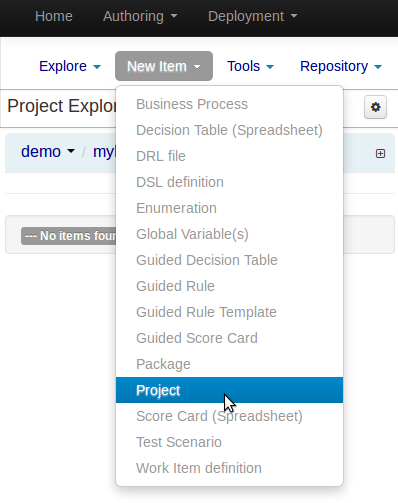
Select "Project" from the "New Item" menu.
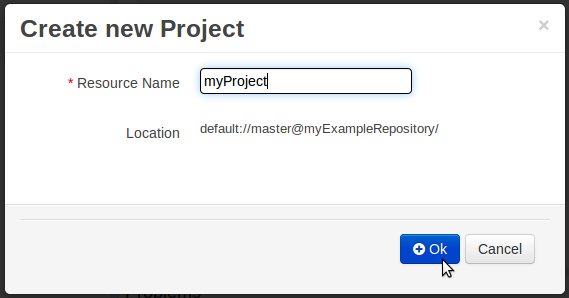
Enter a project name first.
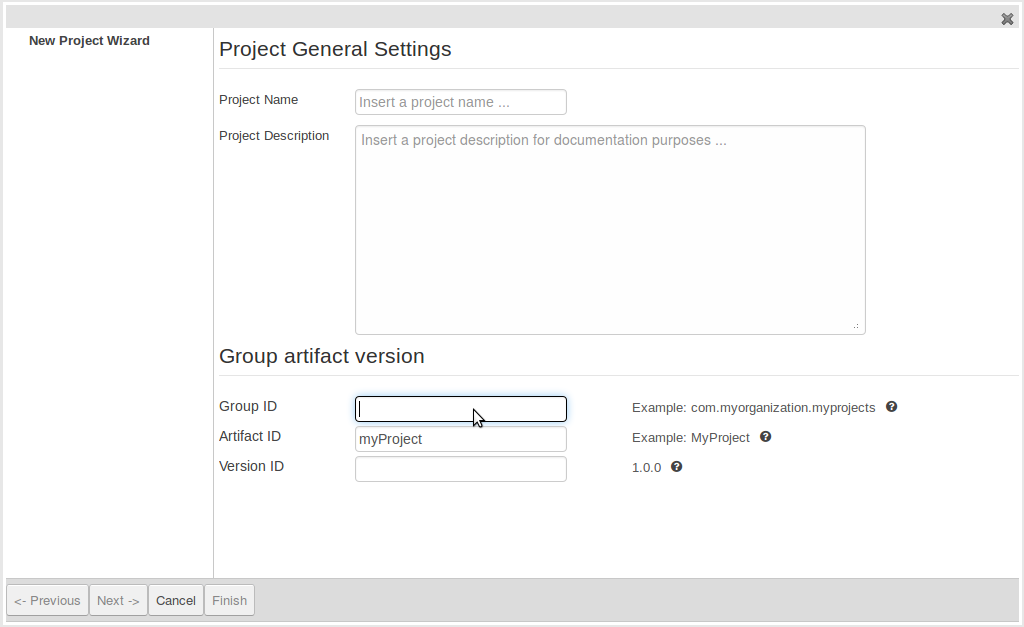
Enter the project details next.
Group ID follows Maven conventions.
Artifact ID is pre-populated from the project name.
Version follows Maven conventions.
After a project has been created you need to define Types to be used by your rules.
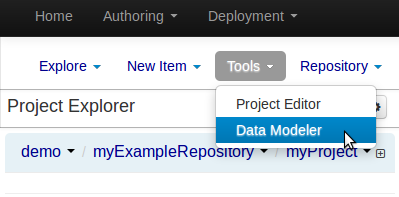
Select "Data Modeller" from the "Tools" menu.
Note
You can also use types contained in existing JARs.
Please consult the full documentation for details.
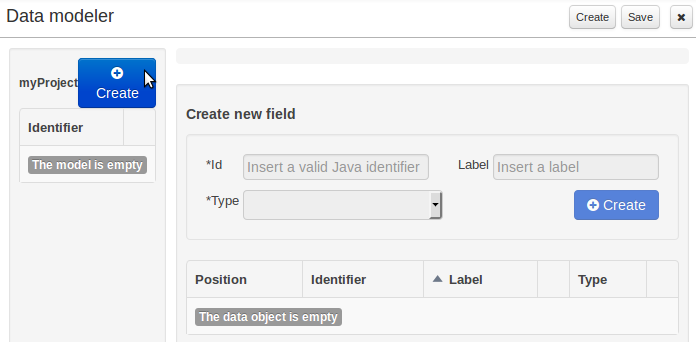
Click on "Create" to create a new type.
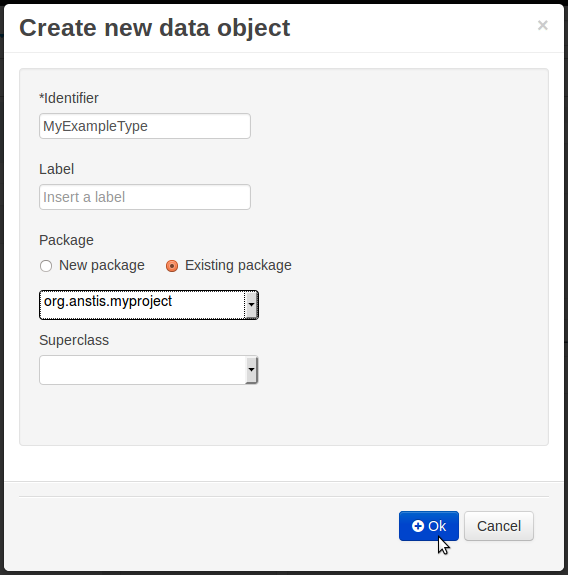
Enter the required details for the type.
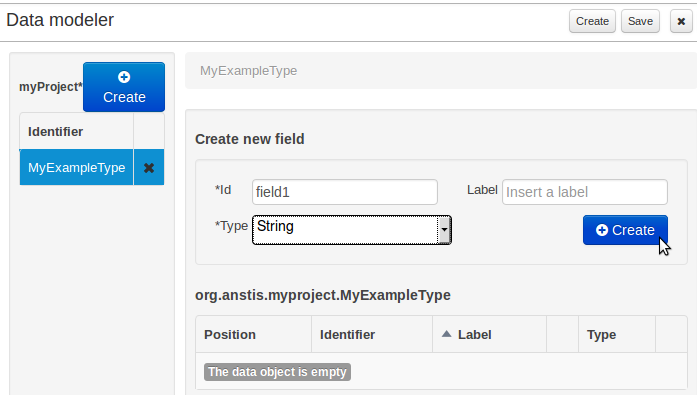
Click on "Create" to create a field for the type.
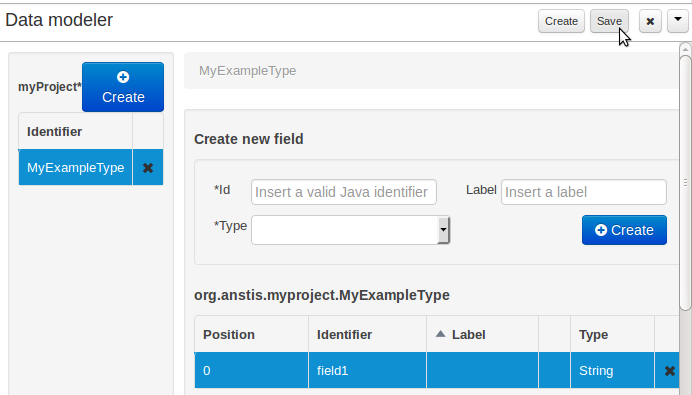
Click "Save" to create the model.
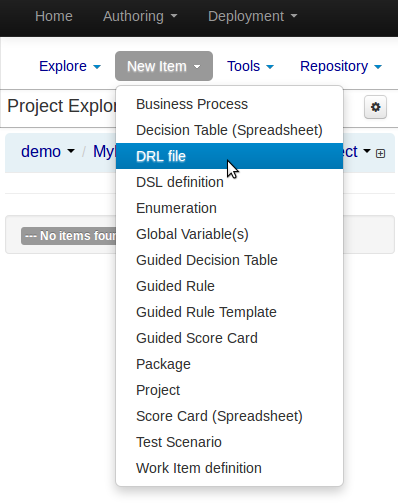
Select "DRL file" (for example) from the "New Item" menu.
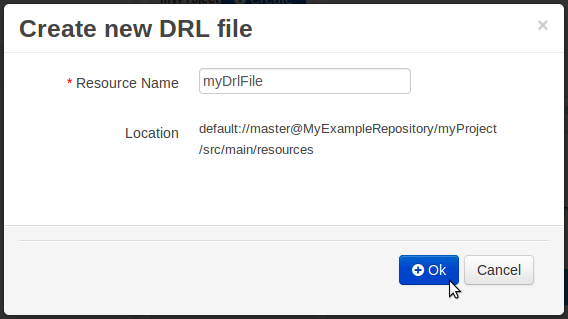
Enter a file name for the new rule.
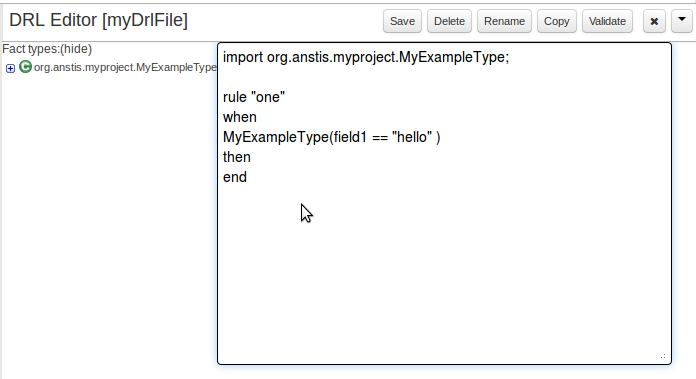
Enter a definition for the rule.
The definition process differs from asset type to asset type.
The full documentation has details about the different editors.
Once the rule has been defined it will need to be saved.
Once rules have been defined within a project; the project can be built and deployed to the Workbench's Maven Artifact Repository.
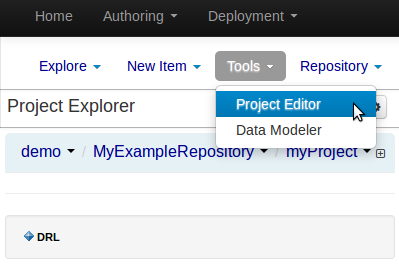
To build a project select the "Project Editor" from the "Tools" menu.
Click "Build and Deploy" to build the project and deploy it to the Workbench's Maven Artifact Repository.
When you select Build & Deploy the workbench will deploy to any repositories defined in the Dependency Management section of the pom in your workbench project. You can edit the pom.xml file associated with your workbench project under the Repository View of the project explorer. Details on dependency management in maven can be found here : http://maven.apache.org/guides/introduction/introduction-to-dependency-mechanism.html
If there are errors during the build process they will be reported in the "Problems Panel".
Now the project has been built and deployed; it can be referenced from your own projects as any other Maven Artifact.
The full documentation contains details about integrating projects with your own applications.
A workbench is structured with Organization Units, VFS repositories and projects:
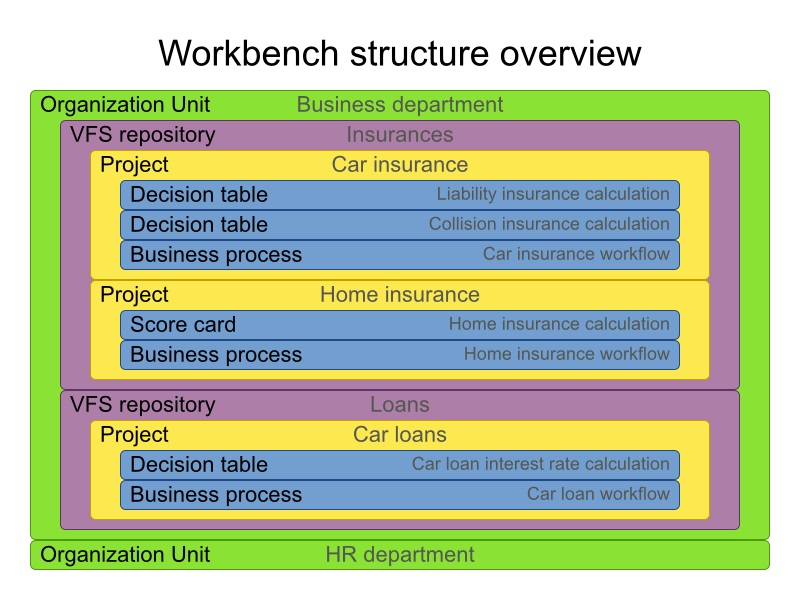
Organization units are useful to model departments and divisions.
An organization unit can hold multiple repositories.
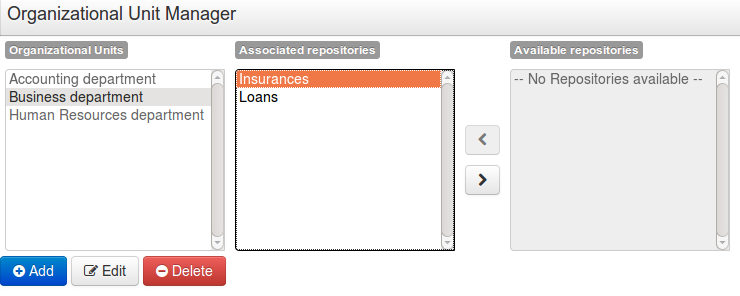
Repositories are the place where assets are stored and each repository is organized by projects and belongs to a single organization unit.
Repositories are in fact a Virtual File System based storage, that by default uses GIT as backend. Such setup allows workbench to work with multiple backends and, in the same time, take full advantage of backend specifics features like in GIT case versioning, branching and even external access.
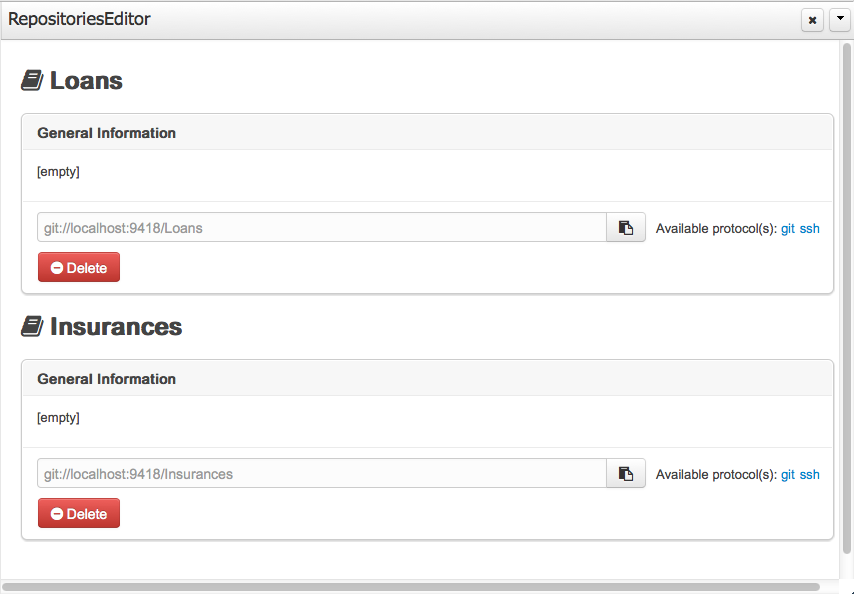
A new repository can be created from scratch or cloned from an existing repository.
One of the biggest advantage of using GIT as backend is the ability to clone a repository from external and use your preferred tools to edit and build your assets.
Note
It's important to follow Workbench structure: each project defined in a directory in repository root.
Warning
Workbench doesn't support multi projects
Warning
Never clone your repositories directly from .niogit directory. Use always the available protocol(s) displayed in repositories editor.
The workbench authenticates its users against the application server's authentication and authorization (JAAS).
On JBoss EAP and WildFly, add a user with the script $JBOSS_HOME/bin/add-user.sh (or
.bat):
$ ./add-user.sh
// Type: Application User
// Realm: empty (defaults to ApplicationRealm)
// Role: admin
There is no need to restart the application server.
The Workbench uses the following roles:
admin
analyst
developer
manager
user
Administrates the BPMS system.
Manages users
Manages VFS Repositories
Has full access to make any changes necessary
Developer can do almost everything admin can do, except clone repositories.
Manages rules, models, process flows, forms and dashboards
Manages the asset repository
Can create, build and deploy projects
Can use the JBDS connection to view processes
Analyst is a weaker version of developer and does not have access to the asset repository or the ability to deploy projects.
Daily user of the system to take actions on business tasks that are required for the processes to continue forward. Works primarily with the task lists.
Does process management
Handles tasks and dashboards
It is possible to restrict access to repositories using roles and organizational groups. To let an user access a repository.
The user either has to belong into a role that has access to the repository or to a role that belongs into an orgazinational group that has access to the repository. These restrictions can be managed with the command line config tool.
Provides capabilities to manage the system repository from command line. System repository contains the data about general workbench settings: how editors behave, organizational groups, security and other settings that are not editable by the user. System repository exists in the .niogit folder, next to all the repositories that have been created or cloned into the workbench.
Online (default and recommended) - Connects to the Git repository on startup, using Git server provided by the KIE Workbench. All changes are made locally and published to upstream when:
"push-changes" command is explicitly executed
"exit" is used to close the tool
Offline - Creates and manipulates system repository directly on the server (no discard option)
Table 15.1. Available Commands
| exit | Publishes local changes, cleans up temporary directories and quits the command line tool |
| discard | Discards local changes without publishing them, cleans up temporary directories and quits the command line tool |
| help | Prints a list of available commands |
| list-repo | List available repositories |
| list-org-units | List available organizational units |
| list-deployment | List available deployments |
| create-org-unit | Creates new organizational unit |
| remove-org-unit | Removes existing organizational unit |
| add-deployment | Adds new deployment unit |
| remove-deployment | Removes existing deployment |
| create-repo | Creates new git repository |
| remove-repo | Removes existing repository ( only from config ) |
| add-repo-org-unit | Adds repository to the organizational unit |
| remove-repo-org-unit | Removes repository from the organizational unit |
| add-role-repo | Adds role(s) to repository |
| remove-role-repo | Removes role(s) from repository |
| add-role-org-unit | Adds role(s) to organizational unit |
| remove-role-org-unit | Removes role(s) from organizational unit |
| add-role-project | Adds role(s) to project |
| remove-role-project | Removes role(s) from project |
| push-changes | Pushes changes to upstream repository (only in online mode) |
The tool can be found from kie-config-cli-${version}-dist.zip. Execute the kie-config-cli.sh script and by default it will start in online mode asking for a Git url to connect to ( the default value is ssh://localhost/system ). To connect to a remote server, replace the host and port with appropriate values, e.g. ssh://kie-wb-host/system.
./kie-config-cli.sh
To operate in offline mode, append the offline parameter to the kie-config-cli.sh command. This will change the behaviour and ask for a folder where the .niogit (system repository) is. If .niogit does not yet exist, the folder value can be left empty and a brand new setup is created.
./kie-config-cli.sh offline
Create a user with the role admin and log in with those credentials.
After successfully logging in, the account username is displayed at the top right. Click on it to review the roles of the current account.
After logging in, the home screen shows. The actual content of the home screen depends on the workbench variant (Drools, jBPM, ...).

The Workbench is comprised of different logical entities:
Part
A Part is a screen or editor with which the user can interact to perform operations.
Example Parts are "Project Explorer", "Project Editor", "Guided Rule Editor" etc. Parts can be repositioned.
Panel
A Panel is a container for one or more Parts.
Panels can be resized.
Perspective
A perspective is a logical grouping of related Panels and Parts.
The user can switch between perspectives by clicking on one of the top-level menu items; such as "Home", "Authoring", "Deploy" etc.
The Workbench consists of three main sections to begin; however its layout and content can be changed.
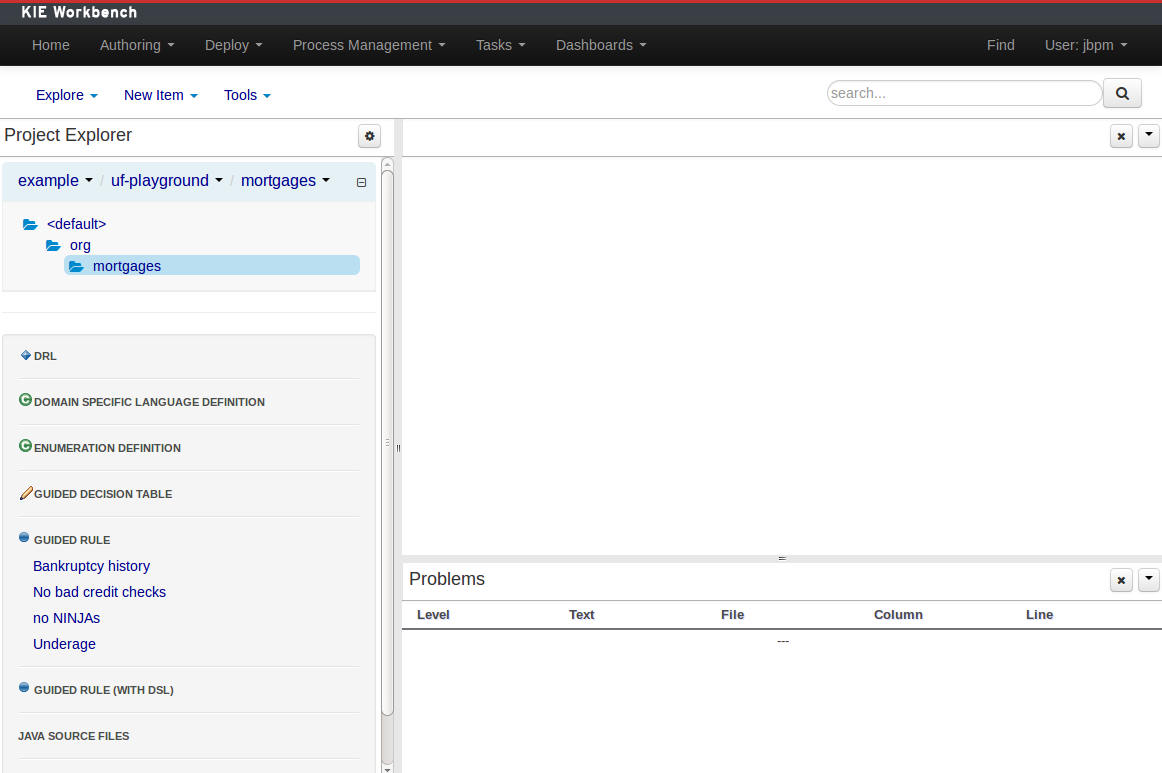
The initial Workbench shows the following components:-
Project Explorer
This provides the ability for the user to browse their configuration; of Organizational Units (in the above "example" is the Organizational Unit), Repositories (in the above "uf-playground" is the Repository) and Project (in the above "mortgages" is the Project).
Problems
This provides the user will real-time feedback about errors in the active Project.
Empty space
This empty space will contain an editor for assets selected from the Project Explorer.
Other screens will also occupy this space by default; such as the Project Editor.
The default layout may not be suitable for a user. Panels can therefore be either resized or repositioned.
This, for example, could be useful when running tests; as the test defintion and rule can be repositioned side-by-side.
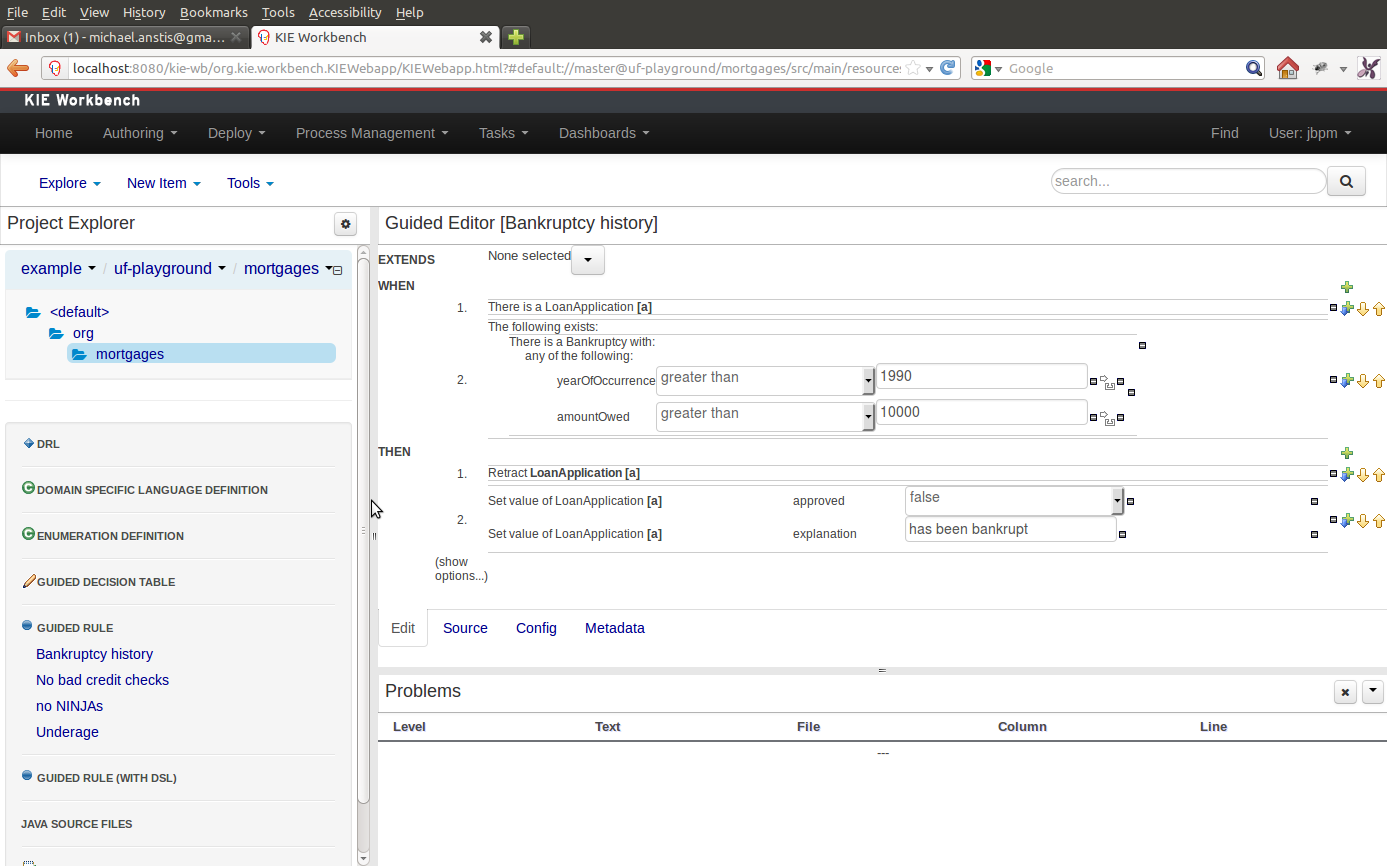
The following screenshot shows a Panel being resized.
Move the mouse pointer over the panel splitter (a grey horizontal or vertical line in between panels).
The cursor will changing indicating it is positioned correctly over the splitter. Press and hold the left mouse button and drag the splitter to the required position; then release the left mouse button.
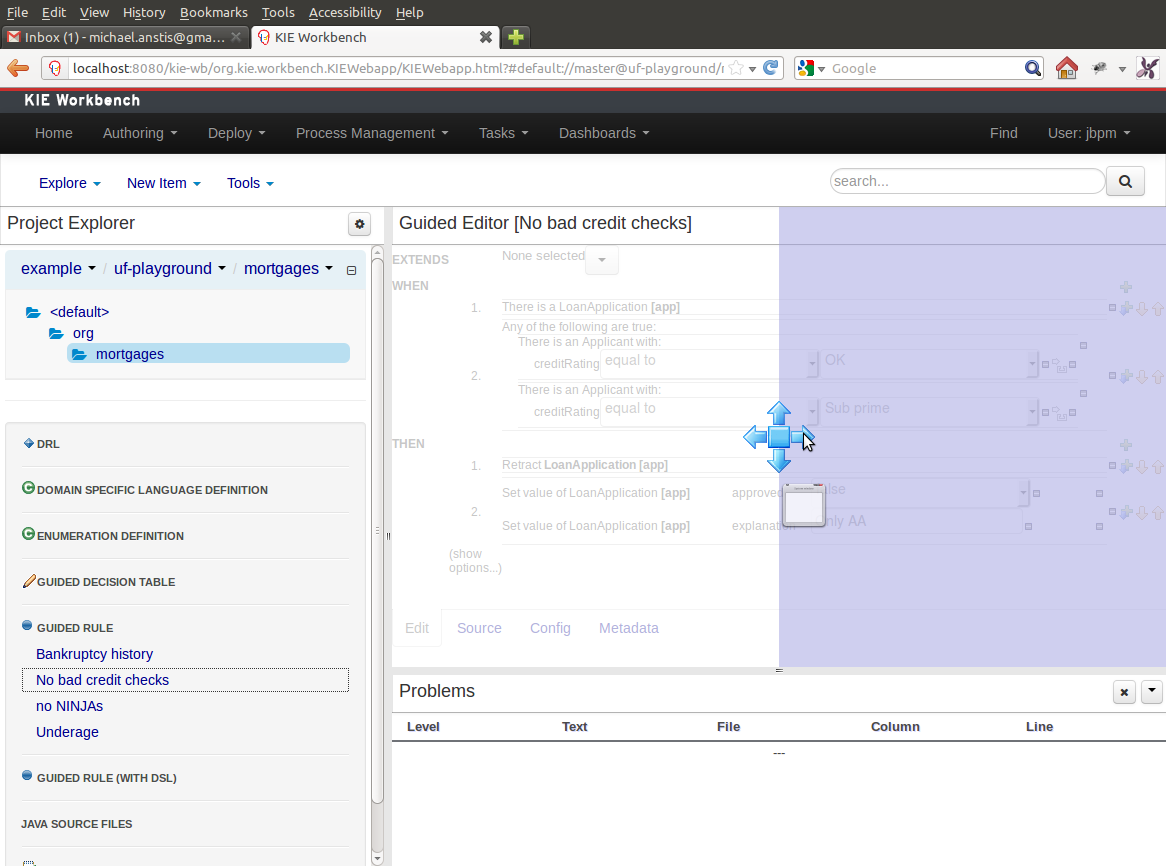
The following screenshot shows a Panel being repositioned.
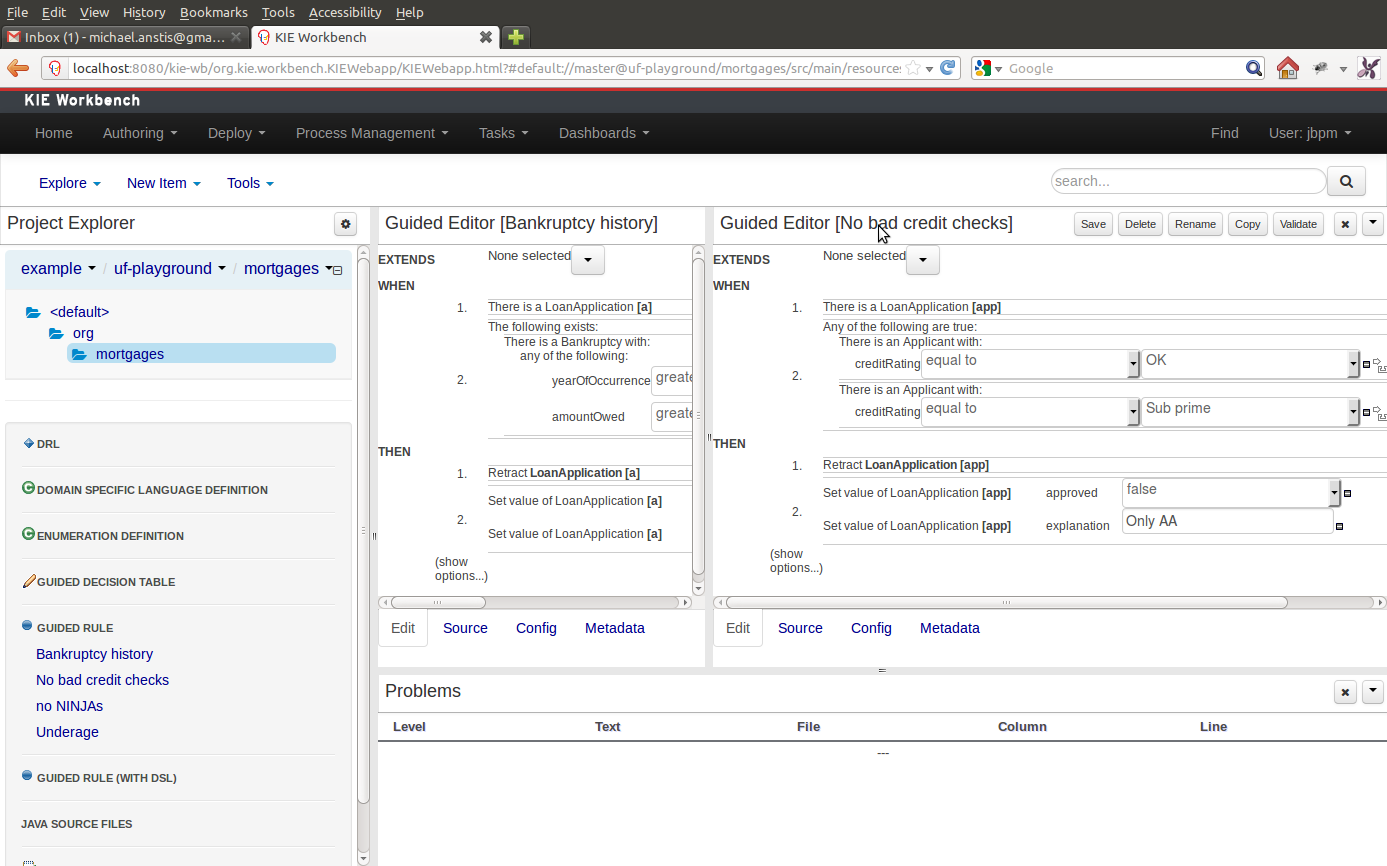
Move the mouse pointer over the Panel title ("Guided Editor [No bad credit checks]" in this example).
The cursor will change indicating it is positioned correctly over the Panel title. Press and hold the left mouse button. Drag the mouse to the required location. The target position is indicated with a pale blue rectangle. Different positions can be chosen by hovering the mouse pointer over the different blue arrows.
Projects often need external artifacts in their classpath in order to build, for example a domain model JARs. The artifact repository holds those artifacts.
The Artifact Repository is a full blown Maven repository. It follows the semantics of a Maven remote repository: all snapshots are timestamped. But it is often stored on the local hard drive.
By default the artifact repository is stored under $WORKING_DIRECTORY/repositories/kie, but
it can be overridden with the system property
-Dorg.guvnor.m2repo.dir. There is only 1 Maven repository per installation.
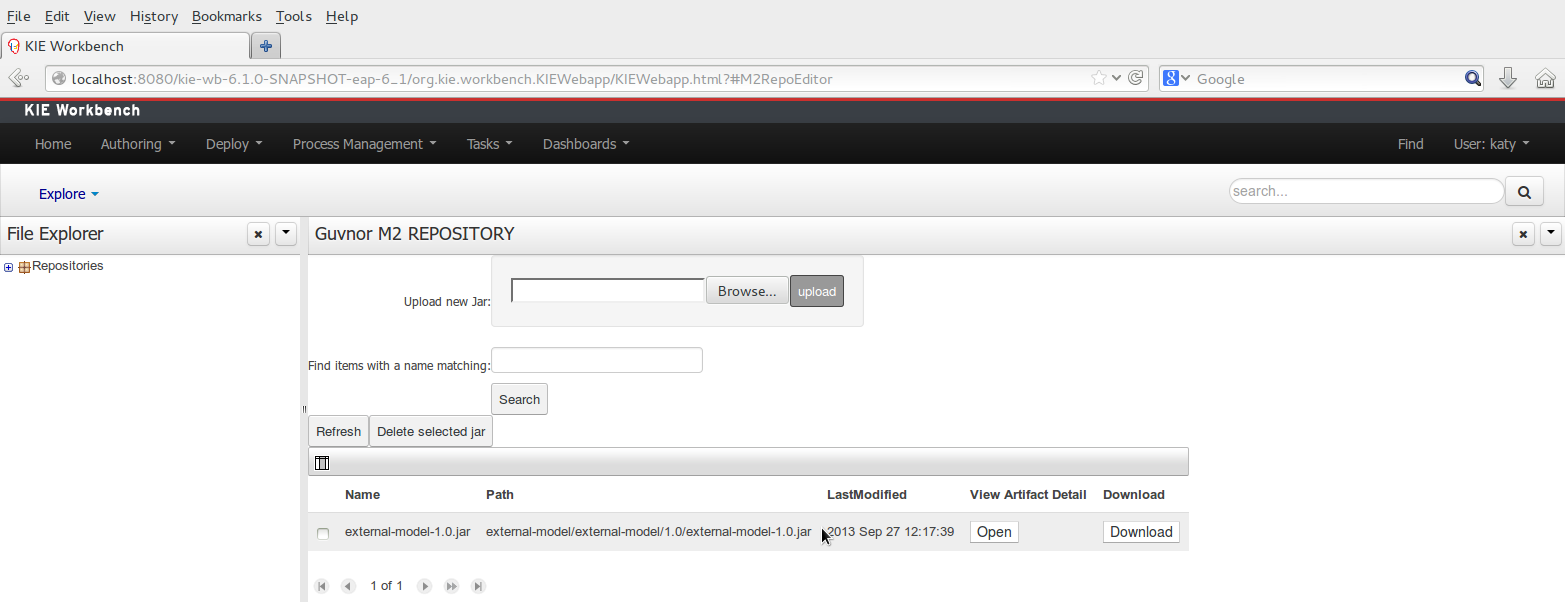
The Artifact Repository screen shows a list of the artifacts in the Maven repository:
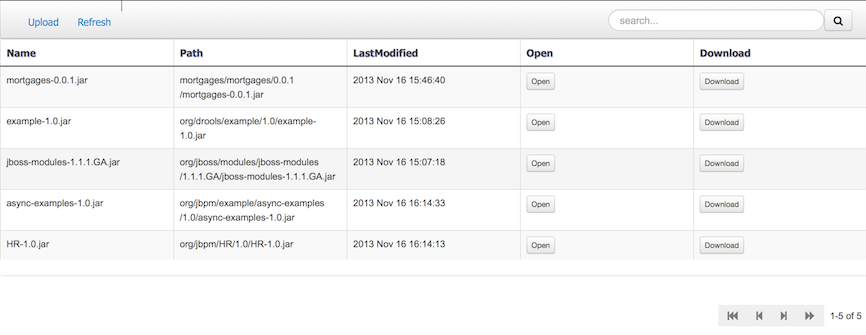
To add a new artifact to that Maven repository, either:
Use the upload button and select a JAR. If the JAR contains a POM file under
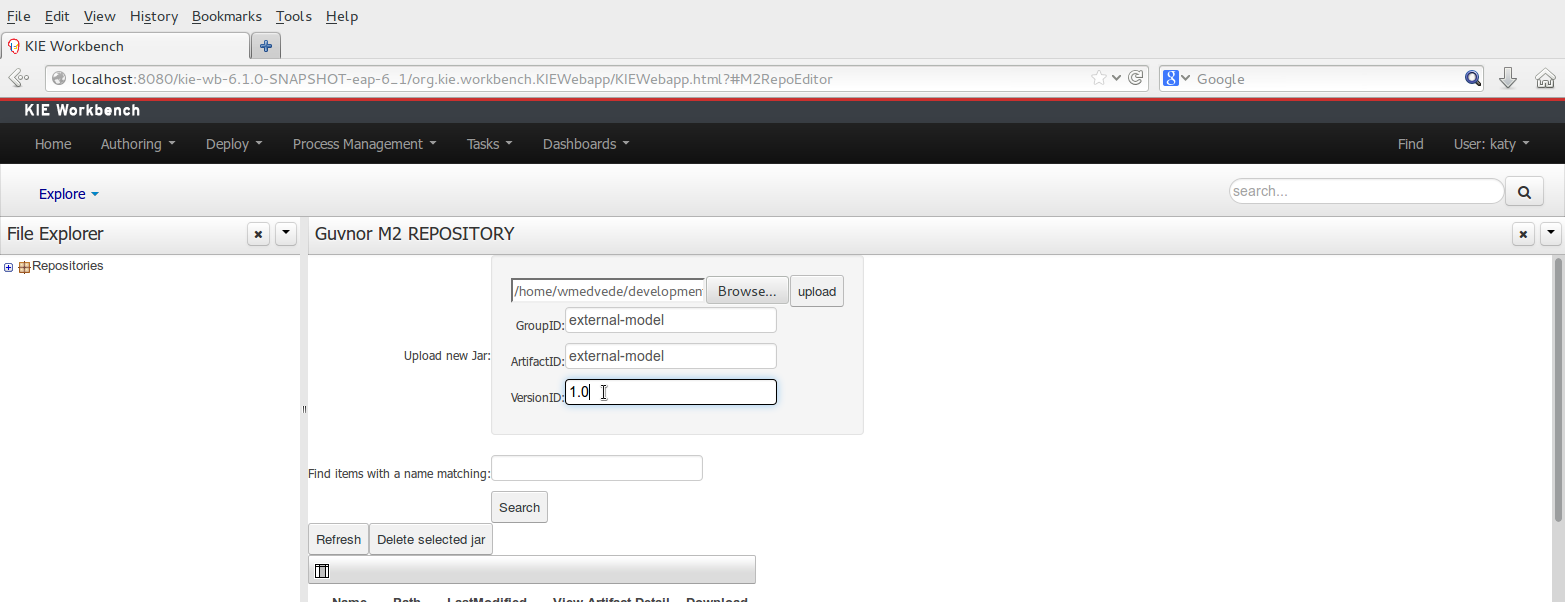
META-INF/maven(which every JAR build by Maven has), no further information is needed. Otherwise, a groupId, artifactId and version need be given too.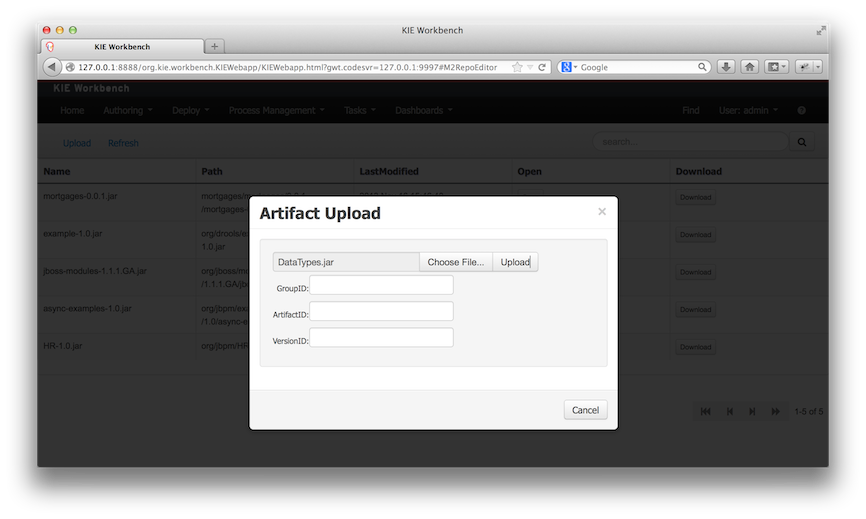
Using Maven,
mvn deployto that Maven repository. Refresh the list to make it show up.
Note
This remote Maven repository is relatively simple. It does not support proxying, mirroring, ... like Nexus or Archiva.
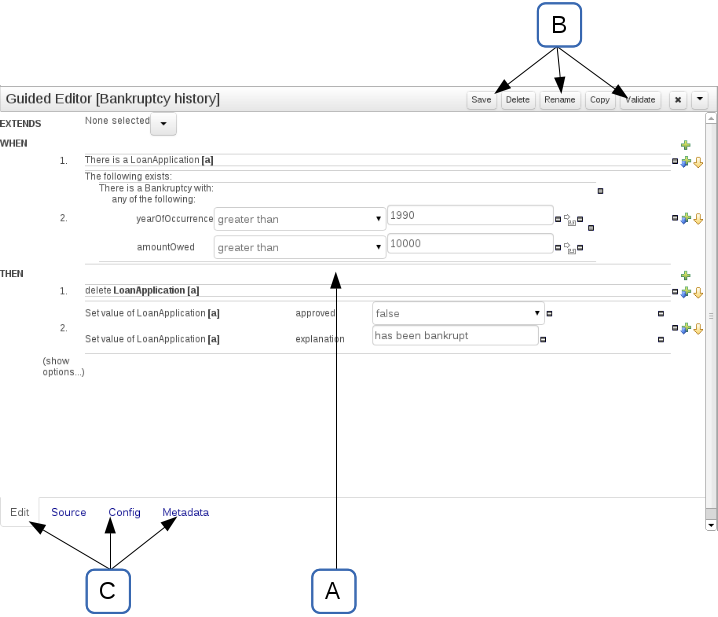
The Asset Editor is the principle component of Guvnor's User-Interface. It consists of two main views Edit and Metadata.
The views
A : The editing area - exactly what form the editor takes depends on the Asset type.
B : This menu bar contains various actions for the Asset; such as Saving, Renaming, Copy etc.
C : Different views for asset content or asset information.
Edit shows the main editor for the asset
Source shows the asset in plain DRL. Note: This tab is only visible if the asset content can be generated into DRL.
Config contains the model imports used by the asset.
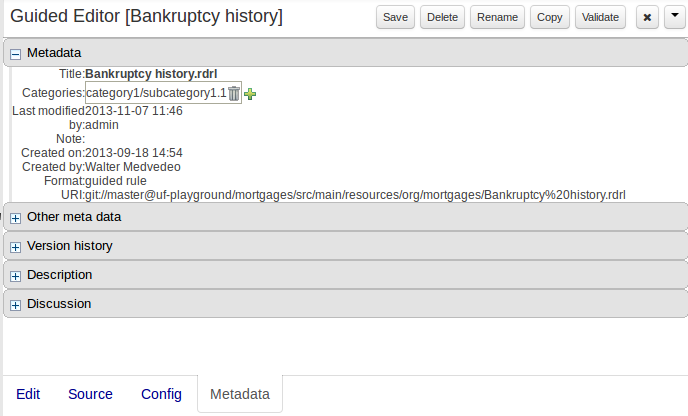
Metadata contains the metadata view for this editor. Explained in more detail below.
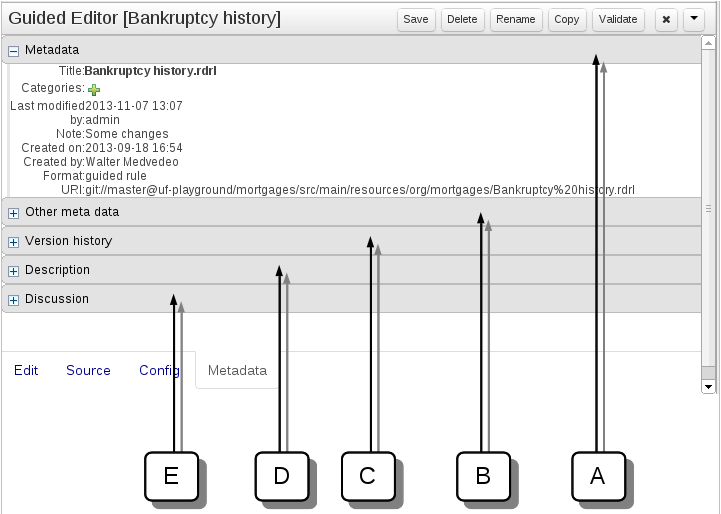
Metadata
A : Meta data (from the "Dublin Core" standard):-
"Title:" Name of the asset
"Categories:" A deprecated feature for grouping the assets.
"Last modified:" The last modified date.
"By:" Who made the last change.
"Note:" A comment made when the Asset was last updated (i.e. why a change was made)
"Created on:" The date and time the Asset was created.
"Created by:" Who initially authored the Asset.
"Format:" The short format name of the type of Asset.
"URI:" URI to the asset inside the Git repository.
B : Other miscellaneous meta data for the Asset.
C : Version history of the Asset.
D : Free-format documentation\description for the Asset. It is encouraged, but not mandatory, to record a description of the Asset before editing.
E : Discussions regarding development of the Asset can be recorded here.
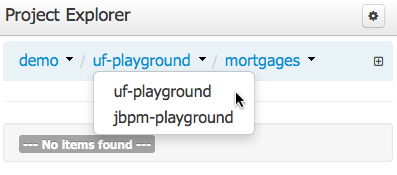
The Project Explorer provides the ability to browse different Organizational Units, Repositories, Projects and their files.
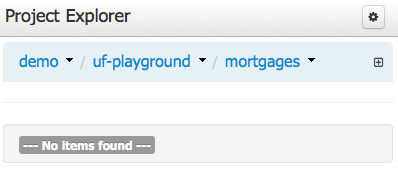
The initial view could be empty when first opened.
The user may have to select an Organizational Unit, Repository and Project from the drop-down boxes.
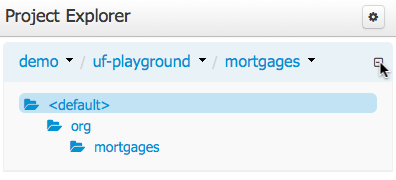
The default configuration hides Package details from view.
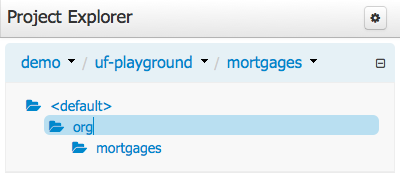
In order to reveal packages click on the icon as indicated in the following screen-shot.
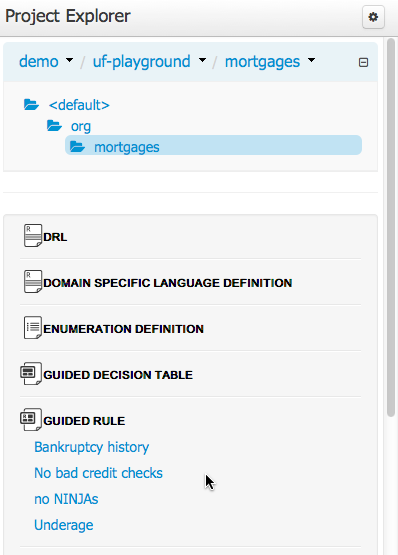
After a suitable combination of Organizational Unit, Repository, Project and Package have been selected the Project Explorer will show the contents. The exact combination of selections depends wholly on the structures defined within the Workbench installation and projects. Each section contains groups of related files.
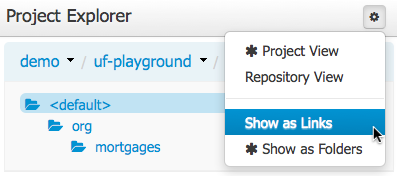
Project Explorer supports multiple views.
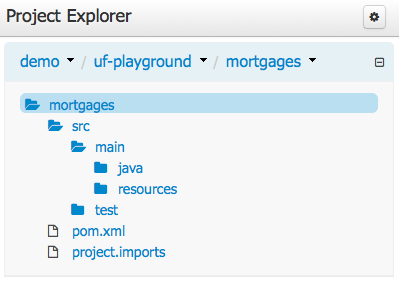
Project View
A simplified view of the underlying project structure. Certain system files are hidden from view.
Repository View
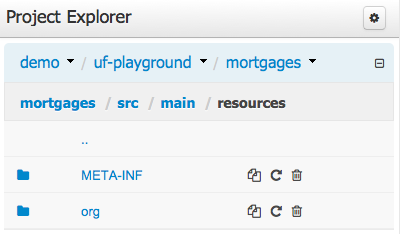
A complete view of the underlying project structure including all files; either user-defined or system generated.
Views can be selected by clicking on the icon within the Project Explorer, as shown below.
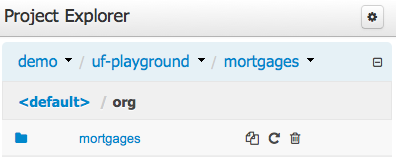
Both Project and Repository Views can be further refined by selecting either "Show as Folders" or "Show as Links".
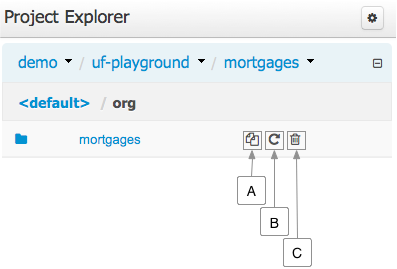
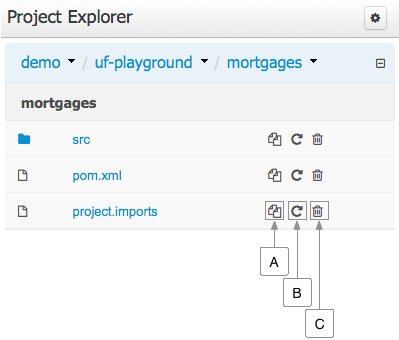
Copy, rename and delete actions are available on Links mode, for packages (in of Project View) and for files and directories as well (in Repository View).
A : Copy
B : Rename
C : Delete
Warning
Workbench roadmap includes a refactoring and an impact analyses tools, but currenctly doesn't have it. Until both tools are provided make sure that your changes (copy/rename/delete) on packages, files or directories doesn't have a major impact on your project.
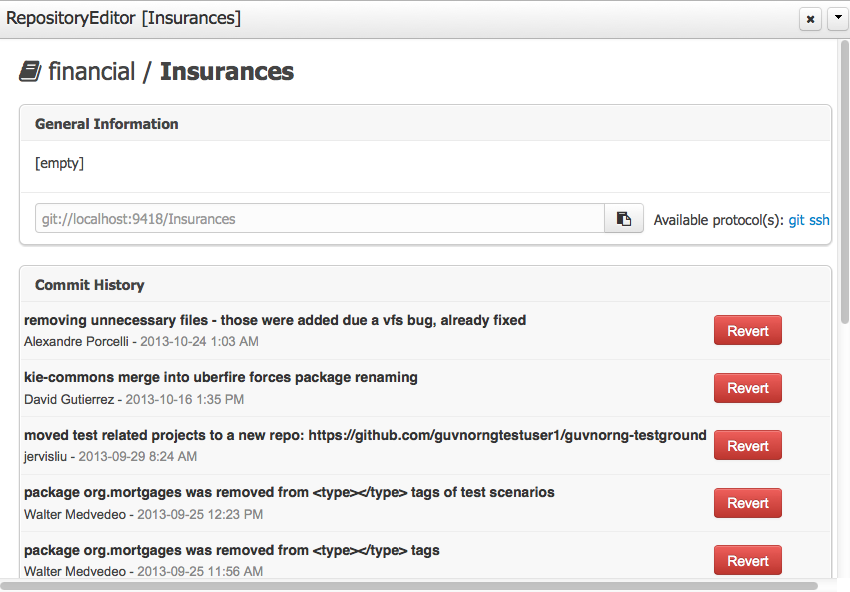
In cases that your change had an unexcepcted impact, Workbench allows you to restore your repository using the Repository editor.
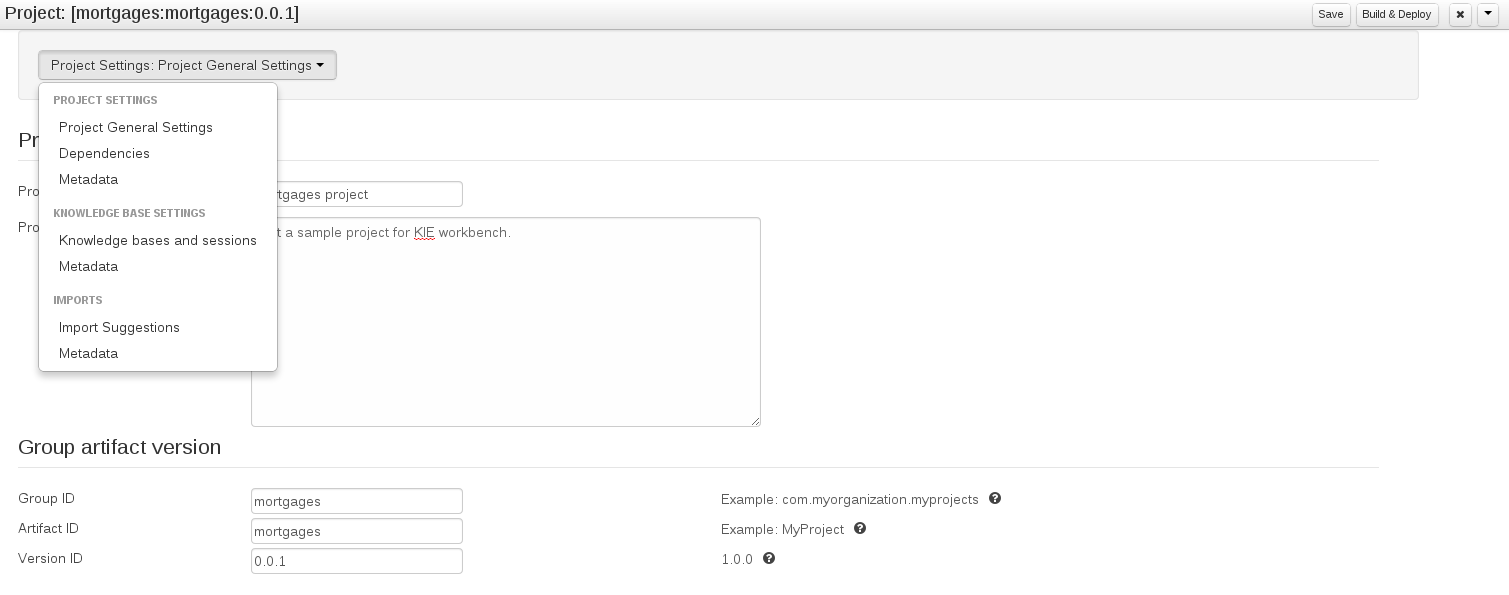
The Project Editor screen can be accessed from the Project menu. Project menu shows the settings for the currently active project.
Unlike most of the workbench editors, project editor edits more than one file. Showing everything that is needed for configuring the KIE project in one place.
Build & Depoy builds the current project and deploys the KJAR into the workbench internal Maven repository.
Project Settings edits the pom.xml file used by Maven.
General settings provide tools for project name and GAV-data (Group, Artifact, Version). GAV values are used as identifiers to differentiate projects and versions of the same project.
The project may have any number of either internal or external dependencies. Dependency is a project that has been built and deployed to a Maven repository. Internal dependencies are projects build and deployed in the same workbench as the project. External dependencies are retrieved from repositories outside of the current workbench. Each dependency uses the GAV-values to specify the project name and version that is used by the project.
Knowledge Base Settings edits the kmodule.xml file used by Drools.
Note
For more information about the Knowledge Base properties, check the Drools Expert documentation for kmodule.xml.
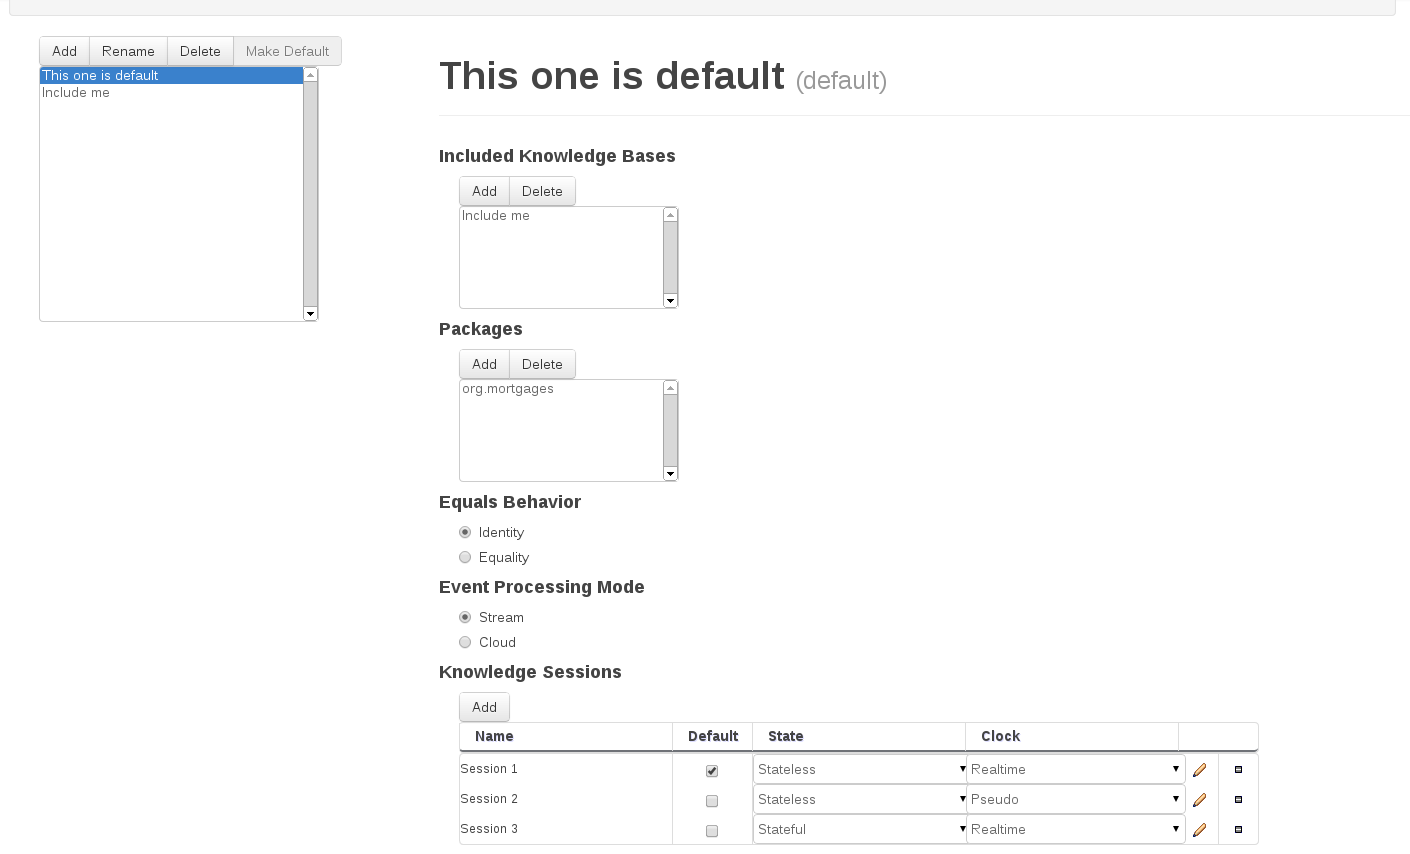
Knowledge bases and sessions lists the knowledge bases and the knowledge sessions specified for the project.
Lists all the knowledge bases by name. Only one knowledge base can be set as default.
Knowledge base can include other knowledge bases. The models, rules and any other content in the included knowledge base will be visible and usable by the currently selected knowledge base.
Rules and models are stored in packages. The packages property specifies what packages are included into this knowledge base.
Equals behavior is explained in the Drools Expert part of the documentation.
Event processing mode is explained in the Drools Fusion part of the documentation.
Settings edits the project.imports file used by the workbench editors.
Import Suggestions lists imports that are used as suggestions when using the guided editors the workbench has. Making it easier to work with the workbench, as there is no need to type each import in each file that uses the import.
Note
Unlike in the previous version of Guvnor. The imports listed in the import suggestions are not automatically added into the knowledge base or into the packages of the workbench. Each import needs to be explicitly added into each file.
The Workbench provides a common and consistent service for users to understand whether files authored within the environment are valid.
The Problems Panel shows real-time validation results of assets within a Project.
When a Project is selected from the Project Explorer the Problems Panel will refresh with validation results of the chosen Project.
When files are created, saved or deleted the Problems Panel content will update to show either new validation errors, or remove existing if a file was deleted.
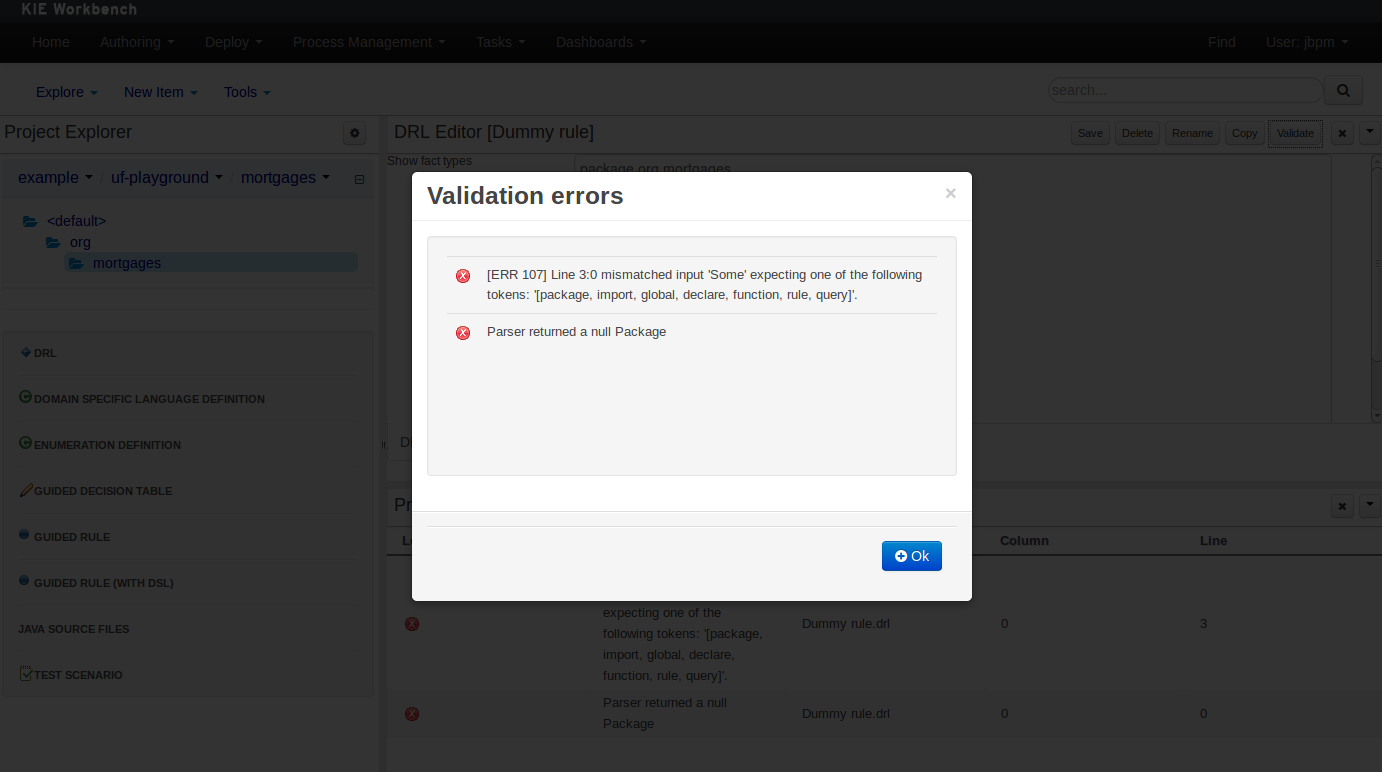
Here an invalid DRL file has been created and saved.
The Problems Panel shows the validation errors.
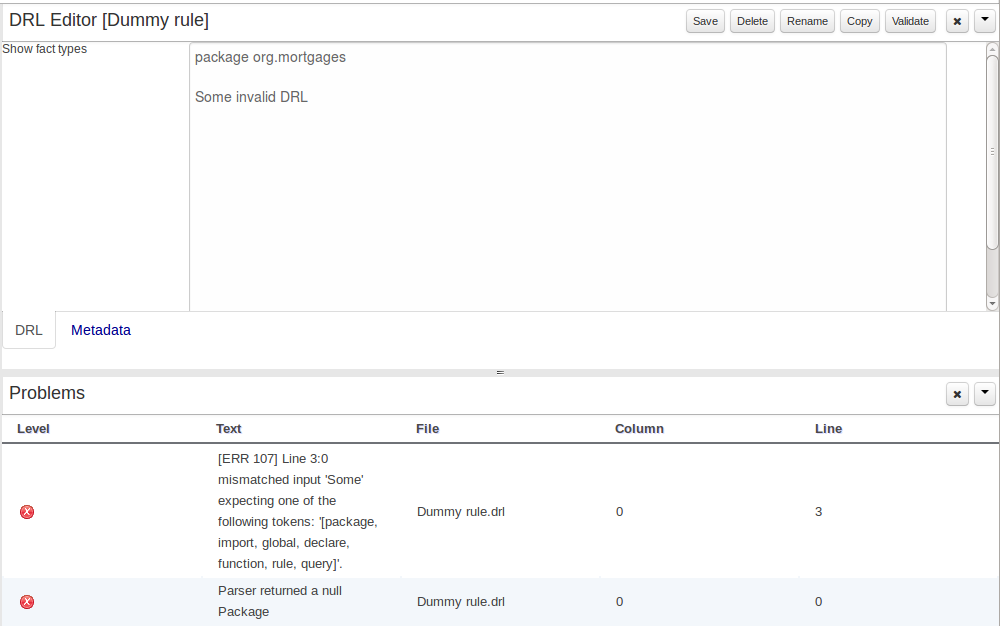
Figure 15.45. The Problems Panel
By default, a data model is always constrained to the context of a project. For the purpose of this tutorial, we will assume that a correctly configured project already exists.
To start the creation of a data model inside a project, take the following steps:
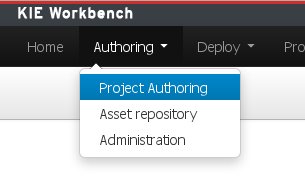
From the home panel, select the authoring perspective
If not open already, start the Project Explorer panel
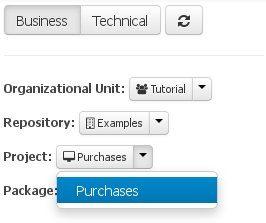
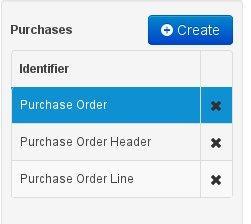
From Project Explorer panel (the "Business" tab), select the organizational unit, repository, and the project the data model has to be created for. For this tutorial's example, the values "Tutorial", "Examples", and "Purchases" were respectively chosen
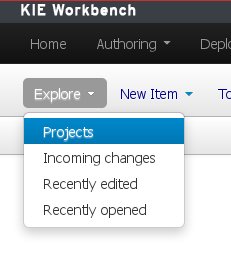
Open the Data Modeller tool by clicking on the "Tools" authoring-menu entry, and selecting the "Data Modeller" option from the drop-down menu
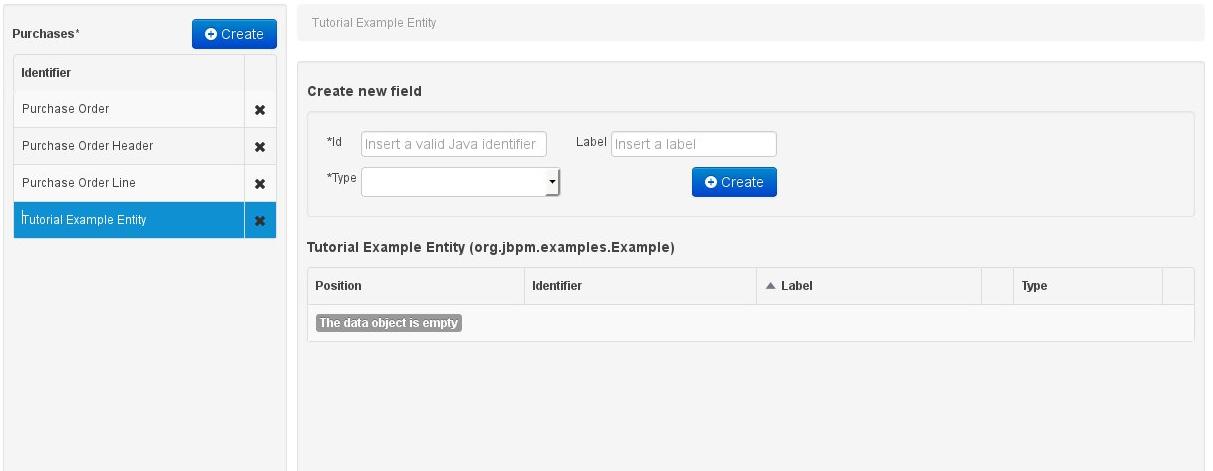
This will start up the Data Modeller tool, which has the following general aspect:
The Data Modeller panel is divided into the following sections:
The leftmost "model browser" section, which shows a list of already existing data entities (if any are present, as in this example's case). Above the list the project's name and a button for new object creation are shown. Note that as soon as any changes are applied to the project, an '*' will be appended to the project's name to notify the user of the existence of non-persisted changes.
The central section consists of three distinct parts:
At the top, the "bread crumb widget": this is a navigational aid, which allows navigating back and forth through the data model, when accessing properties that themselves are model entities. The bread crumb trail shown in the image indicates that the object browser is currently visualizing the properties of an entity called "Purchase Order Line", which we accessed through another entity ("Purchase Order"), where it is defined as a field.
the section beneath the bread crumb widget, is dedicated to the creation of new fields.
the bottom section comprises the Entity's "field browser", which displays a list of the currently selected data object's (in the model browser) fields.
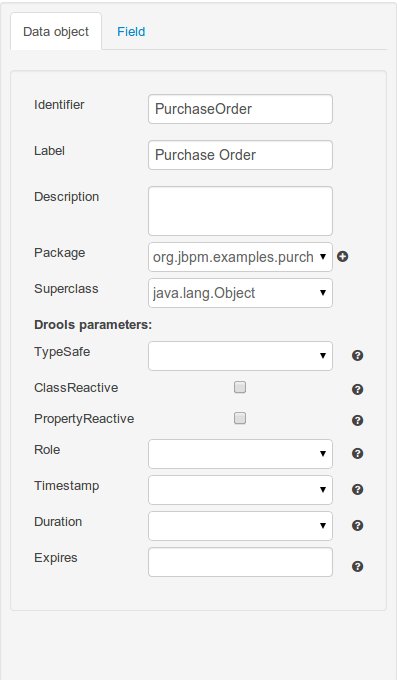
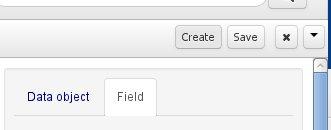
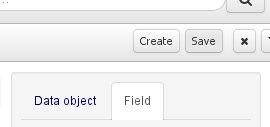
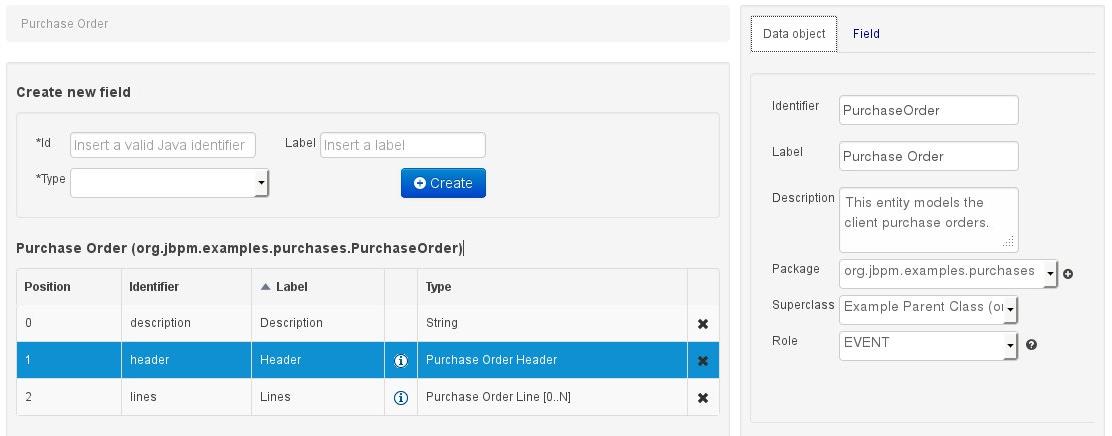
The "entity / field property editor". This is the rightmost section of the Data Modeller screen which visualizes a tabbed pane. The Data object tab allows the user to edit the properties of the currently selected entity in the model browser, whilst the Field tab enables edition of the properties of any of the currently selected object's fields.
A data model consists of data entities which are a logical representation of some real-world data. Such data entities have a fixed set of modeller (or application-owned) properties, such as its internal identifier, a label, description, package etc. Besides those, an entity also has a variable set of user-defined fields, which are an abstraction of a real-world property of the type of data that this logical entity represents.
Creating a data entity can be achieved either by clicking the "Create" button in the model browser section (see fig. "The data model browser" above), or by clicking the one in the top data modeller menu:
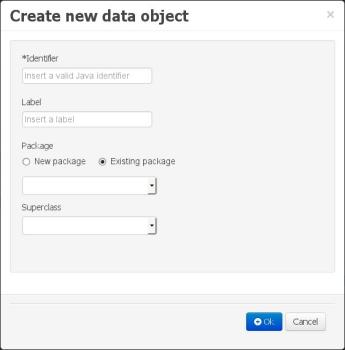
This will pop up the new object screen:
Some initial information needs to be provided before creating the new object:
The object's internal identifier (mandatory). The value of this field must be unique per package, i.e. if the object's proposed identifier already exists in the selected package, an error message will be displayed.
A label (optional): this field allows the user to define a user-friendly label for the data entity about to be created. This is purely conceptual info that has no further influence on how objects of this entity will be treated. If a label is defined, then this is how the entity will be displayed throughout the data modeller tool.
A package (mandatory): a data entity must always be created within a package (or name space, in which this entity will be unique at a platform level). By default, the option for selecting an already existing package will be activated, in which case the corresponding drop-down shows all the packages that are currently defined. If a new package needs to be defined for this entity, then the "New package" option should be selected. In this case the new to be created package should be input into the corresponding text-field. The format for defining new packages is the same as the one for standard Java packages.
A superclass (optional): this will indicate that this entity extends from another already existing one. Since the data modeller entities are translated into standard Java classes, indicating a superclass implies normal Java object extension at the generated-code level.
Once the user has provided at least the mandatory information, by pushing the "Ok" button at the bottom of the screen the new data entity will be created. It will be added to the model browser's entity listing.
It will also appear automatically selected, to make it easy for the user to complete the definition of the newly created entity, by completing the entity's properties in the Data Object Properties browser, or by adding new fields.
Note
As can be seen in the above figure, after performing changes to the data model, the model name will appear with an '*' to alert the user of the existence of un-persisted changes to the model.
In the Data Modeller's object browsing section, an entity can be deleted by clicking upon the 'x' icon to the right of each entity. If an entity is being referenced from within another entity (as a field type), then the modeller tool will not allow it to be deleted, and an error message will appear on the screen.
Once the data entity has been created, it now has to be completed by adding user-defined properties to its definition. This can be achieved by providing the required information in the "Create new field" section (see fig. "New field creation"), and clicking on the "Create" button when finished. The following fields can (or must) be filled out:
The field's internal identifier (mandatory). The value of this field must be unique per data entity, i.e. if the proposed identifier already exists within current entity, an error message will be displayed.
A label (optional): as with the entity definition, the user can define a user-friendly label for the data entity field which is about to be created. This has no further implications on how fields from objects of this entity will be treated. If a label is defined, then this is how the field will be displayed throughout the data modeller tool.
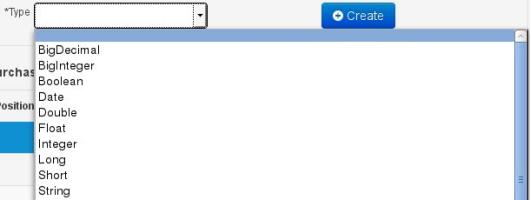
A field type (mandatory): each entity field needs to be assigned with a type.
This type can be either of the following:
A 'primitive java object' type: these include most of the object equivalents of the standard Java primitive types, such as Boolean, Short, Float, etc, as well as String, Date, BigDecimal and BigInteger.
An 'entity' type: any user defined entity automatically becomes a candidate to be defined as a field type of another entity, thus enabling the creation of relationships between entities. As can be observed in the above figure, our recently defined 'Tutorial Example Entity' already appears in the types list and can be used as a field type, even for a field of itself. An entity type field can be created either in 'single' or in 'multiple' form, the latter implying that the field will be defined as a collection of this type, which will be indicated by the extension '[0..N]' in the type drop-down or in the entity fields table (as can be seen for the 'Lines' field of the 'Purchase Order' entity, for example).
A 'primitive java' type: these include java primitive types byte, short, int, long, float, double, char and boolean.
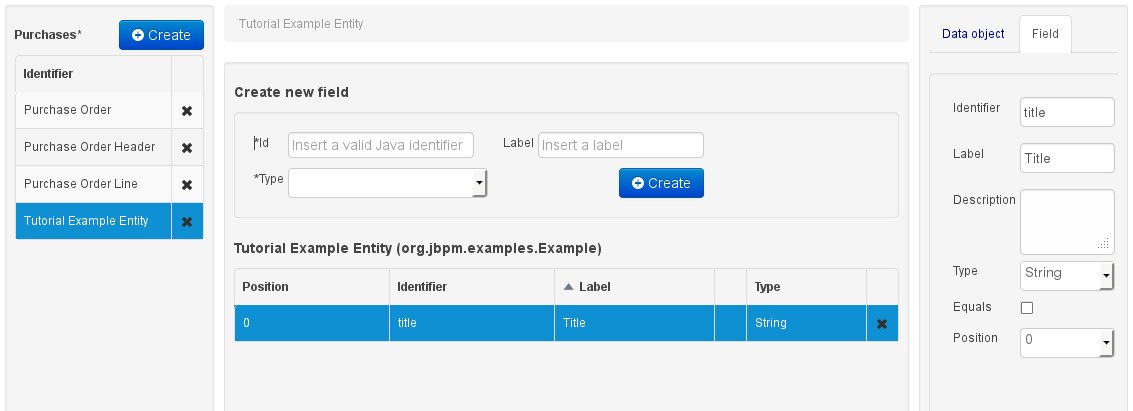
When finished introducing the initial information for a new field, clicking the 'Create' button will add the newly created field to the end of the entity's fields table below:
The new field will also automatically be selected in the entity's field list, and its properties will be shown in the Field tab of the Property editor. The latter facilitates completion of some additional properties of the new field by the user (see below).
At any time, any field (without restrictions) can be deleted from an entity definition by clicking on the corresponding 'x' icon in the entity's fields table.
As stated before, both entities as well as entity fields require some of their initial properties to be set upon creation. These are by no means the only properties entities and fields have. Below we will give a detailed description of the additional entity and field properties.
Description: this field allows the user to introduce some kind of description for the current entity, for documentation purposes only. As with the label property, this is conceptual information that will not influence the use or treatment of this entity or its instances in any way.
TypeSafe: this property allows to enable/disable the type safe behaviour for current type. By default all type declarations are compiled with type safety enabled. (See Drools for more information on this matter).
ClassReactive: this property allows to mark this type to be treated as "Class Reactive" by the Drools engine. (See Drools for more information on this matter).
PropertyReactive: this property allows to mark this type to be treated as "Property Reactive" by the Drools engine. (See Drools for more information on this matter).
Role: this property allows to configure how the Drools engine should handle instances of this type: either as regular facts or as events. By default all types are handled as a regular fact, so for the time being the only value that can be set is "Event" to declare that this type should be handled as an event. (See Drools Fusion for more information on this matter).
Timestamp: this property allows to configure the "timestamp" for an event, by selecting one of his attributes. If set the engine will use the timestamp from the given attribute instead of reading it from the Session Clock. If not, the engine will automatically assign a timestamp to the event. (See Drools Fusion for more information on this matter).
Duration: this property allows to configure the "duration" for an event, by selecting one of his attributes. If set the engine will use the duration from the given attribute instead of using the default event duration = 0. (See Drools Fusion for more information on this matter).
Expires: this property allows to configure the "time offset" for an event expiration. If set, this value must be a temporal interval in the form: [#d][#h][#m][#s][#[ms]] Where [ ] means an optional parameter and # means a numeric value. e.g.: 1d2h, means one day and two hours. (See Drools Fusion for more information on this matter).
Description: this field allows the user to introduce some kind of description for the current field, for documentation purposes only. As with the label property, this is conceptual information that will not influence the use or treatment of this entity or its instances in any way.
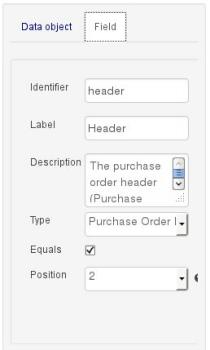
Equals: checking this property for an entity field implies that it will be taken into account, at the code generation level, for the creation of both the equals() and hashCode() methods in the generated Java class. We will explain this in more detail in the following section.
Position: this field requires a zero or positive integer. When set, this field will be interpreted by the Drools engine as a positional argument (see the section below and also the Drools documentation for more information on this subject).
The data model in itself is merely a visual tool that allows the user to define high-level data structures, for them to interact with the Drools Engine on the one hand, and the jBPM platform on the other. In order for this to become possible, these high-level visual structures have to be transformed into low-level artifacts that can effectively be consumed by these platforms. These artifacts are Java POJOs (Plain Old Java Objects), and they are generated every time the data model is saved, by pressing the "Save" button in the top Data Modeller Menu.
At this time each entity that has been defined in the model will be translated into a Java class, according to the following transformation rules:
The entity's identifier property will become the Java class's name. It therefore needs to be a valid Java identifier.
The entity's package property becomes the Java class's package declaration.
The entity's superclass property (if present) becomes the Java class's extension declaration.
The entity's label and description properties will translate into the Java annotations "@org.kie.api.definition.type.Label" and "@org.kie.api.definition.type.Description", respectively. These annotations are merely a way of preserving the associated information, and as yet are not processed any further.
The entity's role property (if present) will be translated into the "@org.kie.api.definition.type.Role" Java annotation, that IS interpreted by the application platform, in the sense that it marks this Java class as a Drools Event Fact-Type.
The entity's type safe property (if present) will be translated into the "@org.kie.api.definition.type.TypeSafe Java annotation. (see Drools)
The entity's class reactive property (if present) will be translated into the "@org.kie.api.definition.type.ClassReactive Java annotation. (see Drools)
The entity's property reactive property (if present) will be translated into the "@org.kie.api.definition.type.PropertyReactive Java annotation. (see Drools)
The entity's timestamp property (if present) will be translated into the "@org.kie.api.definition.type.Timestamp Java annotation. (see Drools)
The entity's duration property (if present) will be translated into the "@org.kie.api.definition.type.Duration Java annotation. (see Drools)
The entity's expires property (if present) will be translated into the "@org.kie.api.definition.type.Expires Java annotation. (see Drools)
A standard Java default (or no parameter) constructor is generated, as well as a full parameter constructor, i.e. a constructor that accepts as parameters a value for each of the entity's user-defined fields.
The entity's user-defined fields are translated into Java class fields, each one of them with its own getter and setter method, according to the following transformation rules:
The entity field's identifier will become the Java field identifier. It therefore needs to be a valid Java identifier.
The entity field's type is directly translated into the Java class's field type. In case the entity field was declared to be multiple (i.e. '[0..N]'), then the generated field is of the "java.util.List" type.
The equals property: when it is set for a specific field, then this class property will be annotated with the "@org.kie.api.definition.type.Key" annotation, which is interpreted by the Drools Engine, and it will 'participate' in the generated equals() method, which overwrites the equals() method of the Object class. The latter implies that if the field is a 'primitive' type, the equals method will simply compares its value with the value of the corresponding field in another instance of the class. If the field is a sub-entity or a collection type, then the equals method will make a method-call to the equals method of the corresponding entity's Java class, or of the java.util.List standard Java class, respectively.
If the equals property is checked for ANY of the entity's user defined fields, then this also implies that in addition to the default generated constructors another constructor is generated, accepting as parameters all of the fields that were marked with Equals. Furthermore, generation of the equals() method also implies that also the Object class's hashCode() method is overwritten, in such a manner that it will call the hashCode() methods of the corresponding Java class types (be it 'primitive' or user-defined types) for all the fields that were marked with Equals in the Data Model.
The position property: this field property is automatically set for all user-defined fields, starting from 0, and incrementing by 1 for each subsequent new field. However the user can freely changes the position among the fields. At code generation time this property is translated into the "@org.kie.api.definition.type.Position" annotation, which can be interpreted by the Drools Engine. Also, the established property order determines the order of the constructor parameters in the generated Java class.
As an example, the generated Java class code for the Purchase Order entity, corresponding to its definition as shown in the following figure purchase_example.jpg is visualized in the figure at the bottom of this chapter. Note that the two of the entity's fields, namely 'header' and 'lines' were marked with Equals, and have been assigned with the positions 2 and 1, respectively).
    package org.jbpm.examples.purchases;


    /**

    * This class was automatically generated by the data modeler tool.

    */

    @org.kie.api.definition.type.Role(value =

    org.kie.api.definition.type.Role.Type.EVENT)

    @org.kie.api.definition.type.Label(value =

    "Purchase Order")

    @org.kie.api.definition.type.Description(value =

    "This entity models the client purchase orders.")

    public class PurchaseOrder extends org.jbpm.examples.purchases.parent

    implements java.io.Serializable {


    static final long serialVersionUID = 1L;


    @org.kie.api.definition.type.Label(value =

    "Description")

    @org.kie.api.definition.type.Position(value = 0)

    @org.kie.api.definition.type.Description(value =

    "A description for this purchase order.")

    private java.lang.String description;


    @org.kie.api.definition.type.Label(value =

    "Lines")

    @org.kie.api.definition.type.Position(value = 1)

    @org.kie.api.definition.type.Description(value =

    "The purchase order items (collection of Purchase Order Line sub-entities).")

    @org.kie.api.definition.type.Key

    private java.util.List<org.jbpm.examples.purchases.PurchaseOrderLine> lines;


    @org.kie.api.definition.type.annotations.Label(value =

    "Header")

    @org.kie.api.definition.type.Position(value = 2)

    @org.kie.api.definition.type.Description(value =

    "The purchase order header (Purchase Order Header sub-entity).")

    @org.kie.api.definition.type.Key

    private org.jbpm.examples.purchases.PurchaseOrderHeader header;


    public PurchaseOrder() {}


    public PurchaseOrder(

    java.lang.String description,

    java.util.List<org.jbpm.examples.purchases.PurchaseOrderLine> lines,

    org.jbpm.examples.purchases.PurchaseOrderHeader header )

    {

    this.description = description;

    this.lines = lines;

    this.header = header;

    }


    public PurchaseOrder(

    java.util.List<org.jbpm.examples.purchases.PurchaseOrderLine> lines,

    org.jbpm.examples.purchases.PurchaseOrderHeader header )

    {

    this.lines = lines;

    this.header = header;

    }


    public java.lang.String getDescription() {

    return this.description;

    }


    public void setDescription( java.lang.String description ) {

    this.description = description;

    }


    public java.util.List<org.jbpm.examples.purchases.PurchaseOrderLine>

    getLines()

    {

    return this.lines;

    }


    public void setLines(

    java.util.List<org.jbpm.examples.purchases.PurchaseOrderLine> lines )

    {

    this.lines = lines;

    }


    public org.jbpm.examples.purchases.PurchaseOrderHeader getHeader() {

    return this.header;

    }


    public void setHeader( org.jbpm.examples.purchases.PurchaseOrderHeader

    header )

    {

    this.header = header;

    }


    @Override

    public boolean equals(Object o) {

    if (this == o) return true;

    if (o == null || getClass() != o.getClass()) return false;

    org.jbpm.examples.purchases.PurchaseOrder that =

    (org.jbpm.examples.purchases.PurchaseOrder)o;

    if (lines != null ? !lines.equals(that.lines) : that.lines != null)

    return false;

    if (header != null ? !header.equals(that.header) : that.header != null)

    return false;

    return true;

    }


    @Override

    public int hashCode() {

    int result = 17;

    result = 13 * result + (lines != null ? lines.hashCode() : 0);

    result = 13 * result + (header != null ? header.hashCode() : 0);

    return result;

    }

    }
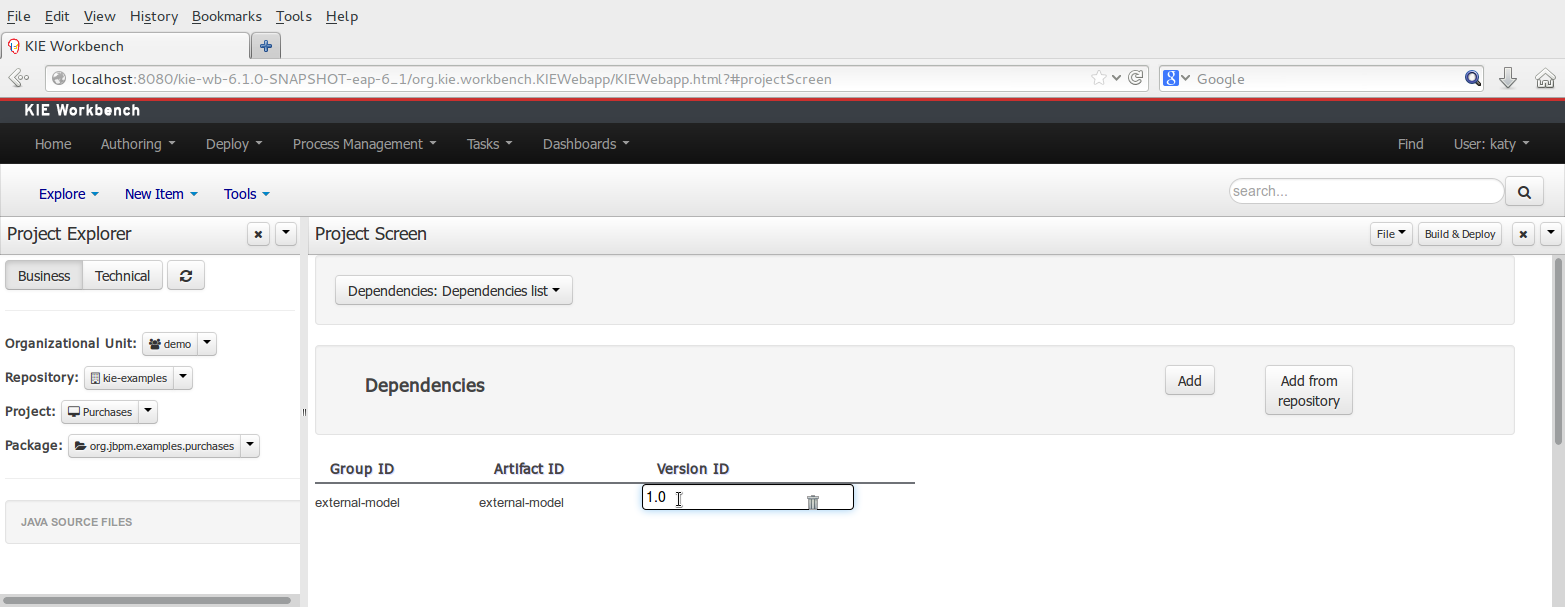
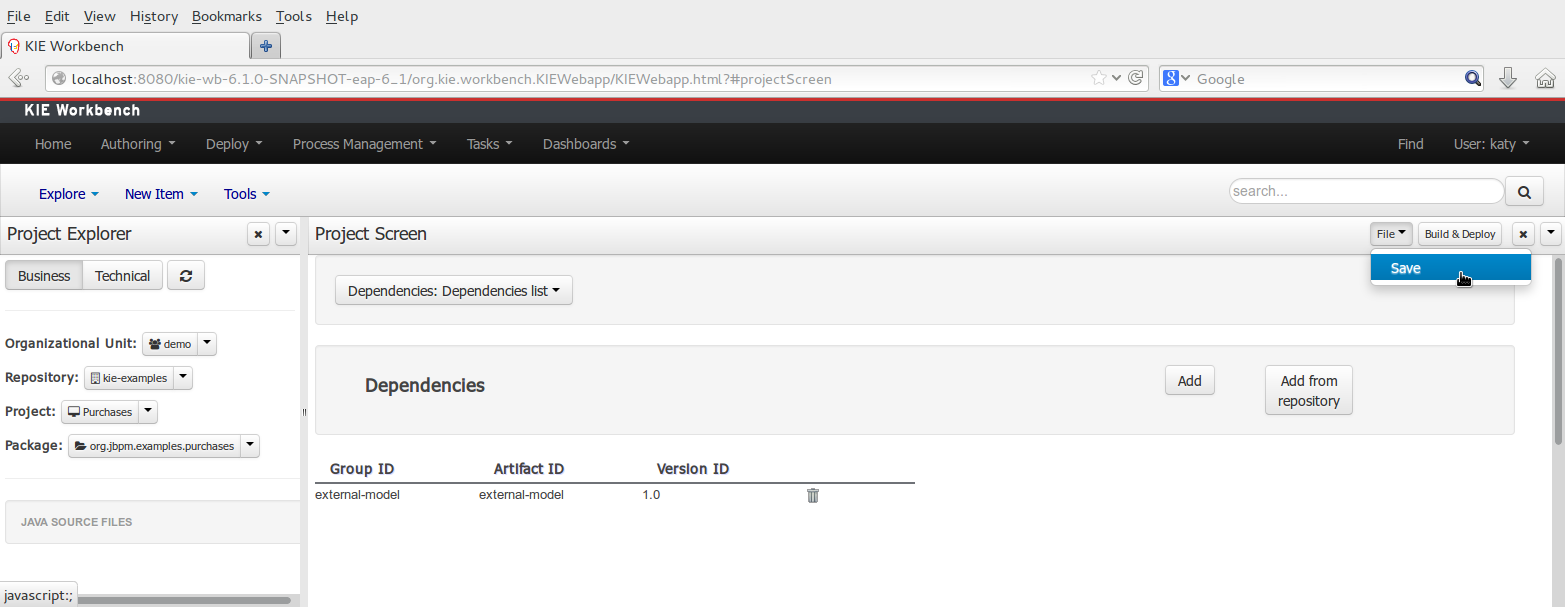
Using an external model means the ability to use a set for already defined POJOs in current project context. In order to make those POJOs available a dependency to the given JAR should be added. Once the dependency has been added the external POJOs can be referenced from current project data model.
There are two ways to add a dependency to an external JAR file:
Dependency to a JAR file already installed in current local M2 repository (typically associated the the user home).
Dependency to a JAR file installed in current Kie Workbench/Drools Workbench "Guvnor M2 repository". (internal to the application)
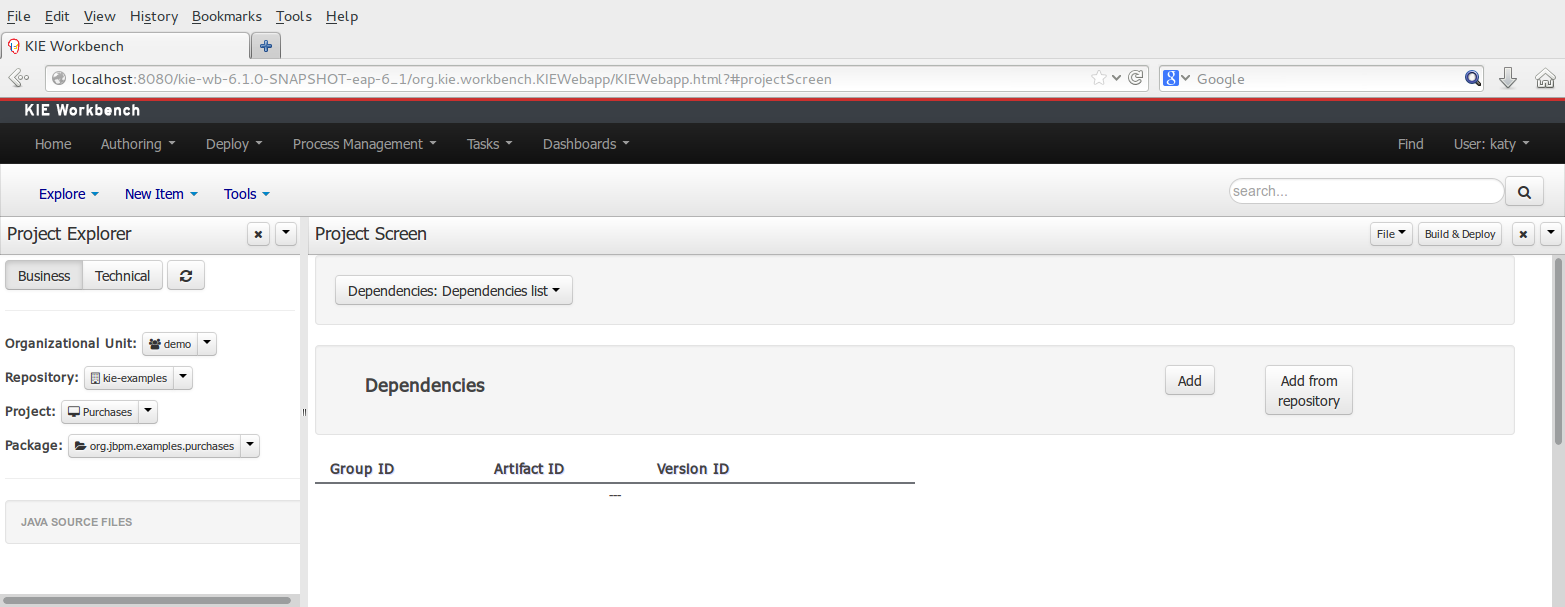
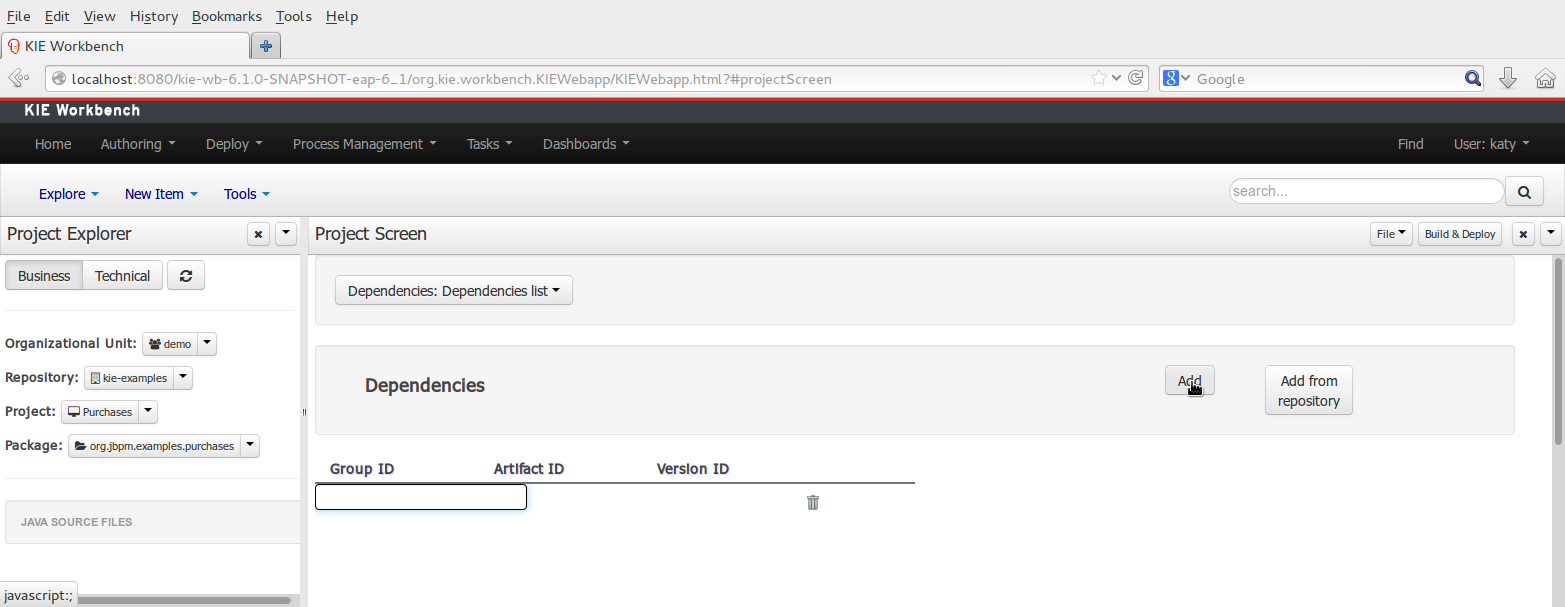
To add a dependency to a JAR file in local M2 repository follow this steps.
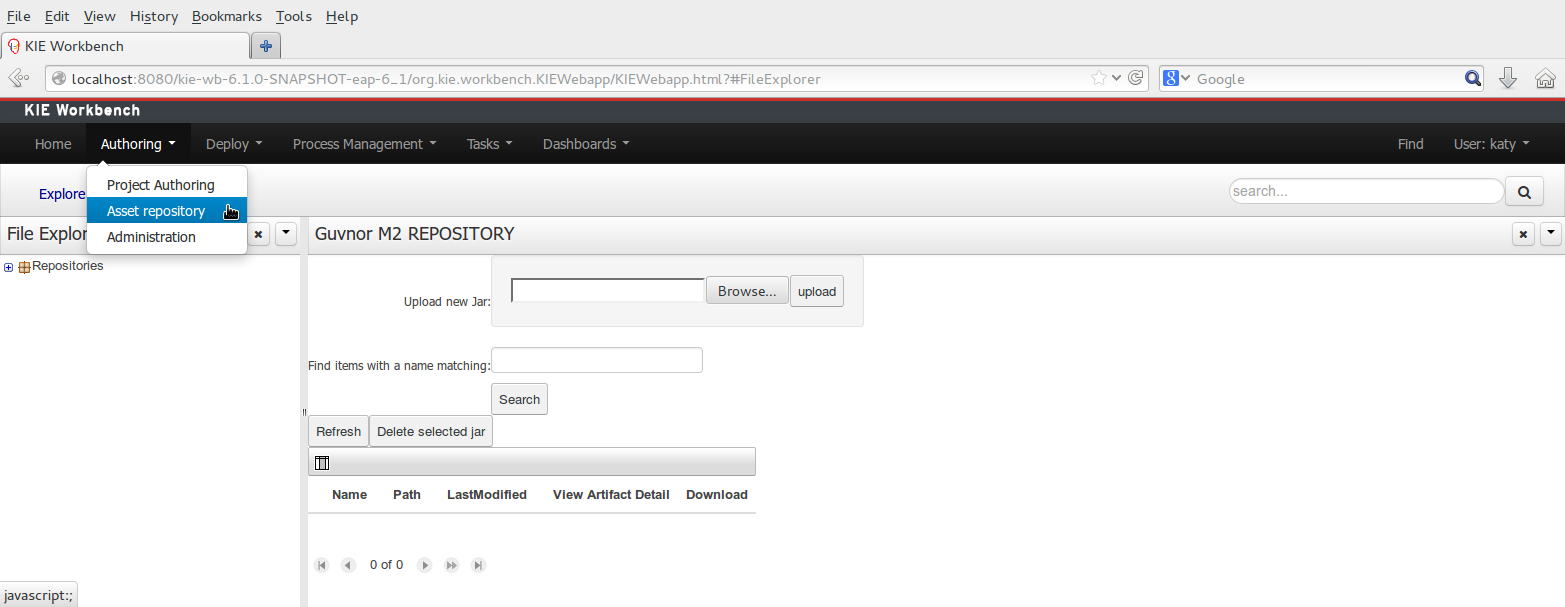
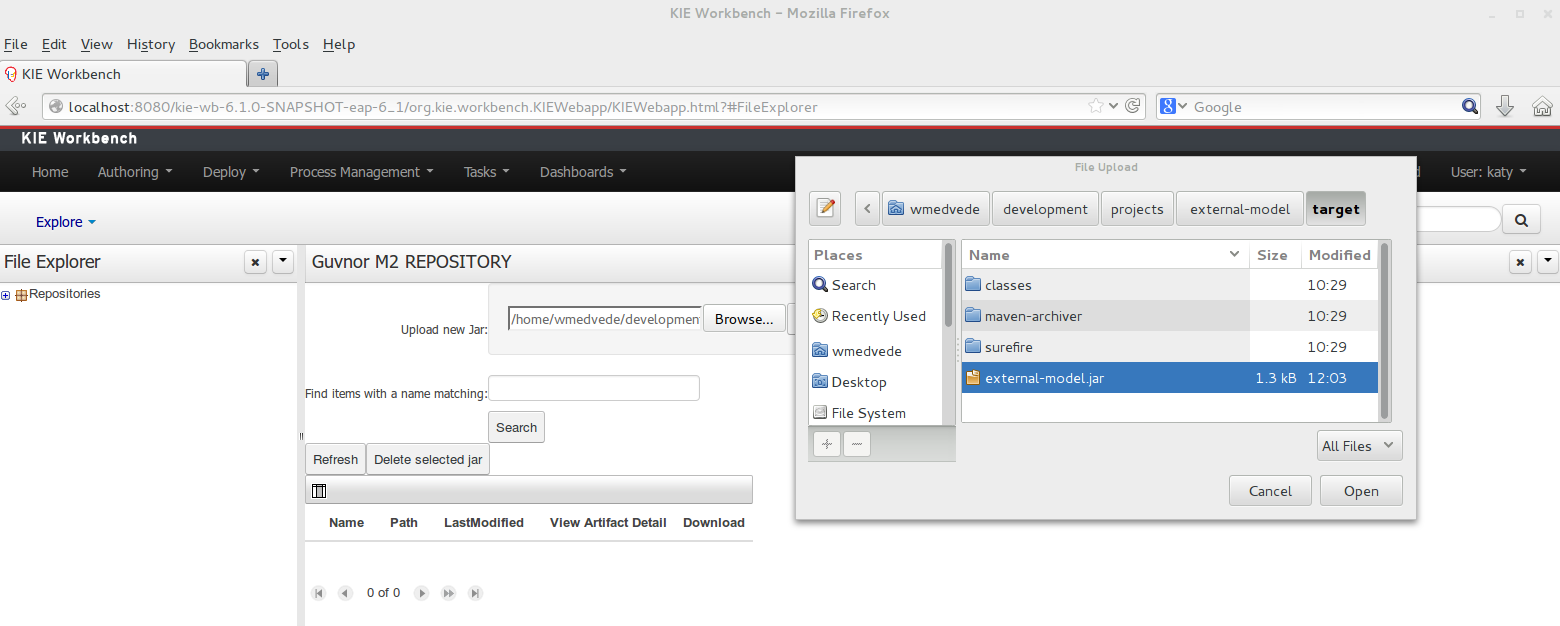
To add a dependency to a JAR file in current "Guvnor M2 repository" follow this steps.
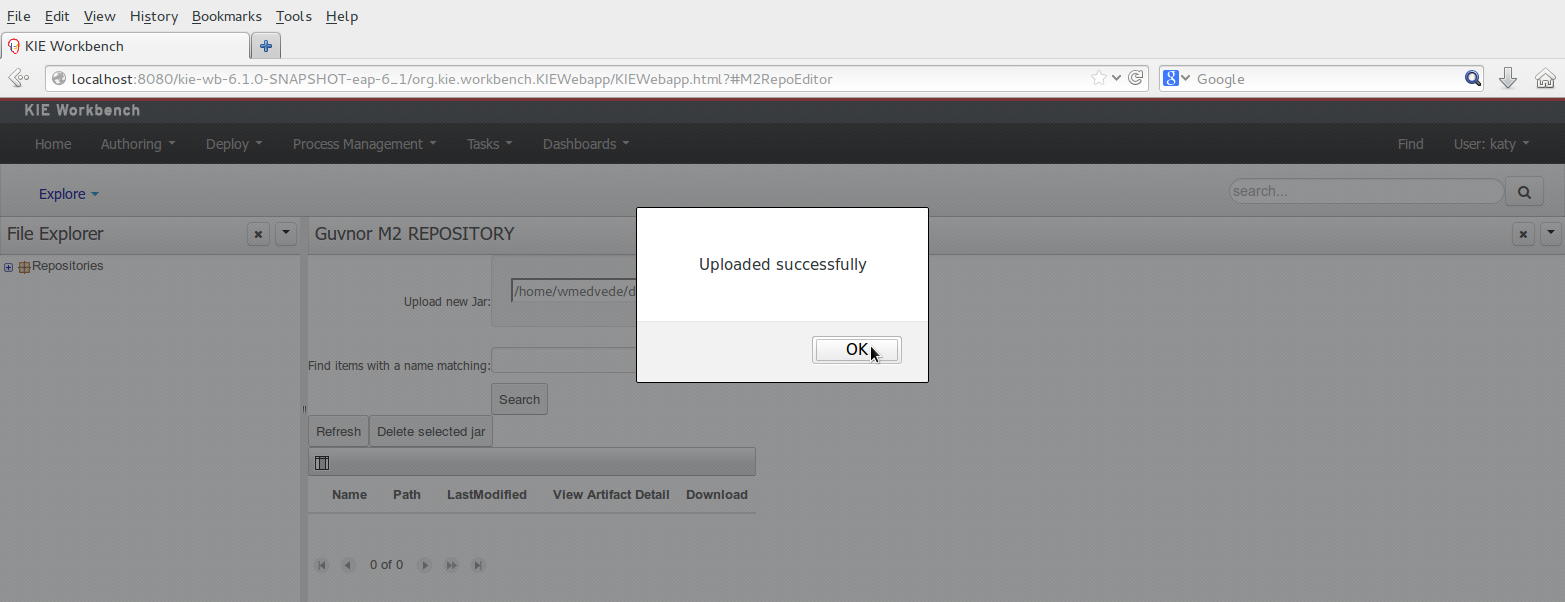
Once the file has been loaded it will be displayed in the repository files list.
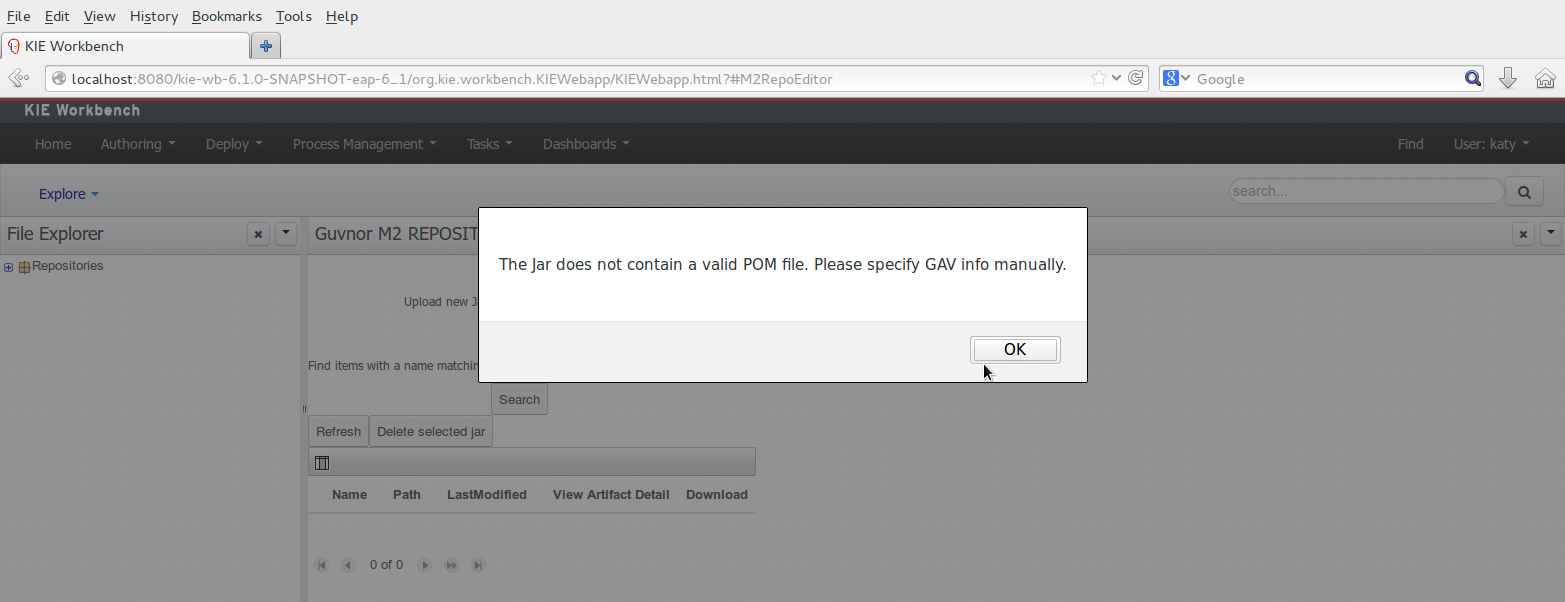
If the uploaded file is not a valid Maven JAR (don't have a pom.xml file) the system will prompt the user in order to provide a GAV for the file to be installed.
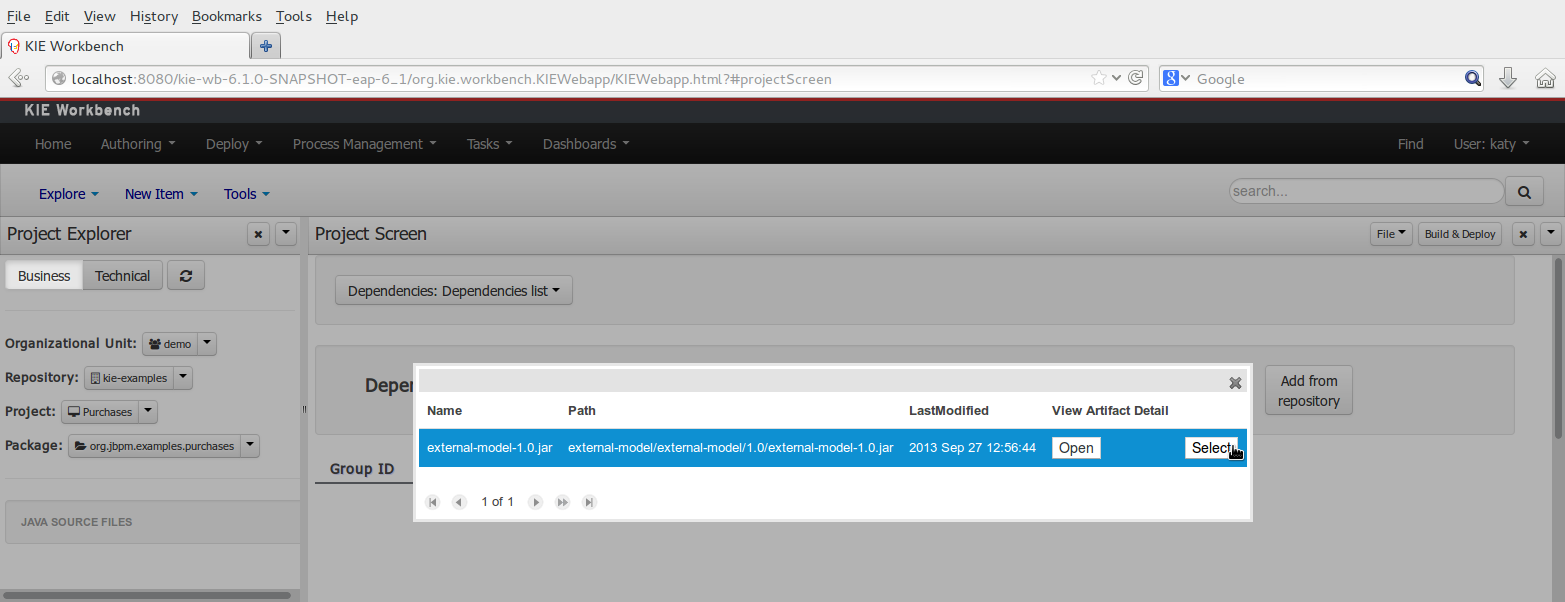
Open the project editor (see bellow) and click on the "Add from repository" button to open the JAR selector to see all the installed JAR files in current "Guvnor M2 repository". When the desired file is selected the project should be saved in order to make the new dependency available.
When a dependency to an external JAR has been set, the external POJOs can be used in the context of current project data model in the following ways:
External POJOs can be extended by current model data objects.
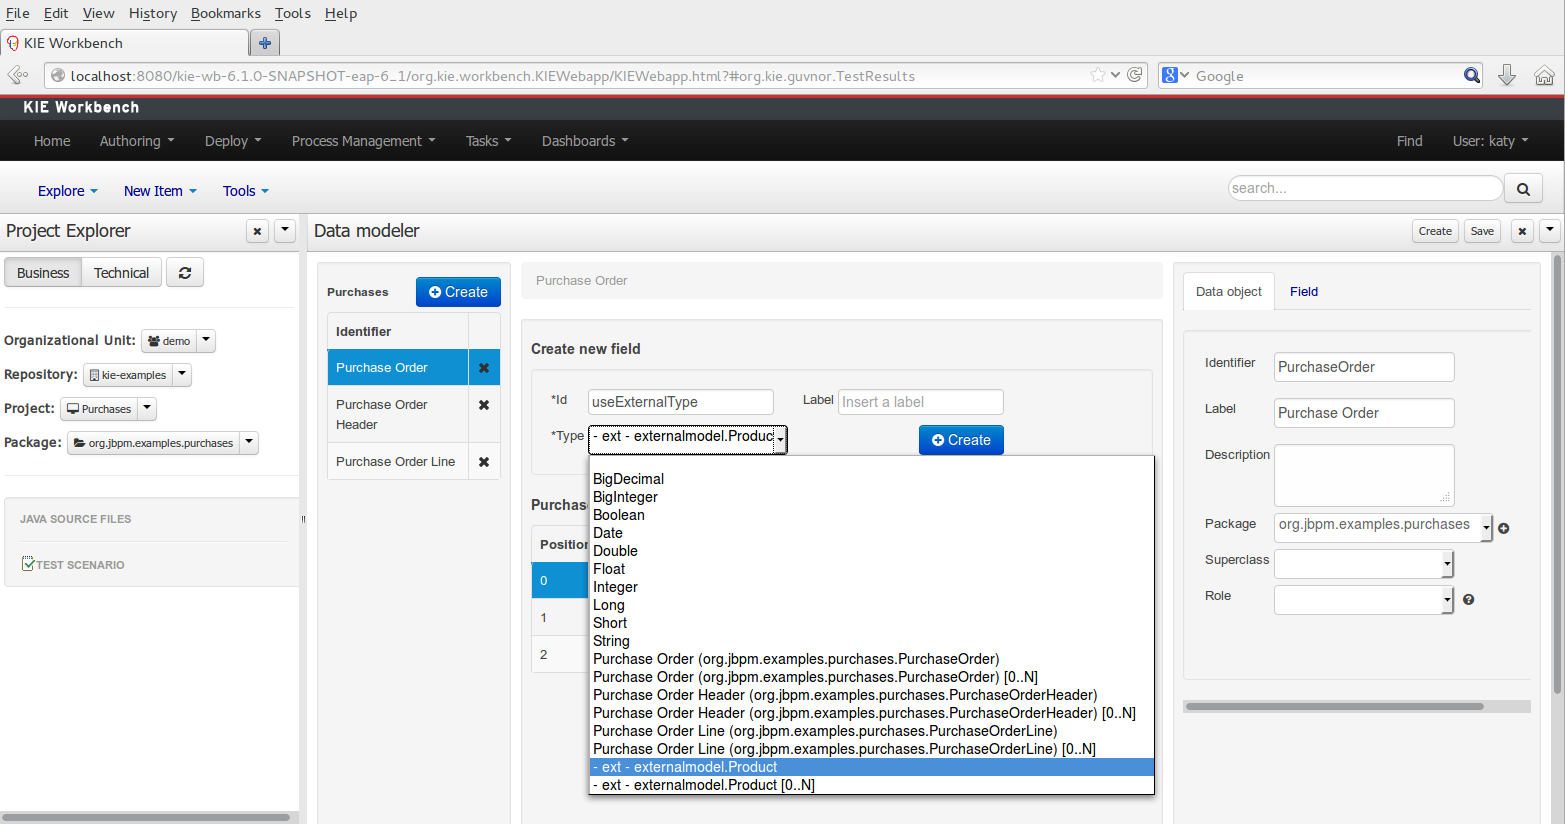
External POJOs can be used as field types for current model data objects.
The following screenshot shows how external objects are prefixed with the string " -ext- " in order to be quickly identified.
Current version implements roundtrip and code preservation between Data modeler and Java source code. No matter where the Java code was generated (e.g. Eclipse, Data modeller), the data modeler will only create/delete/update the necessary code elements to maintain the model updated, i.e, fields, getter/setters, constructors, equals method and hashCode method. Also whatever Type or Field annotation not managed by the Data Modeler will be preserved when the Java sources are updated by the Data modeler.
Aside from code preservation, like in the other workbench editors, concurrent modification scenarios are still possible. Common scenarios are when two different users are updating the model for the same project, e.g. using the data modeler or executing a 'git push command' that modifies project sources.
From an application context's perspective, we can basically identify two different main scenarios:
In this scenario the application user has basically just been navigating through the data model, without making any changes to it. Meanwhile, another user modifies the data model externally.
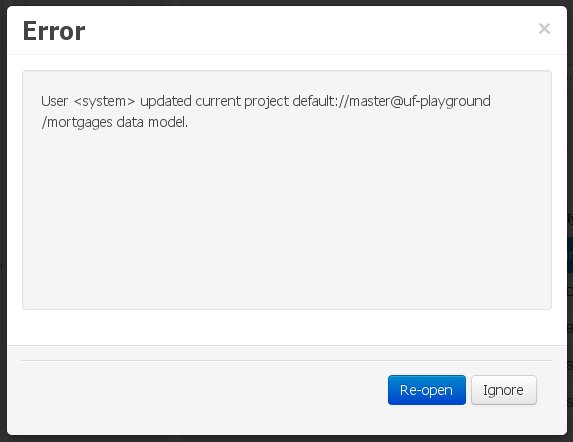
In this case, no immediate warning is issued to the application user. However, as soon as the user tries to make any kind of change, such as add or remove data objects or properties, or change any of the existing ones, the following pop-up will be shown:
The user can choose to either:
Re-open the data model, thus loading any external changes, and then perform the modification he was about to undertake, or
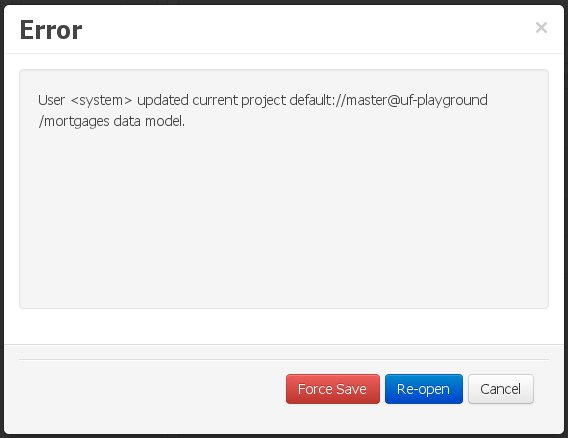
Ignore any external changes, and go ahead with the modification to the model. In this case, when trying to persist these changes, another pop-up warning will be shown:
The "Force Save" option will effectively overwrite any external changes, while "Re-open" will discard any local changes and reload the model.
Warning
"Force Save" overwrites any external changes!
The application user has made changes to the data model. Meanwhile, another user simultaneously modifies the data model from outside the application context.
In this alternative scenario, immediately after the external user commits his changes to the asset repository (or e.g. saves the model with the data modeler in a different session), a warning is issued to the application user:
As with the previous scenario, the user can choose to either:
Re-open the data model, thus losing any modifications that where made through the application, or
Ignore any external changes, and continue working on the model.
One of the following possibilities can now occur:
The user tries to persist the changes he made to the model by clicking the "Save" button in the data modeller top level menu. This leads to the following warning message:
The "Force Save" option will effectively overwrite any external changes, while "Re-open" will discard any local changes and reload the model.
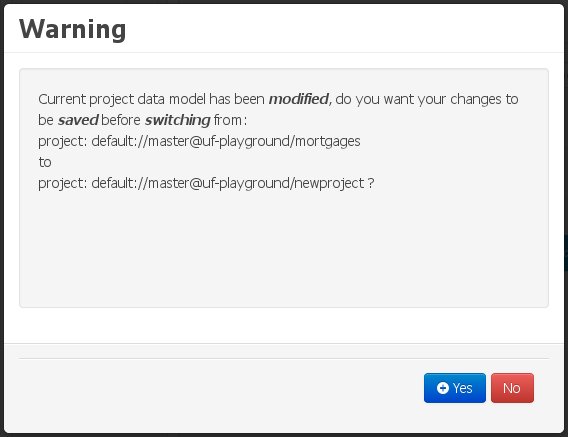
The user switches to another project. In this case he will be warned of the existence of non-persisted local changes through the following warning message:
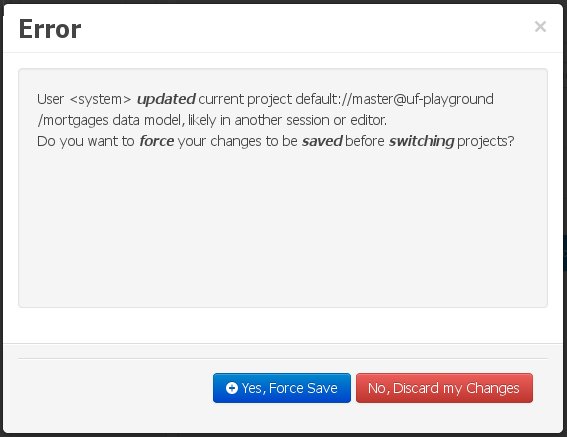
If the user chooses to persist the local changes, then another pop-up message will point out the existence of the changes that were made externally:
The "Yes, Force Save" option will effectively overwrite any external changes, while "No, Discard my Changes" will switch to the other project, discarding any local changes.
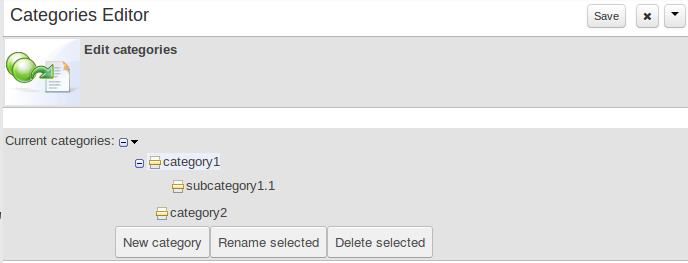
Categories allow assets to be labelled (or tagged) with any number of categories that you define. Assets can belong to any number of categories. In the below diagram, you can see this can in effect create a folder/explorer like view of categories. The names can be anything you want, and are defined by the Workbench administrator (you can also remove/add new categories).
Note
Categories do not have the same role in the current release of the Workbench as they had in prior versions (up to and including 5.5). Projects can no longer be built using a selector to include assets that are labelled with certain Categories. Categories are therefore considered a deprecated feature.
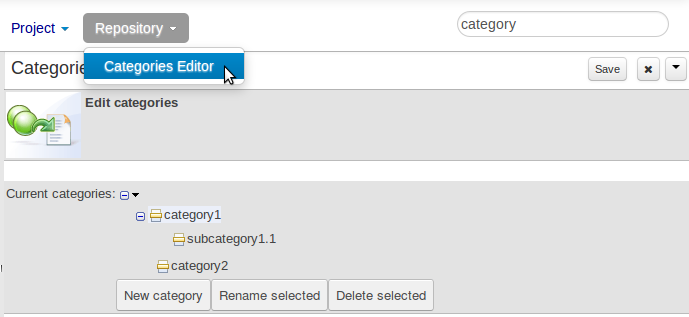
The Categories Editor is available from the Repository menu on the Authoring Perspective.
The below view shows the administration screen for setting up categories (there) are no categories in the system by default. As the categories can be hierarchical you chose the "parent" category that you want to create a sub-category for. From here categories can also be removed (but only if they are not in use by any current versions of assets).
Generally categories are created with meaningful name that match the area of the business the rule applies to (if the rule applies to multiple areas, multiple categories can be attached).
Assets can be assigned Categories using the MetaData tab on the assets' editor.
When you open an asset to view or edit, it will show a list of categories that it currently belongs to If you make a change (remove or add a category) you will need to save the asset - this will create a new item in the version history. Changing the categories of a rule has no effect on its execution.
As we already know, Workbench provides a set of editors to author assets in different formats. According to asset’s format a specialized editor is used.
One additional feature provided by Workbench is the ability to embed it in your own (Web) Applications thru it's standalone mode. So, if you want to edit rules, processes, decision tables, etc... in your own applications without switch to Workbench, you can.
In order to embed Workbench in your application all you'll need is the Workbench application deployed and running in a web/application server and, from within your own web applications, an iframe with proper HTTP query parameters as described in the following table.
Table 15.2. HTTP query parameters for standalone mode
| Parameter Name | Explanation | Allow multiple values | Example |
|---|---|---|---|
| standalone | With just the presence of this parameter workbench will switch to standalone mode. | no | (none) |
| path | Path to the asset to be edited. Note that asset should already exists. | no | git://master@uf-playground/todo.md |
| perspective | Reference to an existing perspective name. | no | org.guvnor.m2repo.client.perspectives.GuvnorM2RepoPerspective |
| header | Defines the name of the header that should be displayed (useful for context menu headers). | yes | ComplementNavArea |
Note
Path and Perspective parameters are mutual exclusive, so can't be used together.
